.png)


Today we are giving my dirty, stained, 30-year-old tile grout a much-needed makeover! And I mean the whole works. We’ll cover deep cleaning, painting, and resealing so it can stay beautiful for years to come. If you're ready to take your kitchen or bathroom from drab to fab, read on!

Trying Various Cleaning Methods
We have large-format printed tile throughout our main floor, including our mudroom, kitchen, and dining room. Believe it or not, this grout is actually supposed to be sand colored! Gross, right?
I spent months researching and trying new ways to clean up this grout. I tried every method in the book–bleach, dish soap, vinegar, etc. It all worked a little. Then I found toilet bowl cleaner!
Cleaning Grout with Toilet Bowl Cleaner
Clorox Clinging Bleach Gel works so much better than anything else. I applied the toilet bowl cleaner across all the grout lines and then let it sit for one to three hours. That’s right, just sit back and let it do the work!
Toilet bowl cleaner isn't something you want to use every day on your grout. Grout is a mixture of sand and cement which makes it very porous. Using something like this or vinegar or bleach does eat away at your grout over time. However, for a one-time deep clean this works really well.
When I came back a while later, I went full Cinderella on my grout! I grabbed my scrub brush, a bucket, and a cloth and got to work.
By now the clinging bleach gel has done the majority of the work for us, so I'm going to take my scrub brush and run it through each of the grout lines to lift that last little bit of dirt up.
Then I need to wipe all the chemical off the ground. I used my cloth to soak up as much as I can, ran over to the sink to rinse it out, came back to do a full wipe down with just water, and then repeated for the next section.

Post-Cleaning Results
If your grout's like mine, you'll see a difference right away. But it does take a few hours later for the water to dry out of the grout, so you won’t see the full bright and clean effect for a little while.
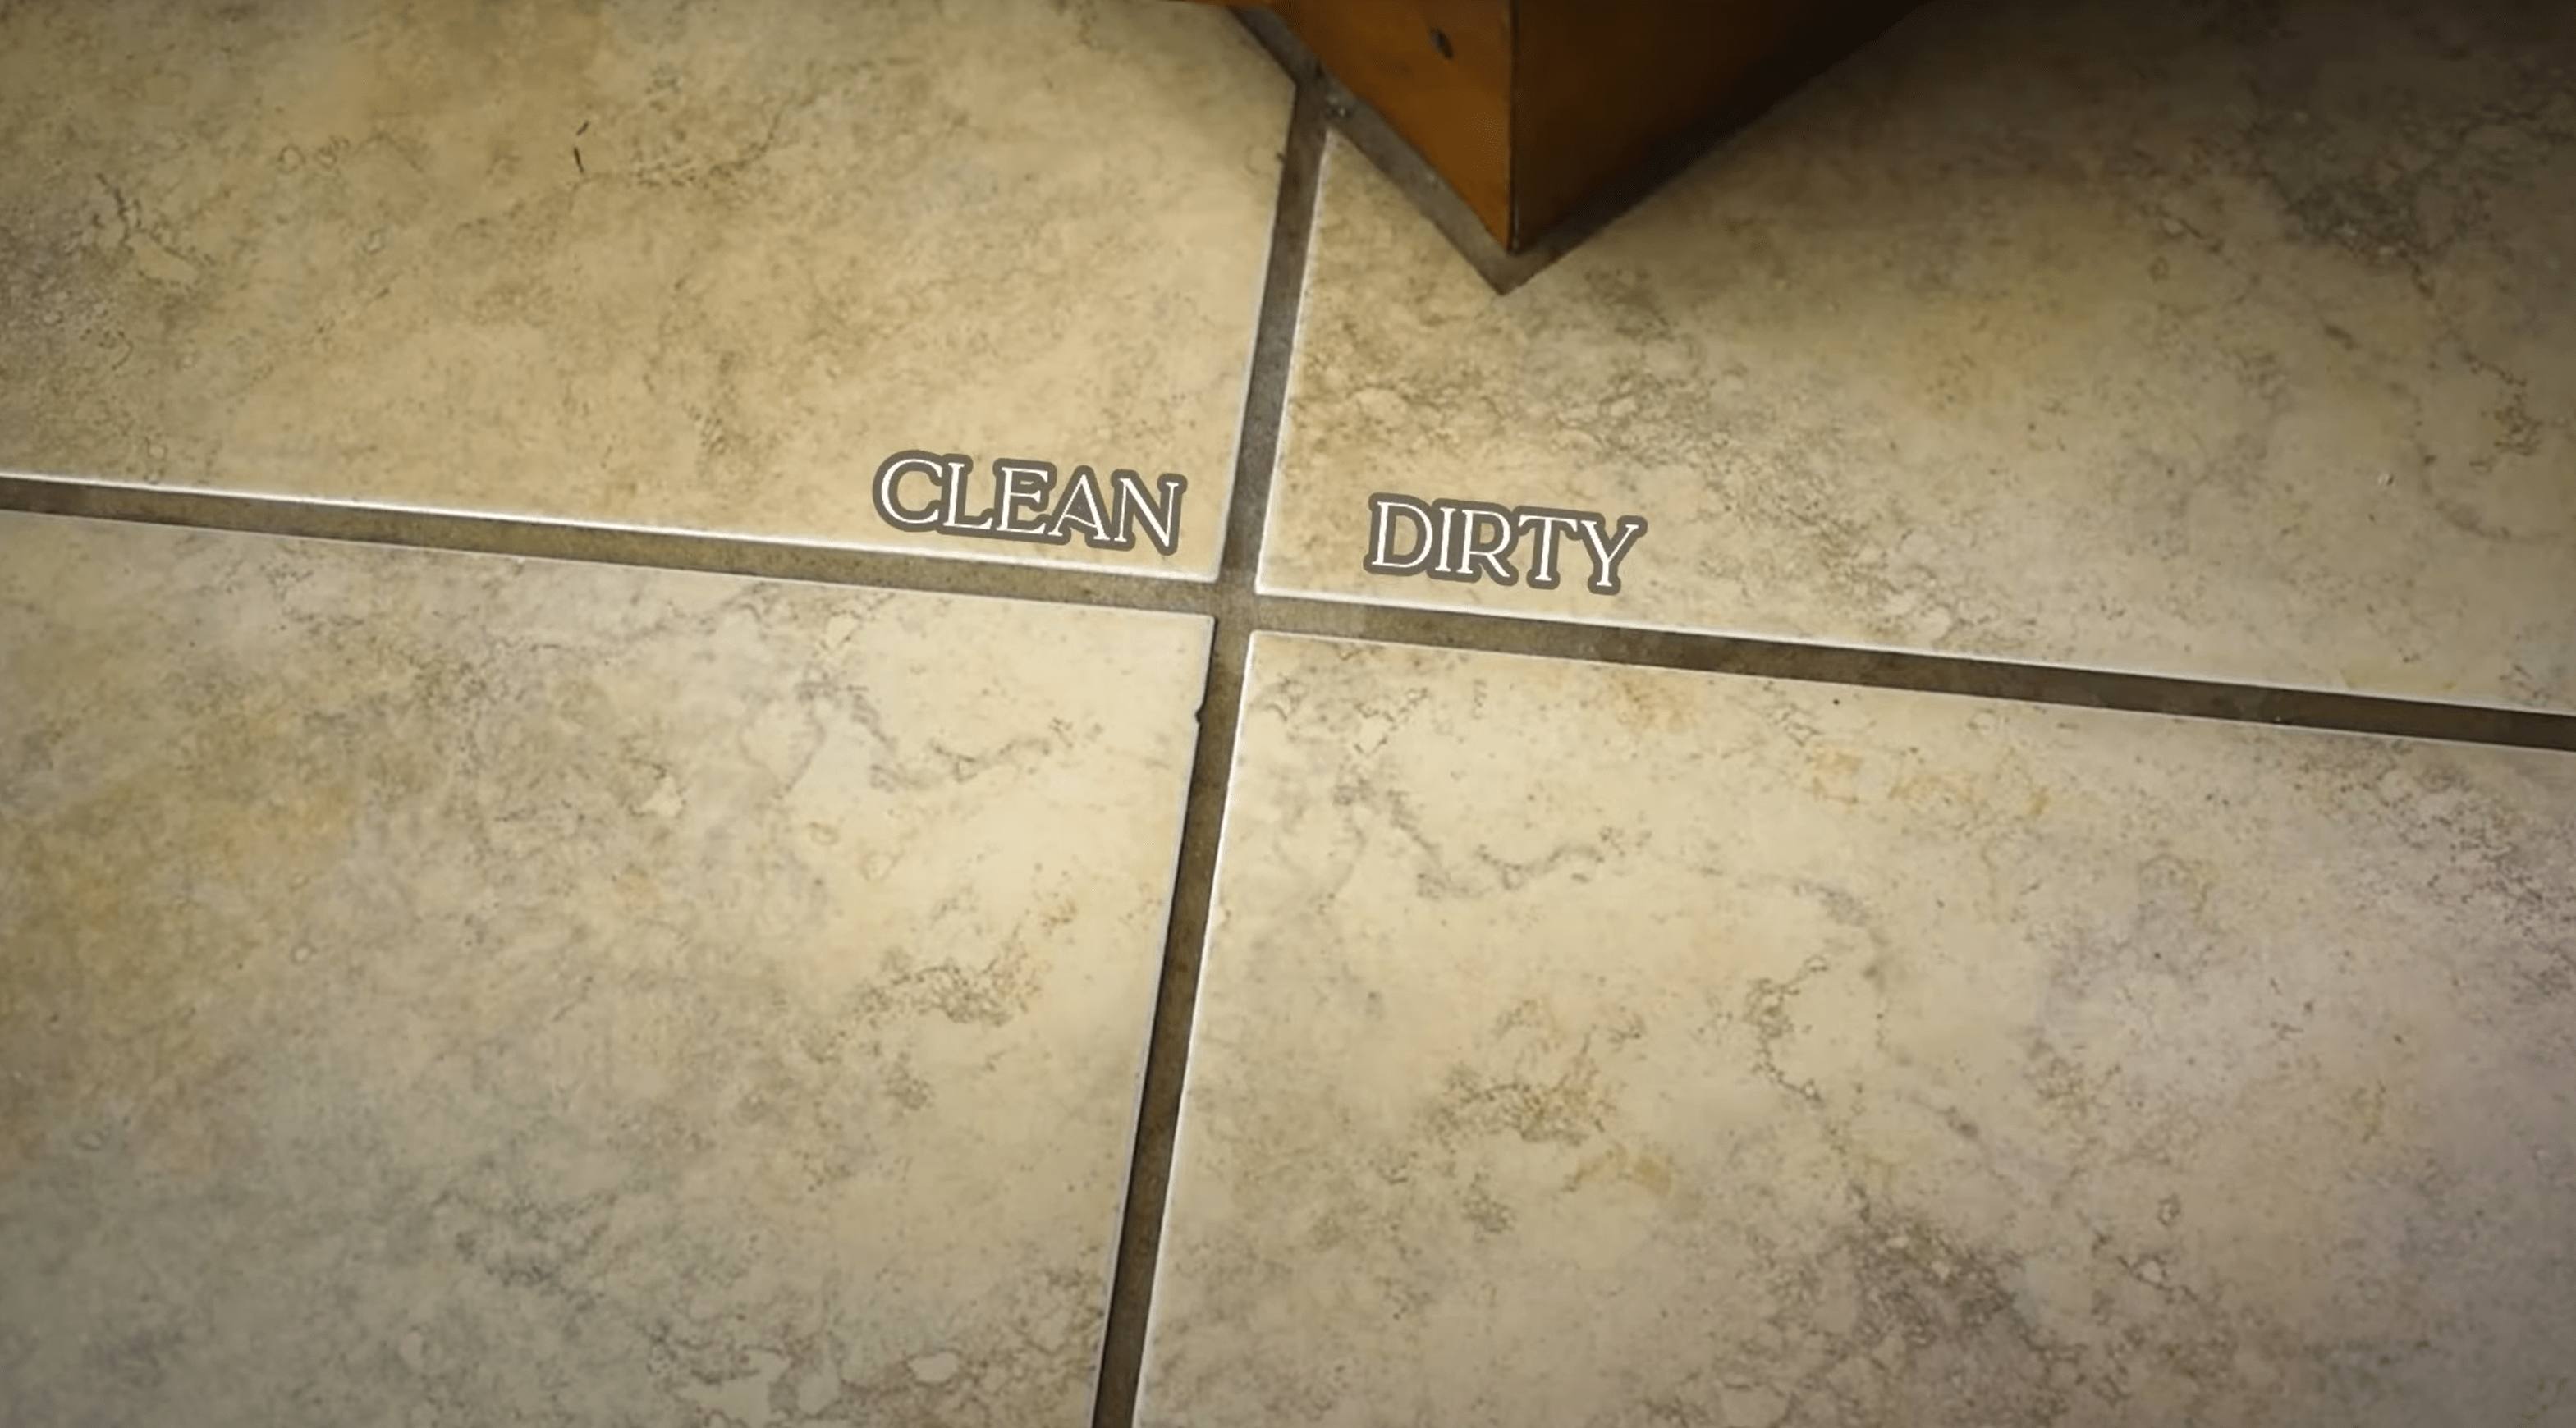
Once my scrubbing spree was over and despite the grout being significantly cleaner, I still had dark patches that just weren't coming out. Also, the overall color of the grout was still darker than I preferred. This makes sense! This is 30-year-old grout. What can I expect? So I decided I'd try to paint my grout.
Painting The Grout
After some research, I settled on Mapei grout paint. I got my bottle from Amazon but you can also find it in big box stores. Mapei is a global grout, tile, and flooring supplier, so that gave me some assurance that this paint would be good quality.
The paint comes in a squeeze bottle with a narrow tip. I found out very quickly that a little goes a long way! I squeezed it out onto the grout lines and used a toothbrush to spread it around. I spread it out fairly thin because I did not want any globs or any issues with it drying incorrectly.
This paint feels very similar to acrylic paint in the way that it applies. I found it gave great coverage in the first round. The paint blended well between sessions. You don't need to keep a wet edge or anything, which really helps to break this work up into multiple stints.
Because I am applying with a toothbrush, there is going to be some spread over onto the tiles but we're going to come back and clean that up later. One thing in reflection I wish I would have done is put some tape on the baseboards. The extra paint come off easily from the tile, but I had to spend a bit longer on the baseboards.
I ended up doing two coats. The first coat was just a little transparent and I wanted a nice even color. The painting portion did take a while, but I broke it up into little chunks throughout the day.
The other thing I did was apply paint on any chips or cracks in my tile. This worked well for me because the paint is a close match to my tile color.
While I absolutely love this Mapei product and I would definitely use it again, my only gripe was the color I ordered did not match the end result. I was going for a true match to my tile color, but my grout turned significantly lighter than advertised. If you're looking for a specific color make sure you do a test first.

Scraping Off the Excess Paint
I let everything dry for at least 24 hours before I came back to clean any excess paint off the tile.
To do that, I actually used a caulking guide. It is one of those little rubber tools that you use to scrape off and round out any edges when applying silicone caulk. The strategy here is to pull the rubber tool on either side of the grout line to rub the excess paint off into little clumps. This worked really well, leaving a clean break where the grout meets the tile. And it was super satisfying!
My tile is printed which means it is very smooth and the excess paint hardly sticks to the tile at all. I had almost no issues with paint peeling out of the grout. It seemed to separate really well and create a perfect line, just like magic.

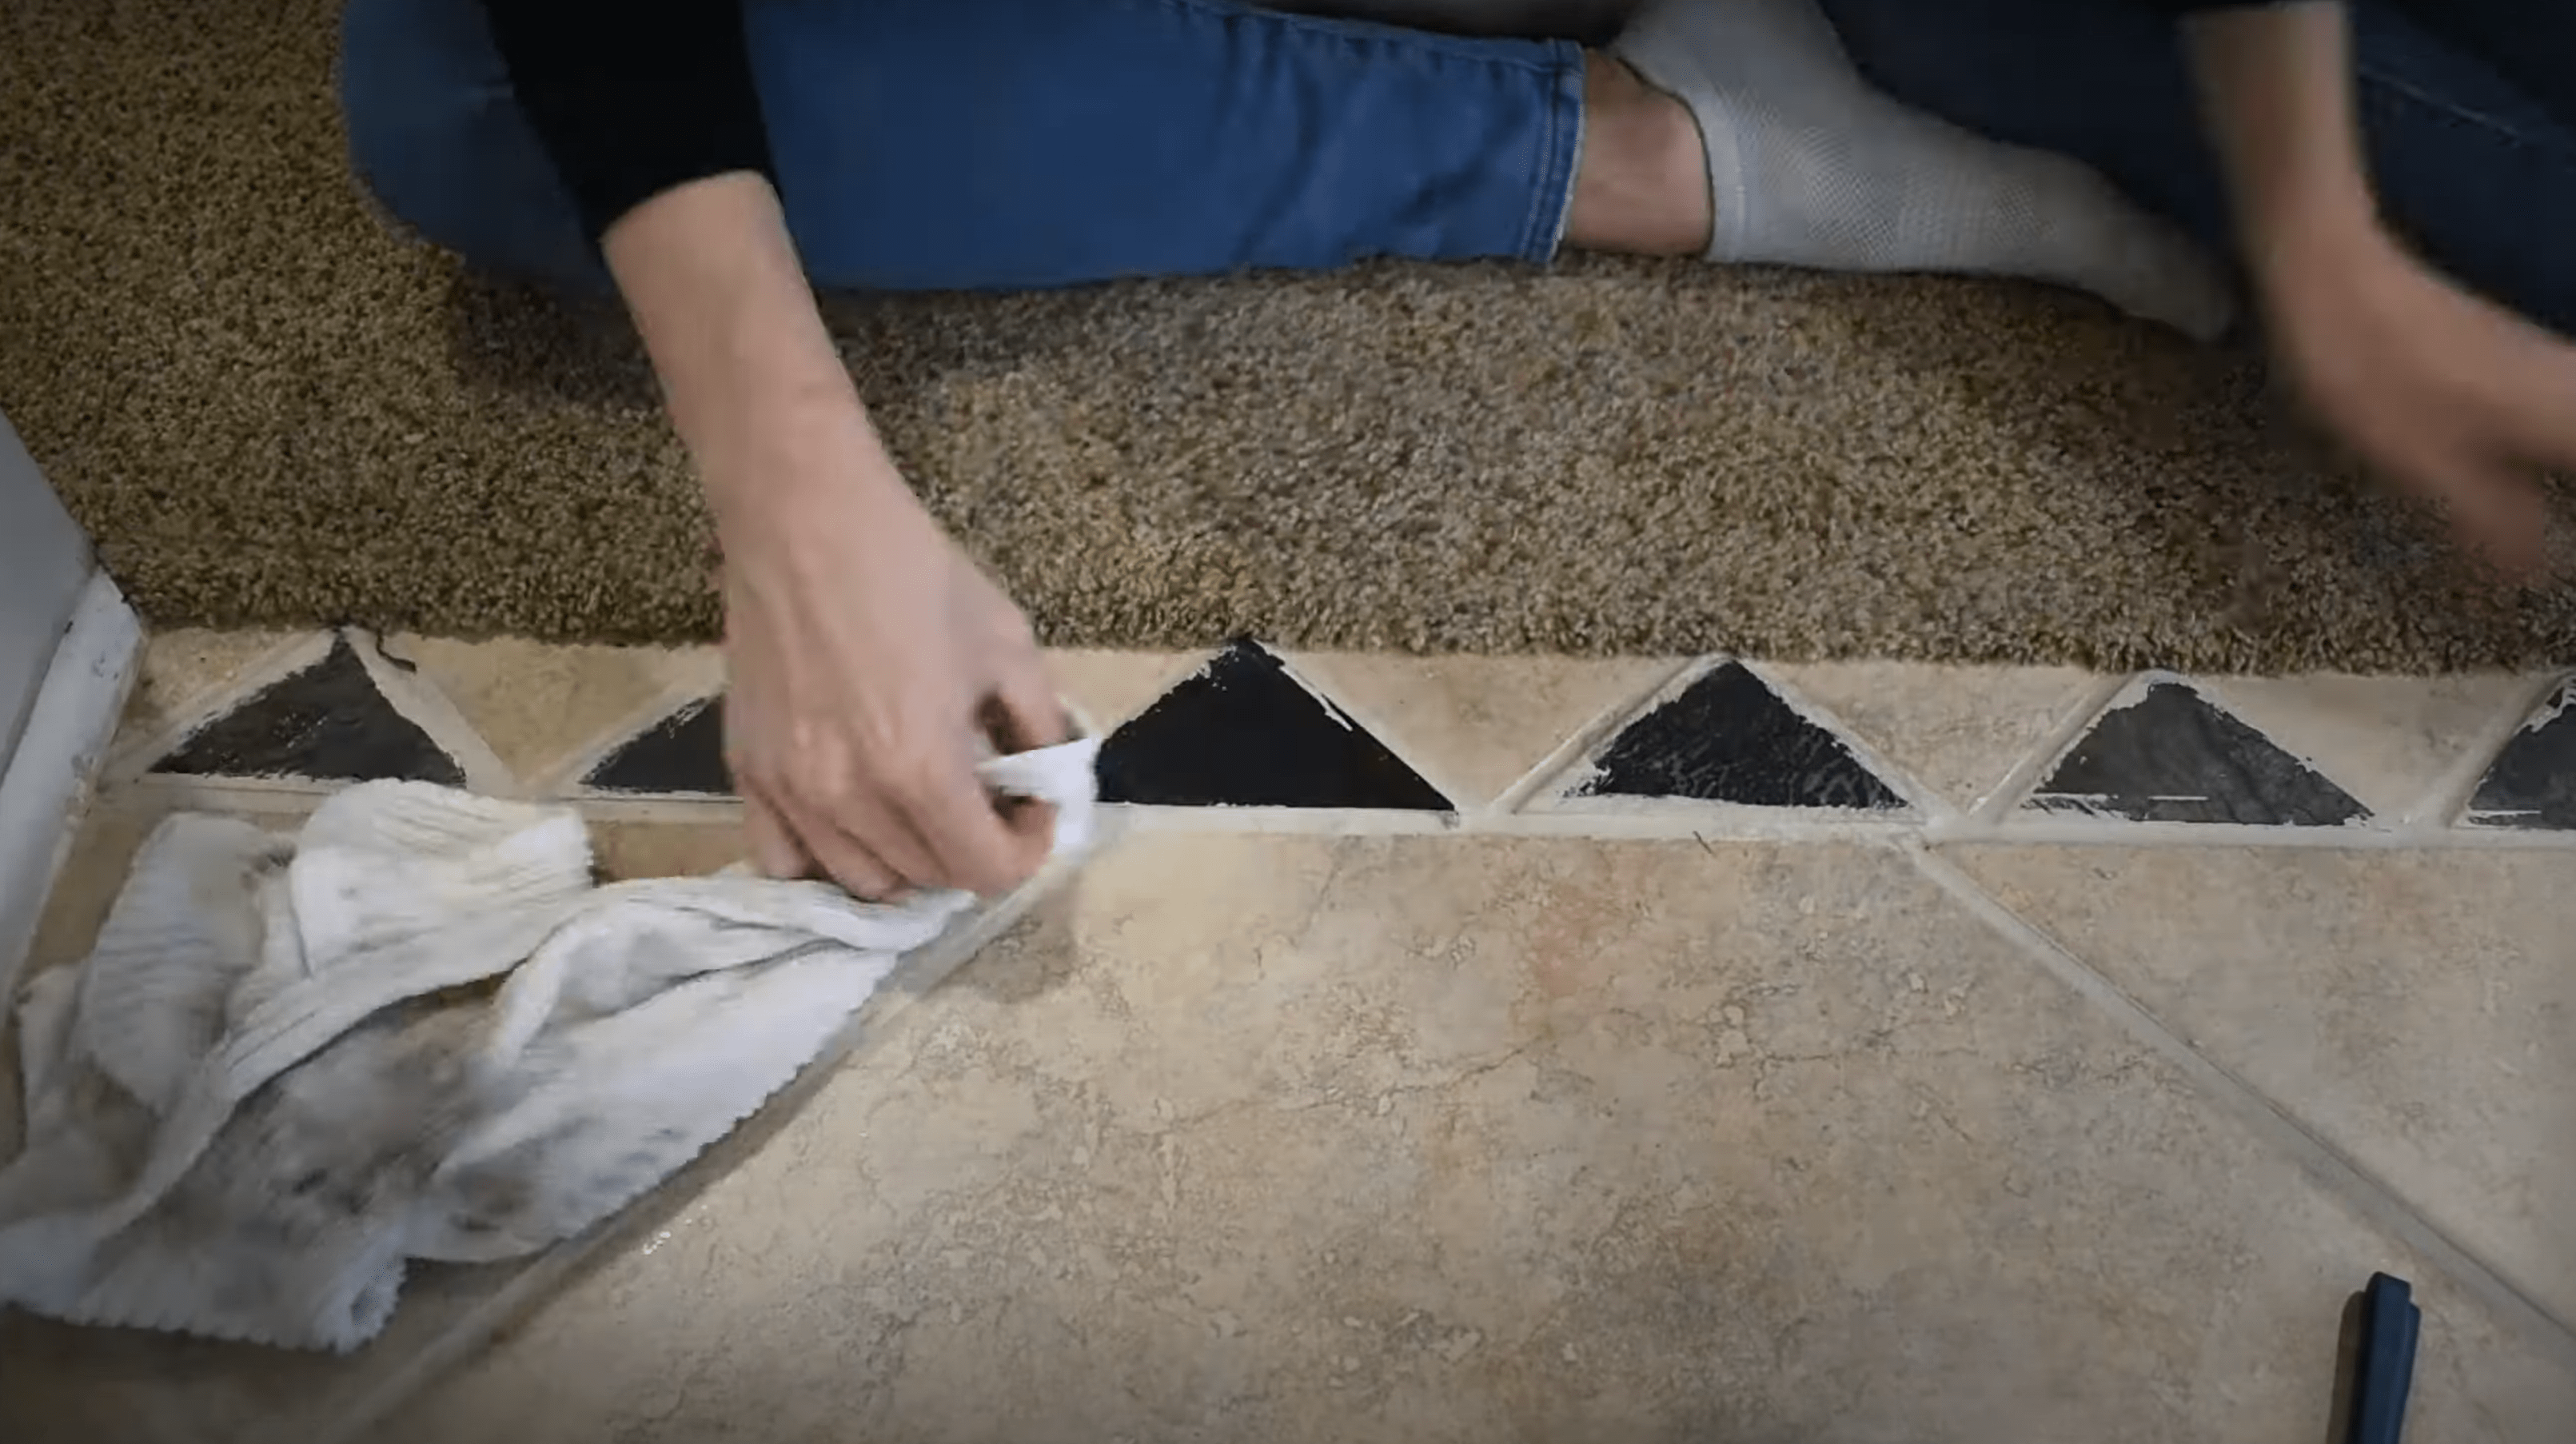
Working with Textured Tile
I have a few tiles separating the different rooms that are more textured. This did not go as well in that area. The best method I could find was to use my scrub brush to wash the top of the tiles with some soapy water. This did peel a good bit of paint out of the grout, so I had to come back again with the paint to touch things up.
If you have textured tile, I don't think this product will work as easily for you. The best advice I have is to either be really detailed with your line work when applying the paint or to put some kind of barrier down, like painter's tape, to protect the tile.
Sealing the Grout
Once I cleaned up all of my lines and did any necessary touch-ups, it was time to seal everything. This step is optional. The Mapei paint does have a built-in sealer, but I want my grout to stay nice and bright for as long as possible, so I am going to double down.
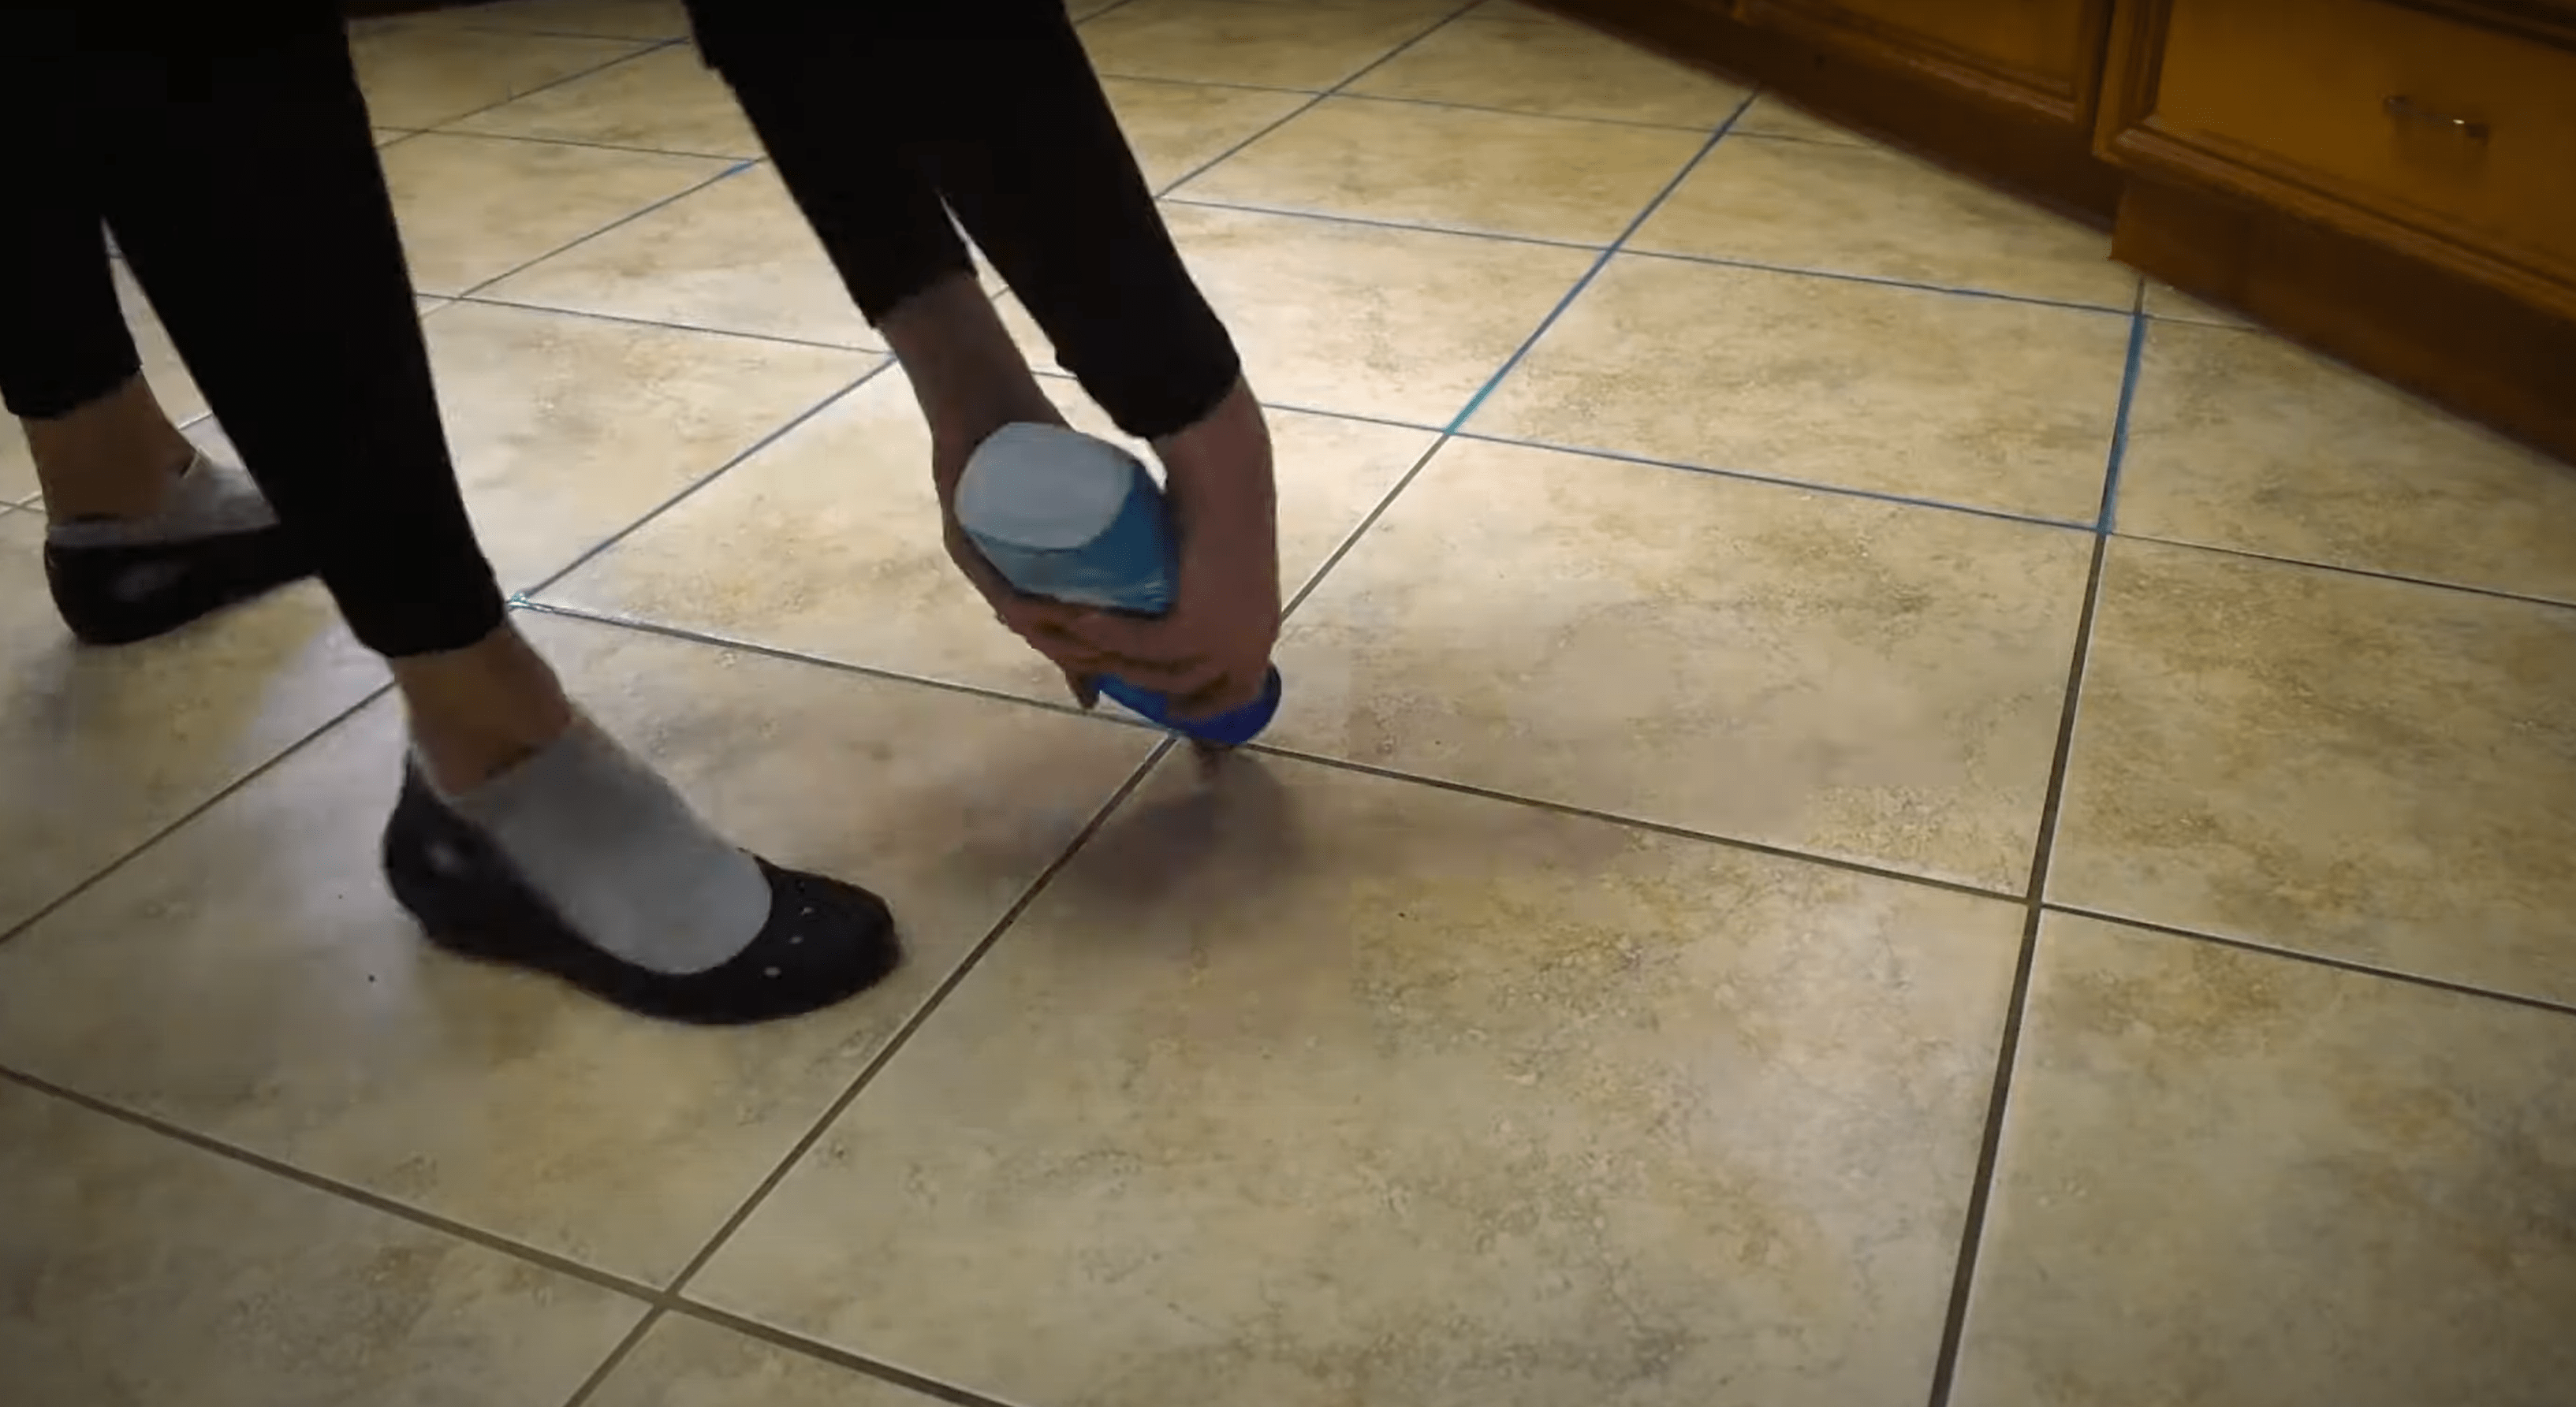
There are a wide variety of sealing products out there. I chose to use Miracle Sealant's 511 aerosol grout sealer. You hold it about six inches from the ground and it sprays in a narrow fan onto the grout and tile.
I did struggle with this. It seemed that a lot of product was coming out. The directions were to wipe up any excess product. I'm not entirely sure what excess meant, so my method was to use a dry Swiffer brush and gently wipe down the tile after I applied the product.
I figured the sealant would pool in the grout wells, so wiping gently over the top of the tile would leave the right amount of sealant in the right places. This stuff is super stinky, so I wore my respirator and made sure I had good ventilation.
I left the sealant to dry for at least an hour and that's it!

Done!
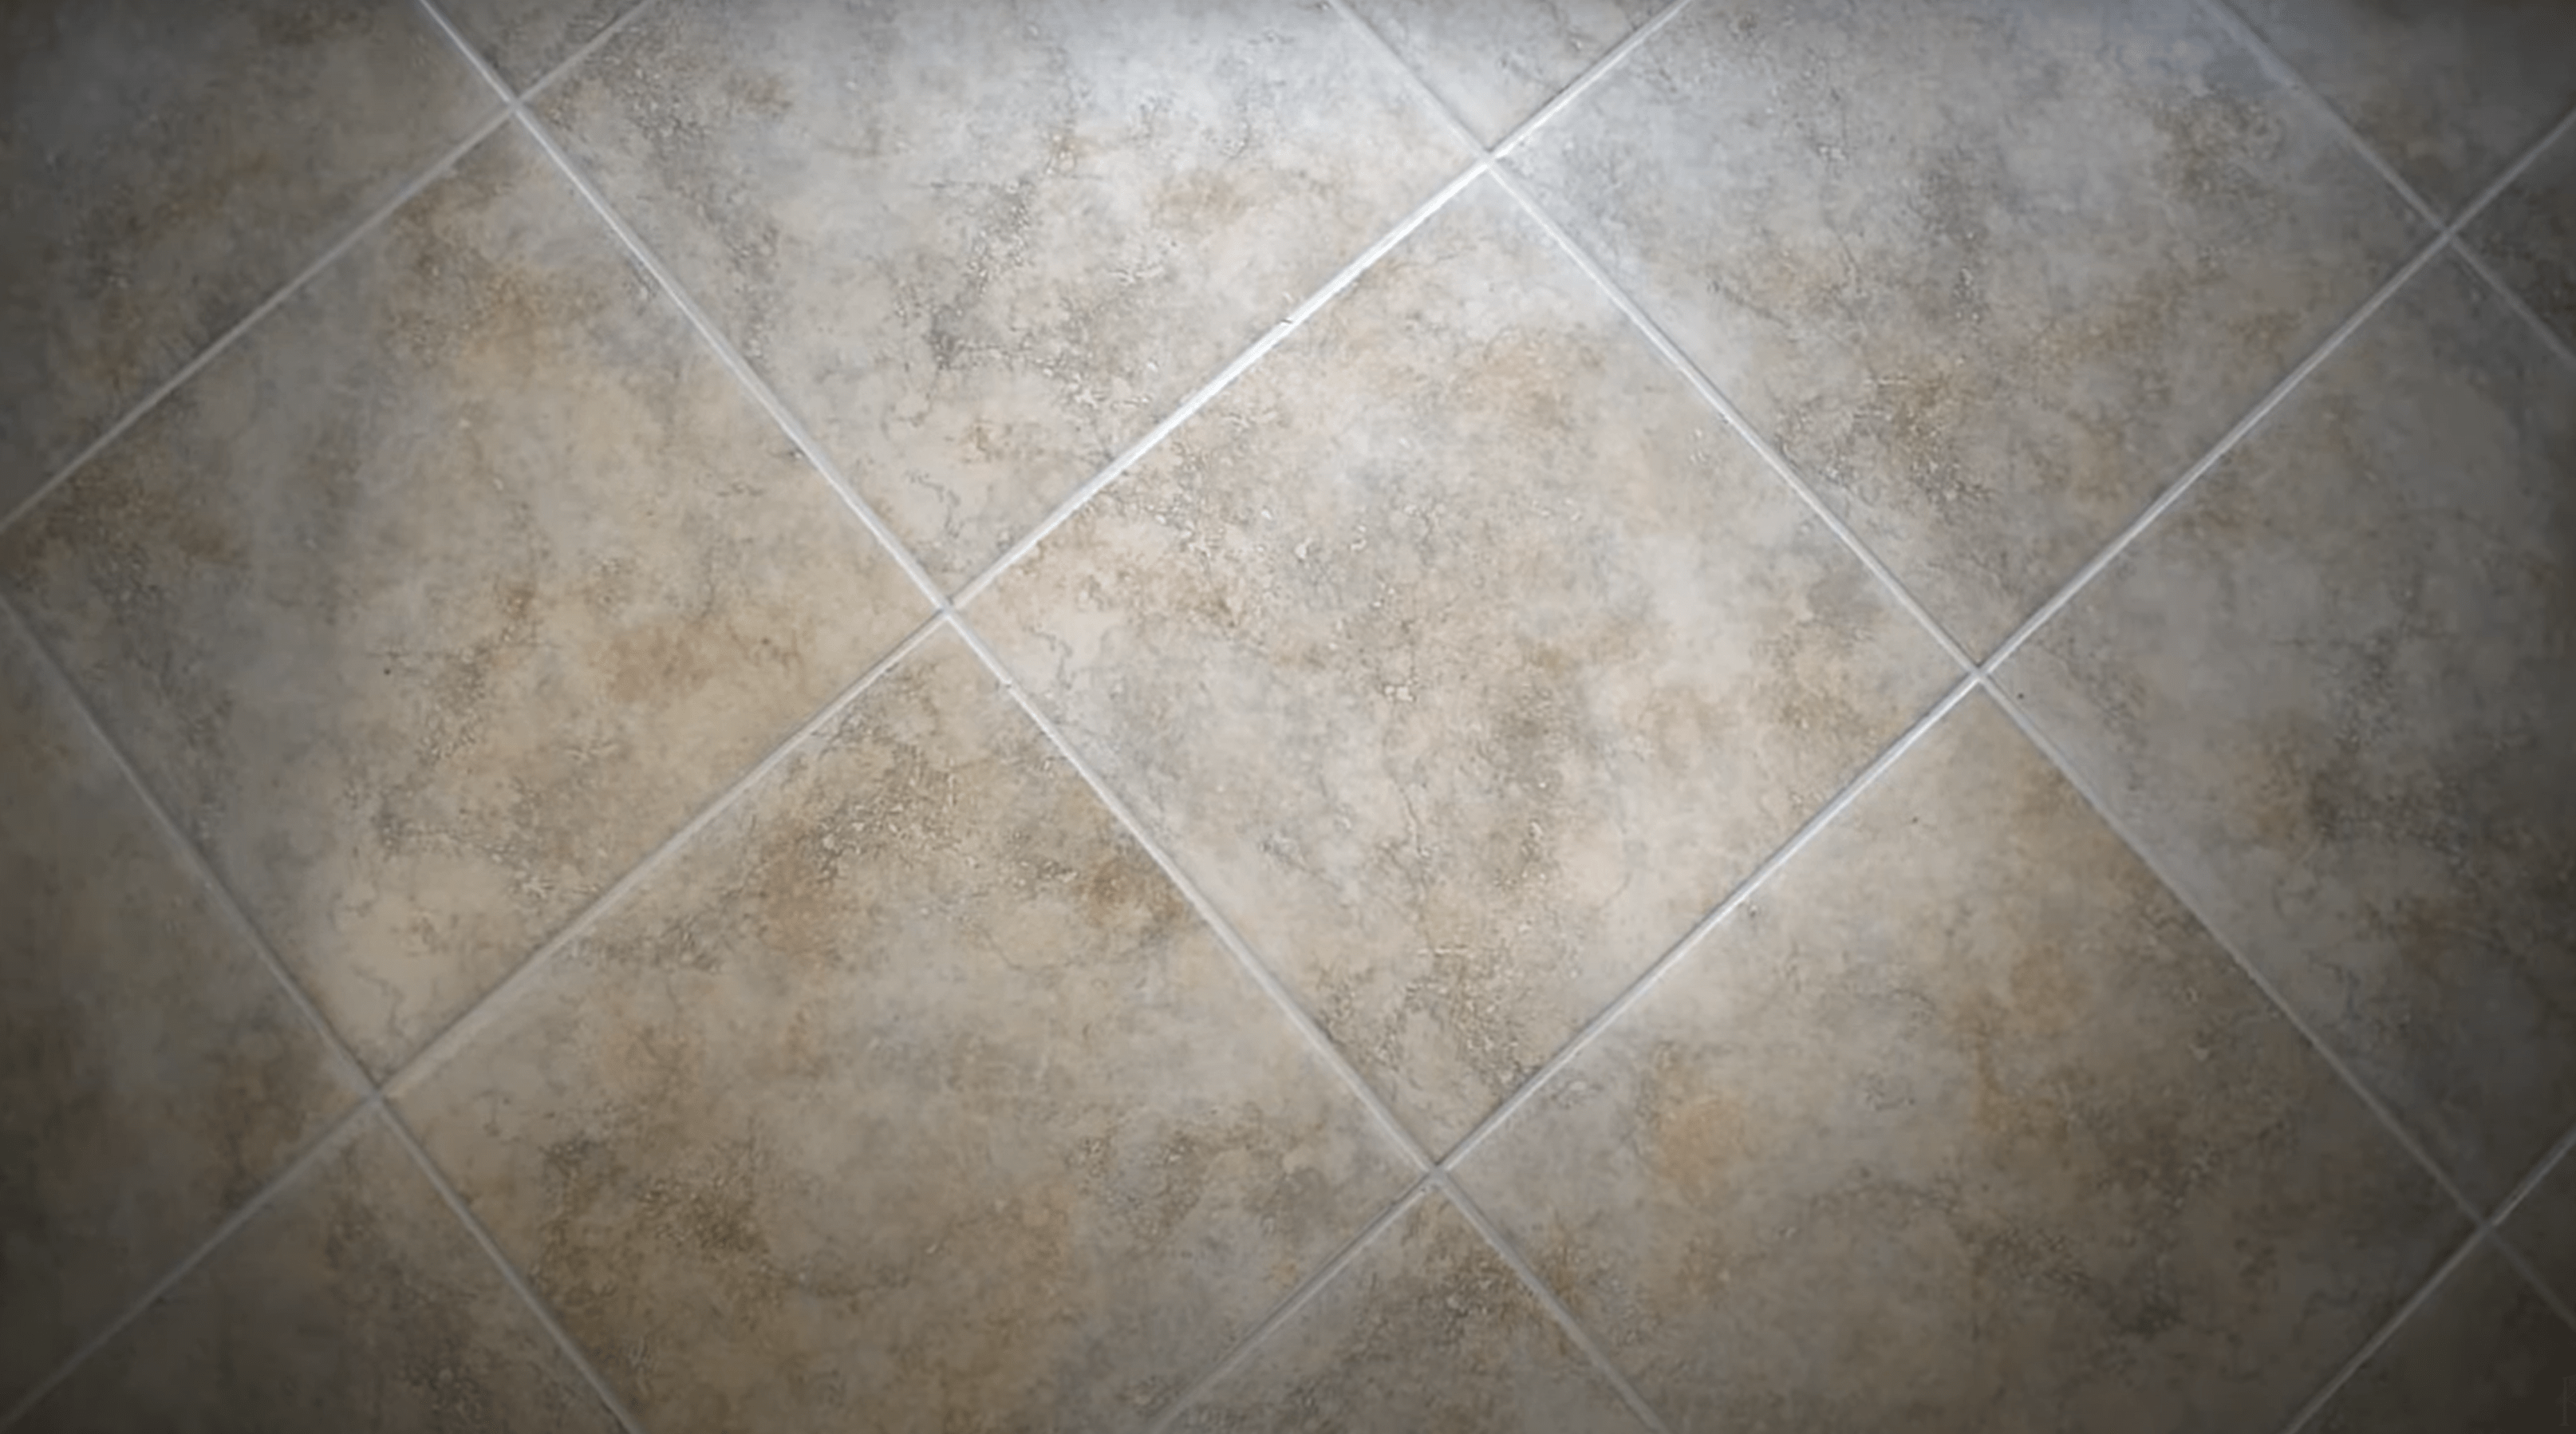
Our tile grout is now beautiful and good to go for the years to come. The color is light, bright, and consistent. There are clean lines along all the tiles and everything is sealed and protected for future wear. My grout underneath is clean so I know that this paint is well-adhered.
While this project did take a good amount of time, I found that if I broke it up into little chunks and did a little bit each day, I made progress quite quickly.
Life is all about learning and trial by error so don't be afraid to give something like this a go! You might surprise yourself with what you're capable of. Until next time, happy painting!


