


Have you ever admired beautifully crafted soaps and wished you could make your own, but felt intimidated by complex processes? I certainly did. That's why I discovered melt and pour soap making, a wonderfully beginner-friendly method that bypasses the chemistry of traditional soap making and lets you jump straight into the fun of customization.
This technique involves simply cutting, melting, and pouring a pre-made soap base, then adding your preferred scents, colors, and mix-ins. It's a quick, easy, and kid-friendly way to create stunning, personalized soaps for yourself, for gifting, or even for starting a small business. While it has some limitations compared to cold process soap, it's an excellent starting point for anyone looking to explore the craft.
I'll walk you through the process, sharing my experiences with different color and scent combinations, and offering tips on everything from melting the base to professional packaging. By the end, you'll have the confidence to create your own unique soap bars that look and smell incredible.
Choosing Your Soap Base and Essential Ingredients
The foundation of melt and pour soap is, of course, the soap base. I prefer using a goat's milk soap base because it offers a lower lather and is excellent for dry, sensitive skin. However, there are many alternatives available to suit different preferences and skin types.
- Goat's milk soap base: My personal preference, great for dry and sensitive skin.
- Shea butter bases: Known for their moisturizing properties.
- Cocoa butter bases: Offer deep hydration and a rich feel.
- Olive oil bases: Gentle and nourishing.
- Glycerin bases: Often clear, perfect for showcasing colors and textures.
Beyond the base, you'll need fragrance and colorants. For fragrance, I typically use fragrance oils designed specifically for soap, such as those from Bramble Berry. While essential oils can be used, they may fade over time and are often pricier. Fragrance oils are usually a blend, sometimes synthetic, but they tend to be stronger and longer-lasting. For color, options include color blocks (pre-mixed color in a small amount of soap), mica powder for a shimmery effect, or liquid colorants. You can also add mix-ins like dried botanicals, sea salt, or coffee grounds for exfoliation or visual appeal.
Gathering Your Tools and Setting Up Your Workspace
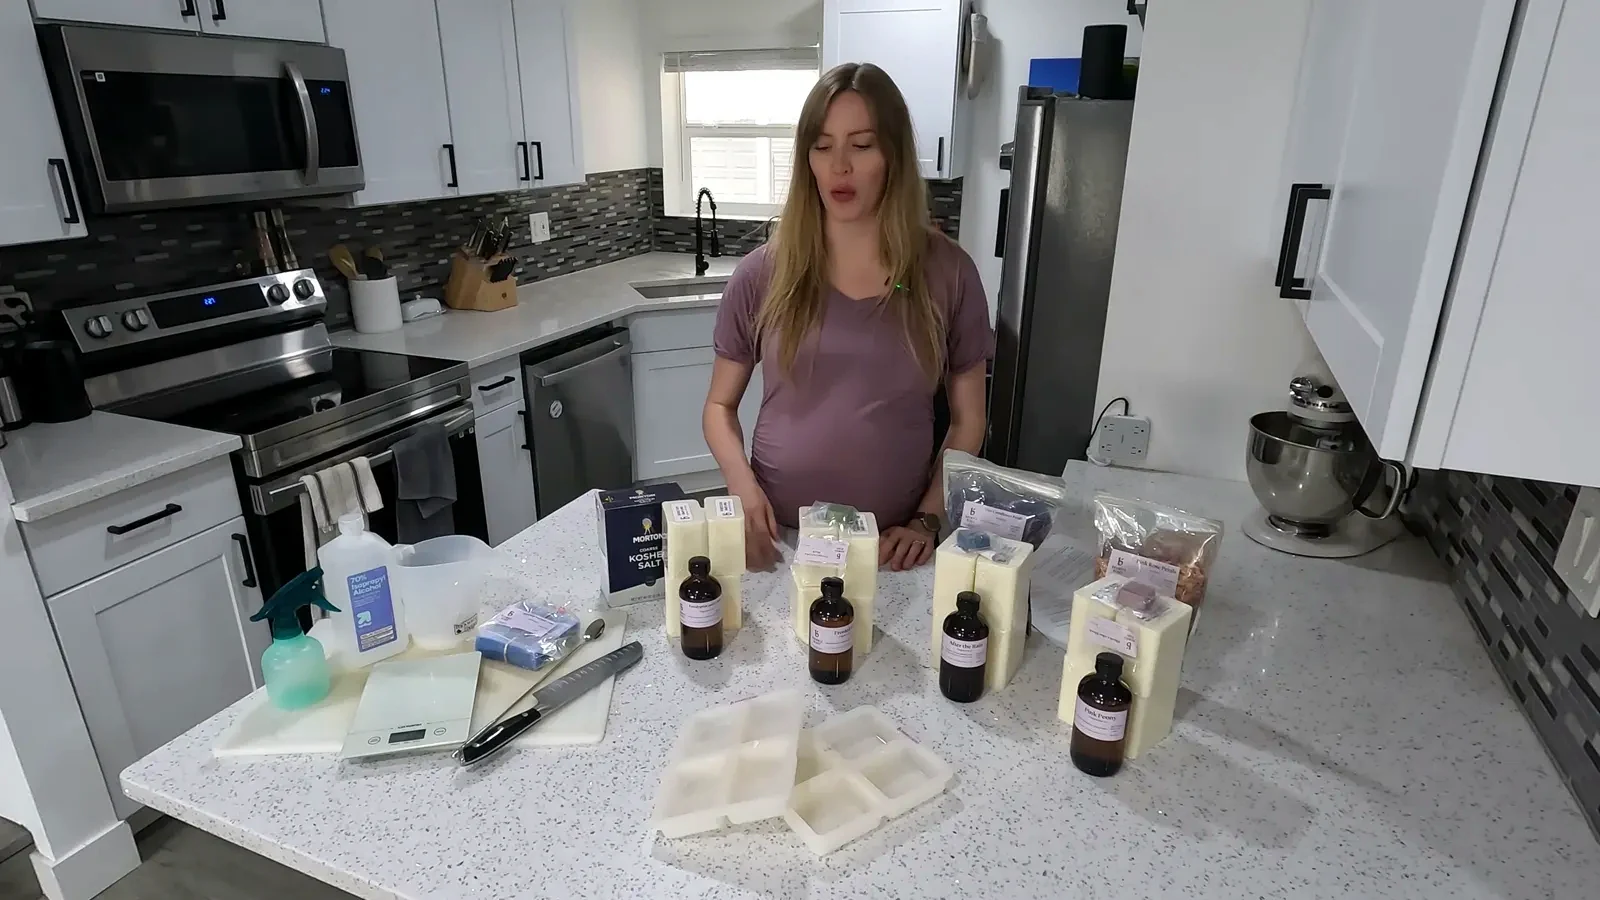
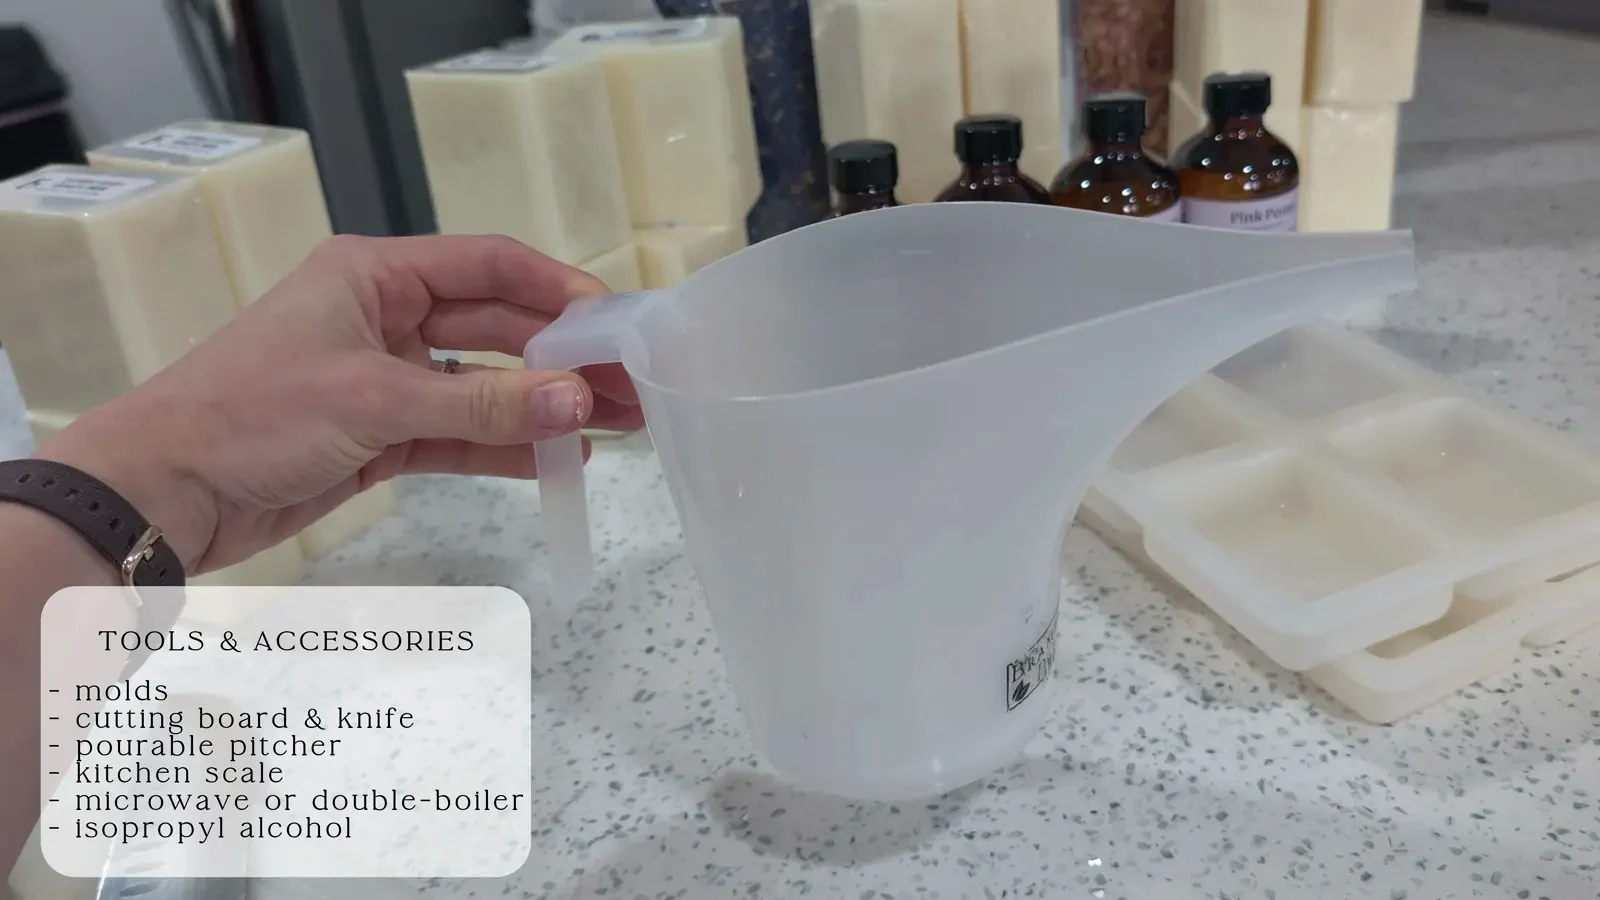
Having the right tools makes the soap-making process smooth and enjoyable. You'll need silicone molds, a cutting board and knife for the soap base, and a pourable pitcher for mixing and pouring. A digital scale is crucial for precise measurements of fragrance, ensuring your scent is just right. For melting, a microwave is convenient, but a double boiler works just as well.
Isopropyl alcohol is a must-have, both for sanitizing your molds and for spraying on top of poured soap to eliminate bubbles. Safety is also important, especially when handling concentrated scents, so I recommend wearing safety glasses and latex gloves. Finally, if you plan to package your soaps, have heat shrink wraps and small soap boxes ready.
Before starting, ensure your workspace is clean and sanitized, especially if you're working in a kitchen. I wipe down all surfaces and tie back my hair to prevent contamination and ensure the best shelf life for the soaps.
Melting and Scenting Your Soap Base
First, sanitize your molds and mixing jar with isopropyl alcohol. This helps dehydrate them and removes any dust or contaminants. Next, calculate how much soap base you need. My molds hold 4.5 ounces per cavity, which translates to just over 1000 grams for a full batch. I cut the goat's milk soap base into small squares to facilitate even melting.
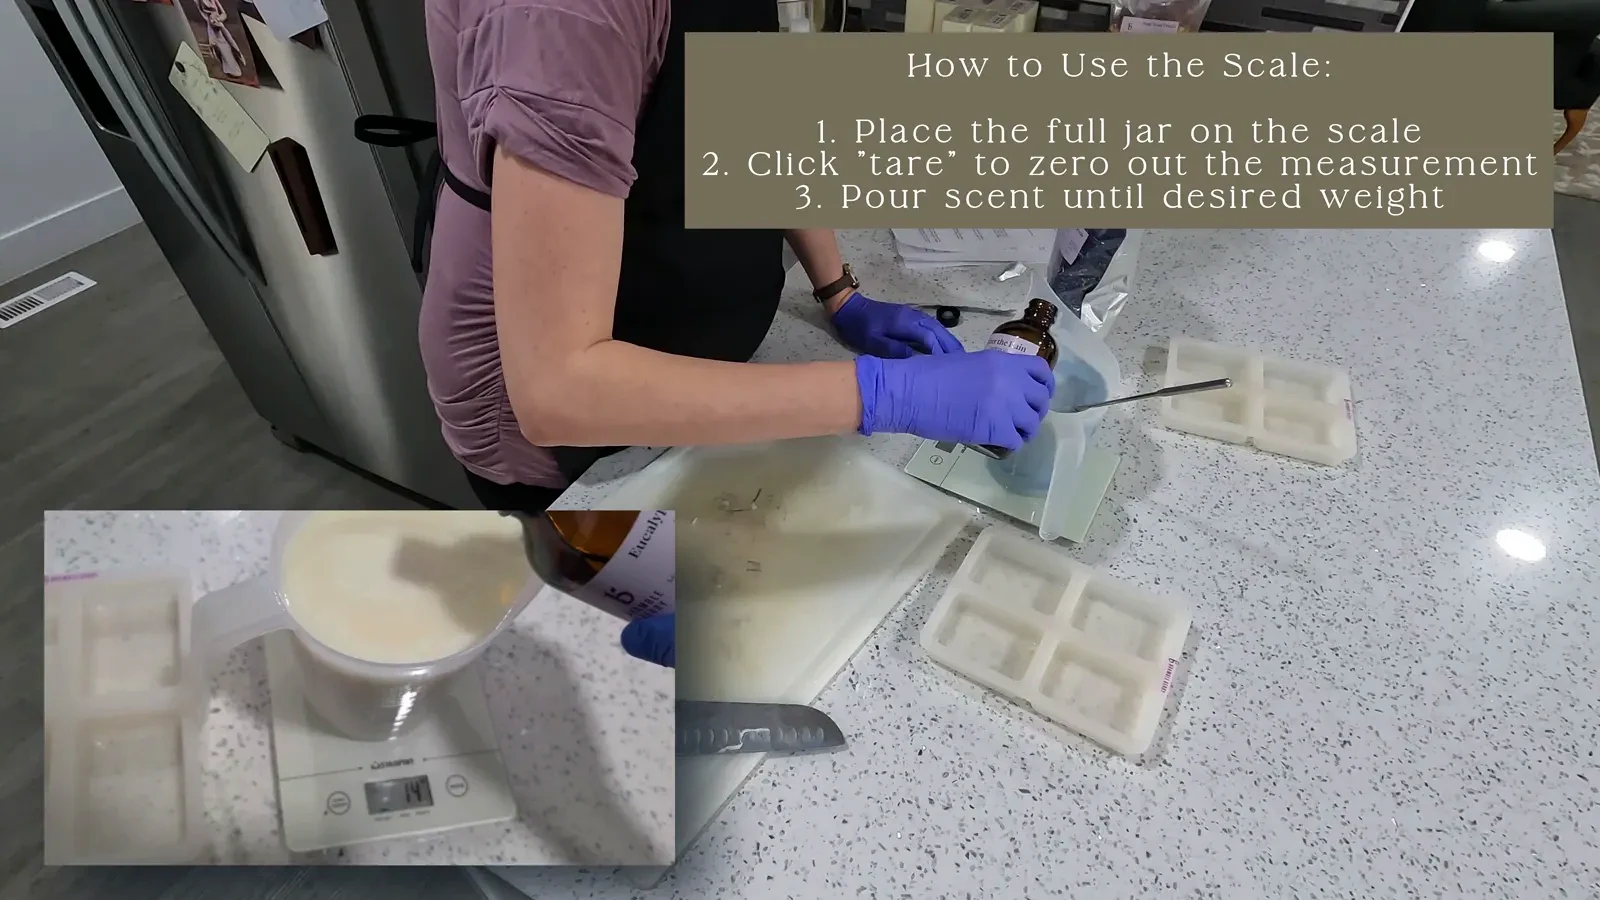
Melting the soap base requires patience. I start with 60 seconds in the microwave, then stir, and continue with shorter bursts of 30 or 20 seconds, stirring thoroughly between each. The key is to heat it slowly to avoid burning or chemically altering the soap. Once melted, it's time to add your fragrance. I use a fragrance calculator, like the one provided by Bramble Berry, to determine the exact amount of scent needed for a light, medium, or strong fragrance. I prefer a medium scent, which for my batch size was 20 grams. I weigh this precisely using my digital scale.
Adding Color and Mix-Ins for Custom Designs
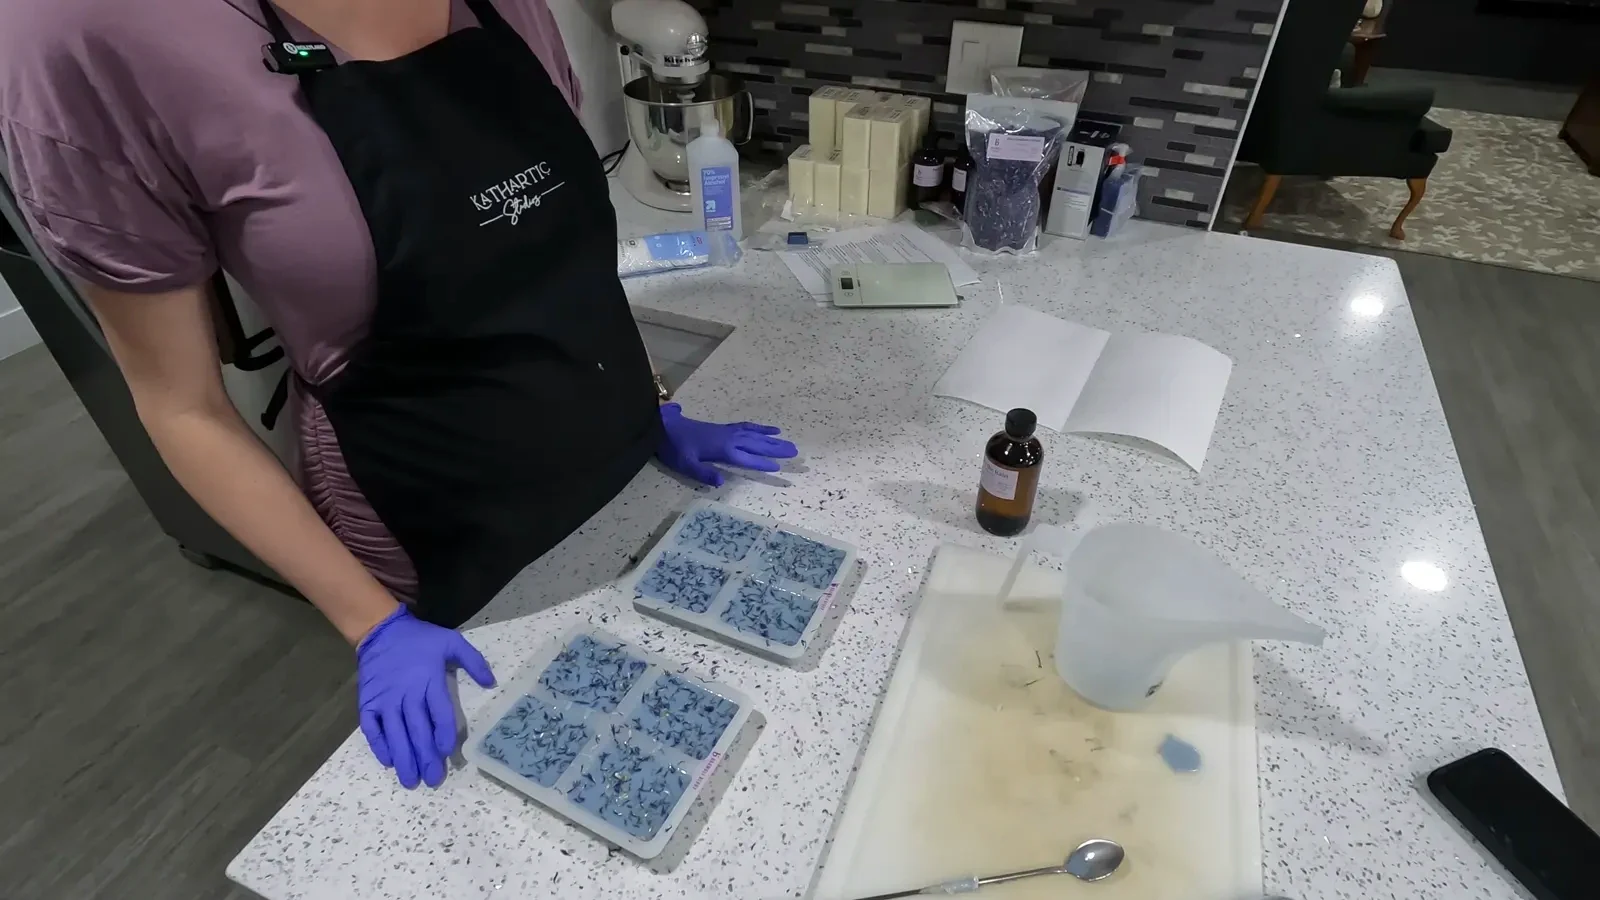
After the fragrance is mixed in, I add the colorant. For my "Misty Rain" soap, I used a blue color block with mica flex for shimmer. I cut the color block into small chunks and stir it into the melted soap until fully dissolved and evenly distributed. Once the color is consistent, I carefully pour the soap into the prepared silicone molds, filling them almost to the top, leaving just enough room for mix-ins.
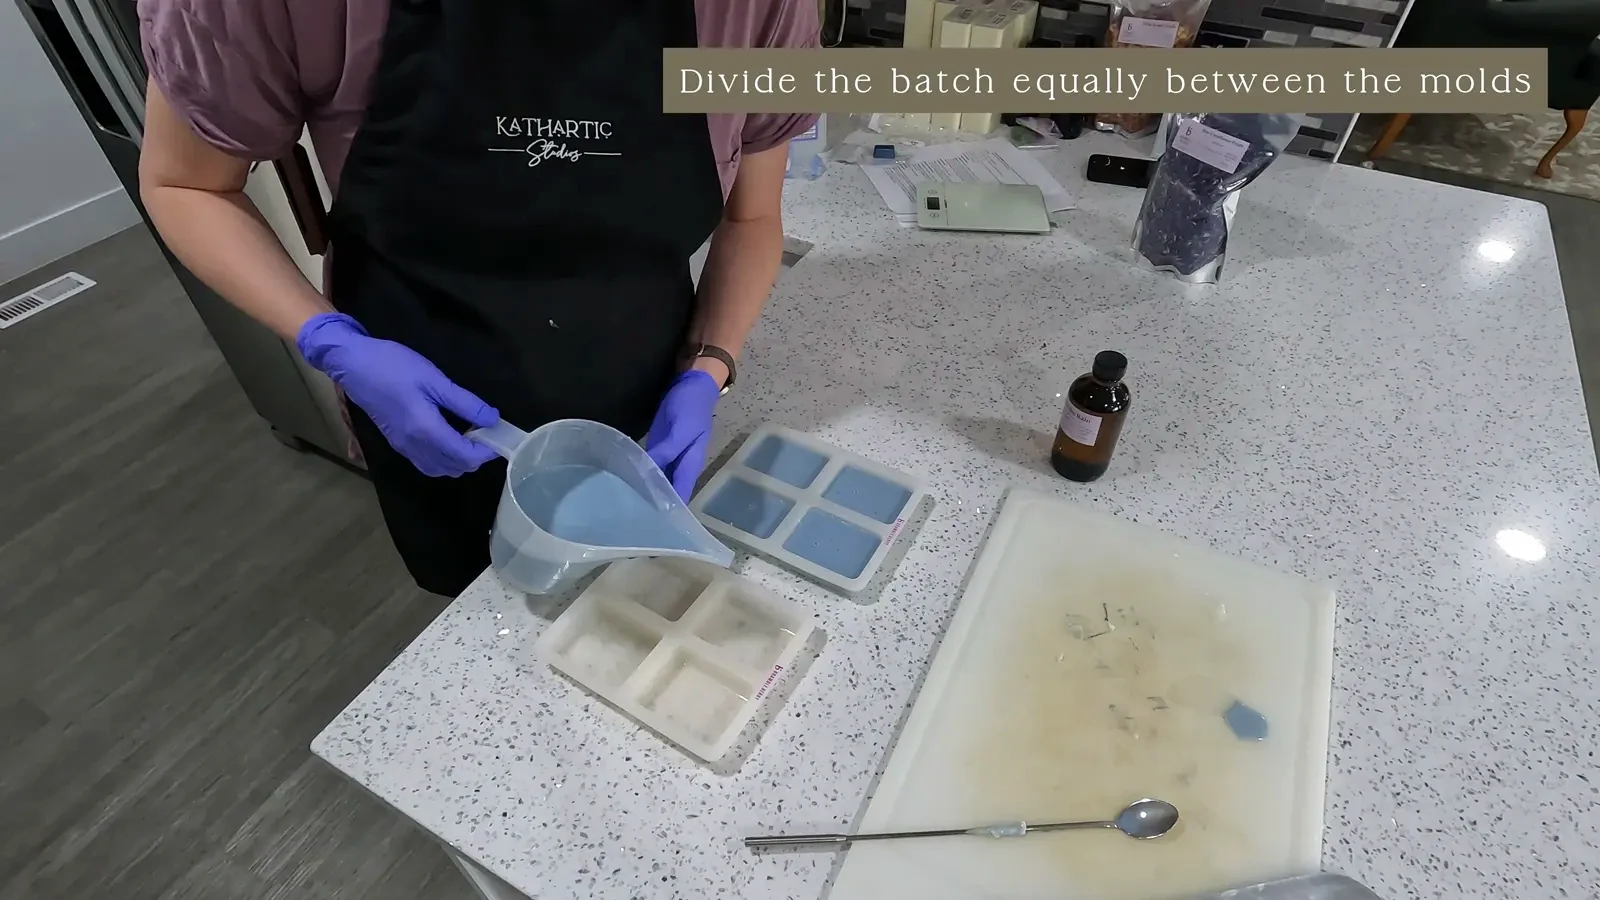
As I pour, bubbles often form on the surface. To get rid of these, I immediately spray the top of the soap with isopropyl alcohol from a spray bottle. This instantly makes the bubbles disappear, leaving a smooth finish. For mix-ins, I prefer to sprinkle them on top of the poured soap rather than mixing them throughout. For the "Misty Rain" soap, I topped it with blue cornflower petals. This method allows the botanicals to act as a decoration on one side, providing an exfoliating component without getting scattered throughout the entire bar or leaving a rough texture that some people dislike. Once the mix-ins are added, the soaps are left to dry for a couple of hours until they are hard.
Unmolding and Creative Soap Recipes
After a few hours, the soaps are ready to be unmolded. They pop out cleanly from the silicone molds, revealing a shiny, shimmery surface with the botanicals beautifully set on one side. The molds I used for the "Misty Rain" soap had a lovely flower leaf shape on top, which added to the aesthetic.
I experimented with several other recipes, each with its own unique scent and visual appeal:
- Frosted Pine: A sweet mix of berries, pineapple, fir, spruce, and musk, colored green with shimmer and topped with rosemary sprigs.
- Wildflower: A soft, modern floral blend of cassis, bergamot, lemon, honey, peony, dandelion, and white musk, colored pink with shimmer and topped with dried rose petals.
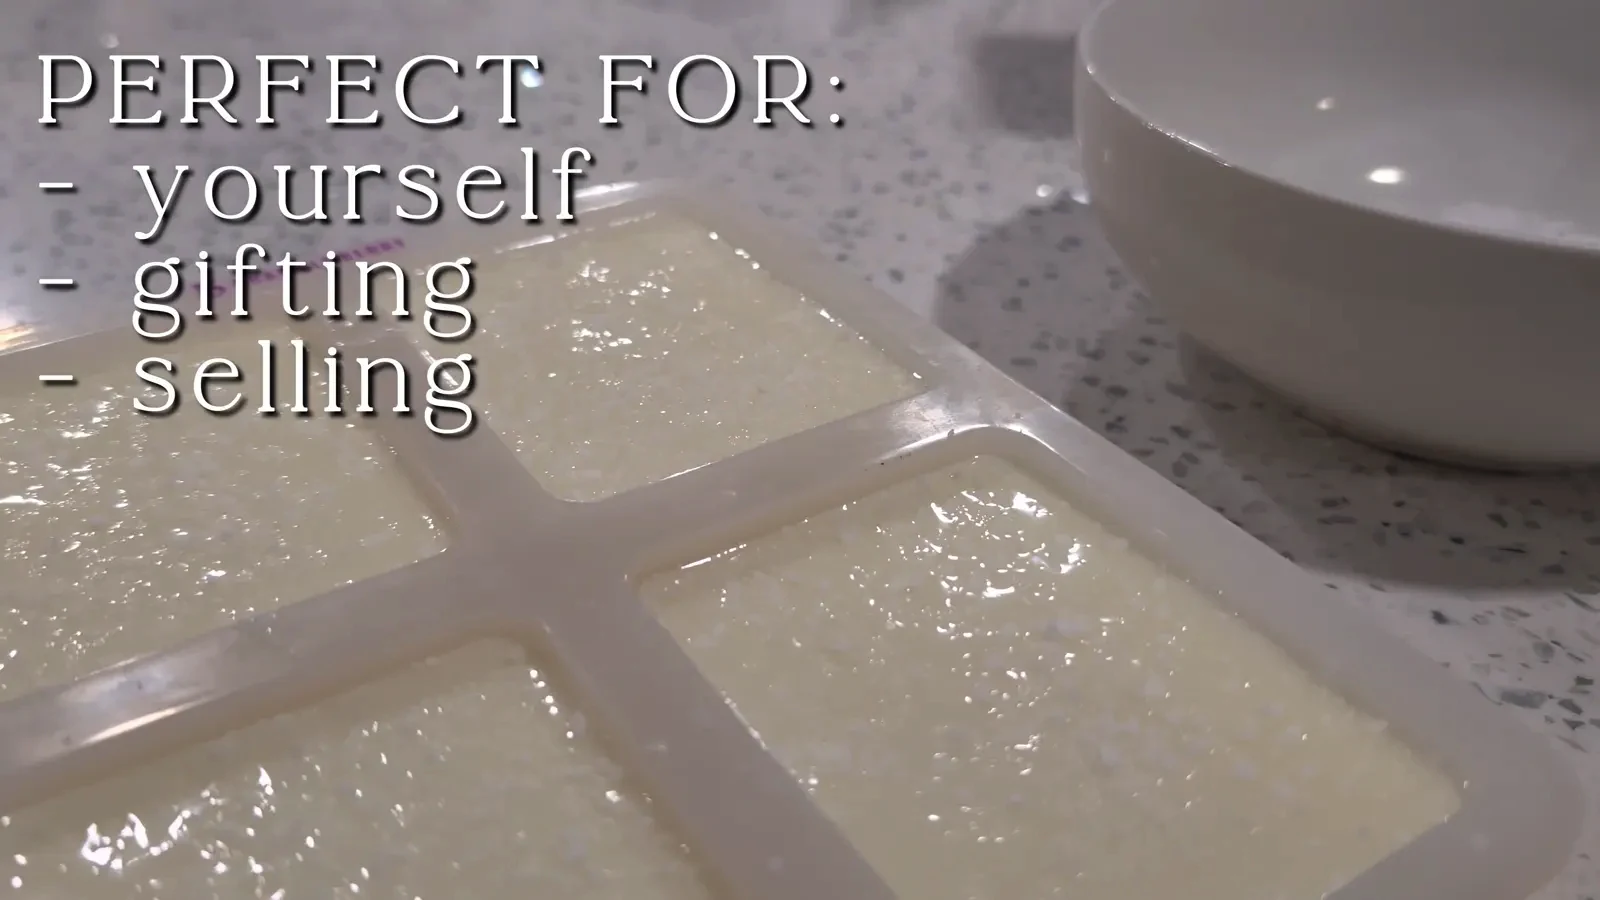
- Cottonwood: A clean, spa-like scent of eucalyptus and cotton with hints of peppermint, gardenia, and sandalwood, left uncolored and topped with coarse salt.
Professional Packaging for Longevity and Presentation
To give your homemade soaps a professional look and extend their shelf life, proper packaging is key. I use heat shrink wraps, which create a tight, clean seal around each bar. These particular wraps have a perforated tear strip, making them easy for the user to open without scissors. Wrapping prevents scratches, dings, and contamination, and most importantly, it protects against "sweating" or condensation, especially in humid climates or with highly moisturizing soap bases.
To apply the shrink wrap, I position the soap inside the wrap and then use a heat gun to shrink the plastic tightly around it. A hairdryer on a hot, low-fan setting can also work, though it might take longer and be less precise. For melt and pour soap, you should wrap it within 12 hours of cooling and setting completely.
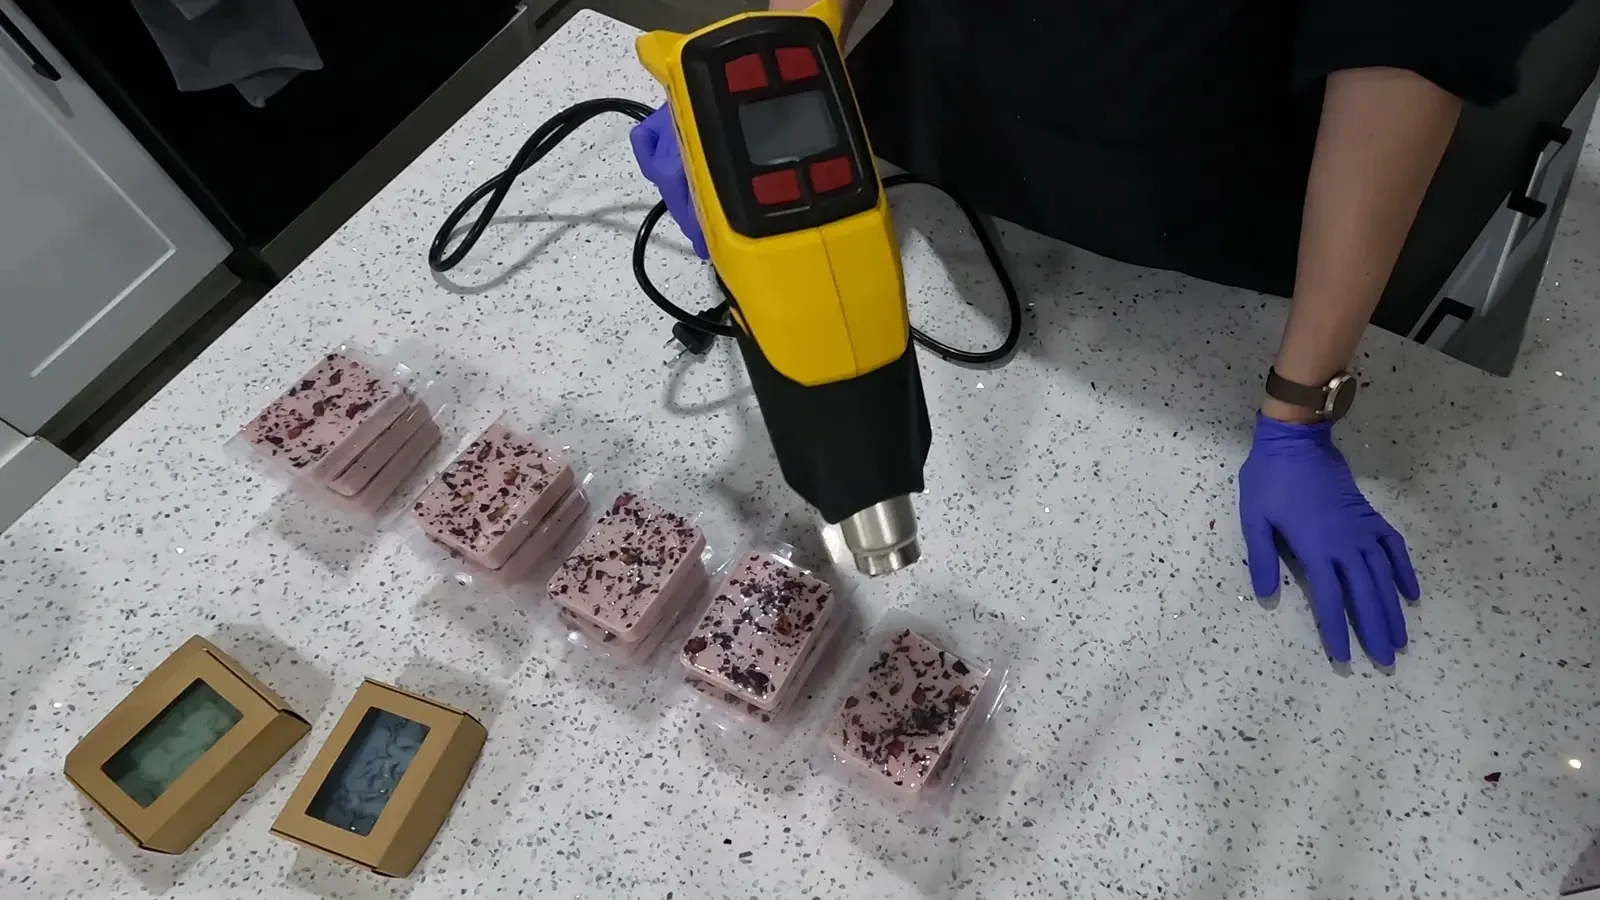
The next step is boxing. I found cardboard soap boxes on Amazon that fit my soaps perfectly and have a window to showcase the product. When selecting boxes, always double-check the dimensions to ensure a good fit. I fold the boxes along their pre-folded lines and snap the bottom together, then place the wrapped soap inside, usually with the botanical side facing up for presentation.
Finally, I design custom sticker labels to add a polished touch. These labels cover the box flap and wrap around the back, displaying the product name, ingredients, and company details. For beginners, printing labels at home is a cost-effective way to experiment with designs before investing in professional printing services. I use a tool like Canva for designing my labels.
The Finished Product
With these steps, you can create beautiful, handmade melt and pour soaps that are perfect for any occasion. The shelf life of these soaps typically ranges from one to two years, depending on the minimum shelf life of all the ingredients used. It's a rewarding craft that allows for endless creativity and results in lovely, functional items.
Frequently asked questions
What is melt and pour soap making?
Melt and pour soap making is a beginner-friendly method where you use a pre-made soap base, cut it, melt it down, and then add your desired scents, colors, and other additives before pouring it into molds. It's simpler than cold process soap making because it bypasses the need to handle harsh chemicals like lye.
How do I prevent bubbles on my melt and pour soap?
To prevent bubbles from forming on the surface of your poured melt and pour soap, lightly spray the top of the soap in the mold with isopropyl alcohol immediately after pouring. This causes the bubbles to dissipate, leaving a smooth finish.
Why should I wrap my melt and pour soap?
Wrapping your melt and pour soap, ideally with heat shrink wraps, helps seal in freshness and scent, prevents scratches or dings, and protects against contamination. Crucially, it also prevents 'sweating' or condensation, which can occur in humid climates or with highly moisturizing soap bases, preserving the soap's appearance.
Can I use essential oils instead of fragrance oils?
Yes, you can use essential oils, but fragrance oils designed for soap are often preferred. Essential oils are natural and can have skincare benefits, but they may fade over time and are typically pricier. Fragrance oils are usually stronger, longer-lasting, and specifically formulated for soap applications.
How long does melt and pour soap take to dry?
Melt and pour soap typically hardens and is ready to unmold within a couple of hours after pouring. Unlike cold process soap, it doesn't require a long curing time; once it's completely cooled and set, it can be wrapped and used.

 Canada
 EUR
EUR Japan
Japan