
This is one of the most challenging furniture projects I’ve ever taken on—I’m taking these two dusty, grimy, totally unrelated pieces from the thrift store and transforming them into a complete, matching three-piece bedroom set for my guest bedroom, with herringbone wood accents.
Preparing the Pieces
The dresser is traditional with rounded, mismatched drawer faces. The top is peeling and the drawer slides are sticky, but otherwise, it’s in decent shape. And then we have the other piece: a child-size, boxy and very un-bedazzled desk that I’m planning to split in two to make two side tables.
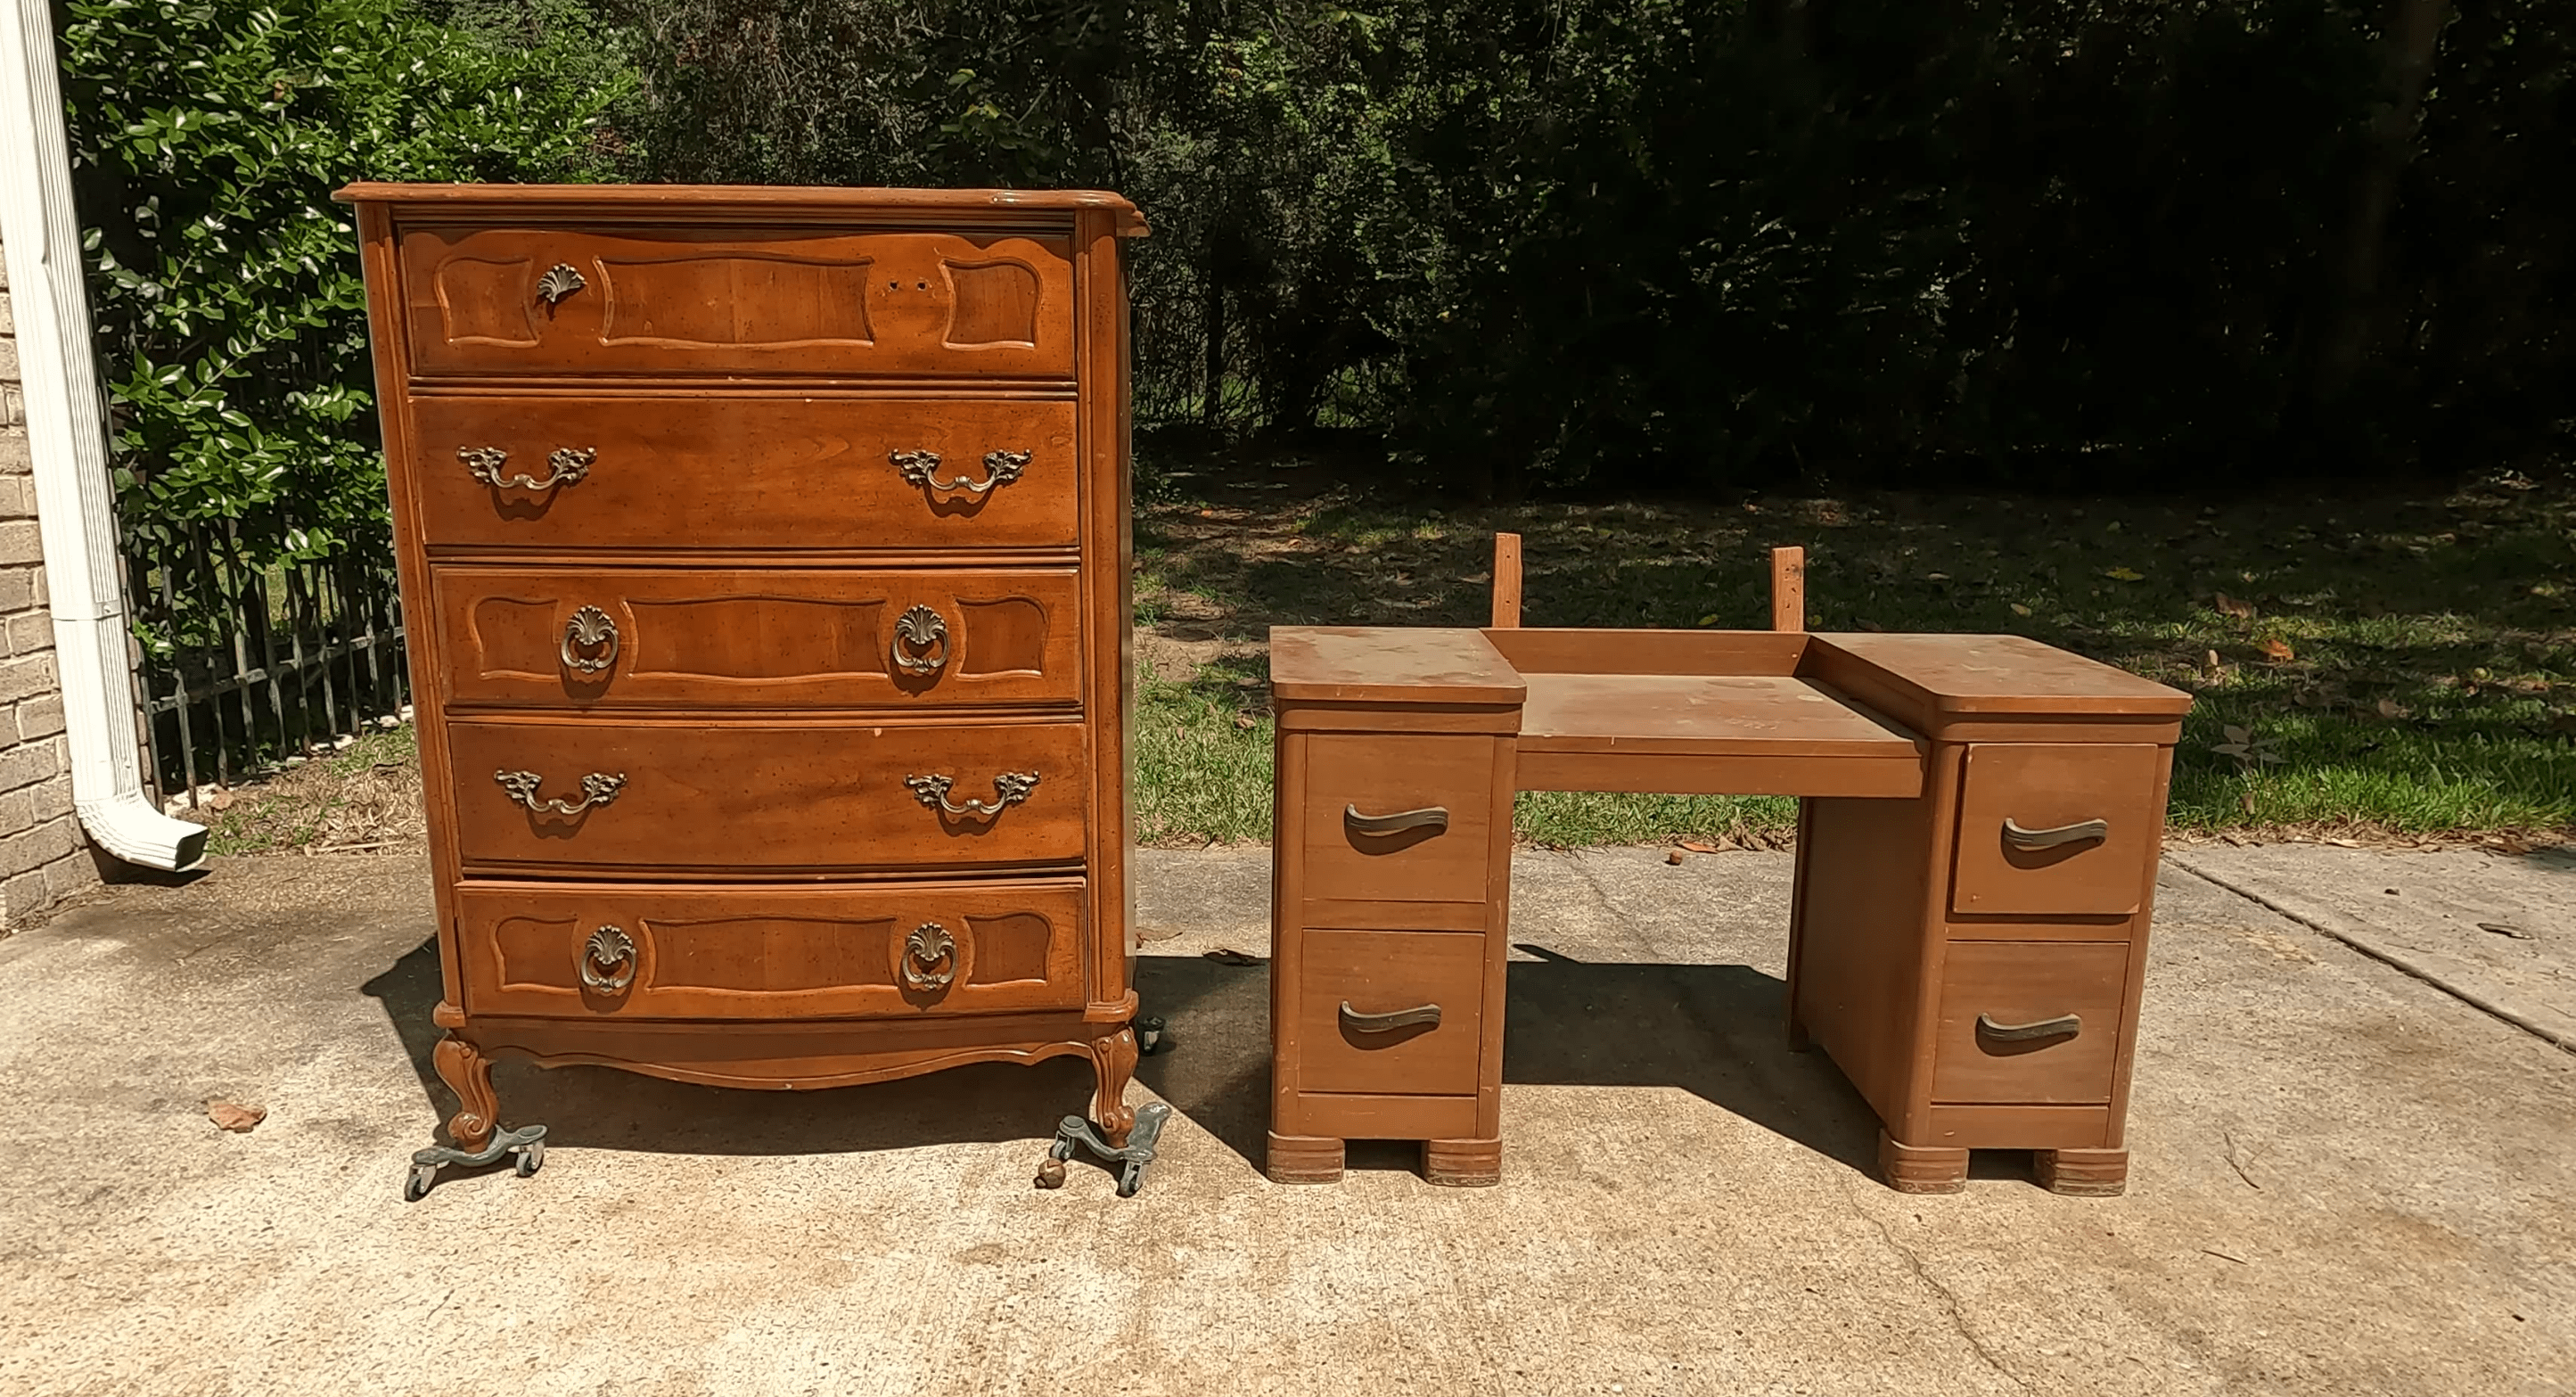 How it started...
I pulled out all the drawers and washed everything down with some TSP Alternative. Then, it was time to remove all the handles, and also pry off the elevated veneer details on the mismatched dresser drawers.
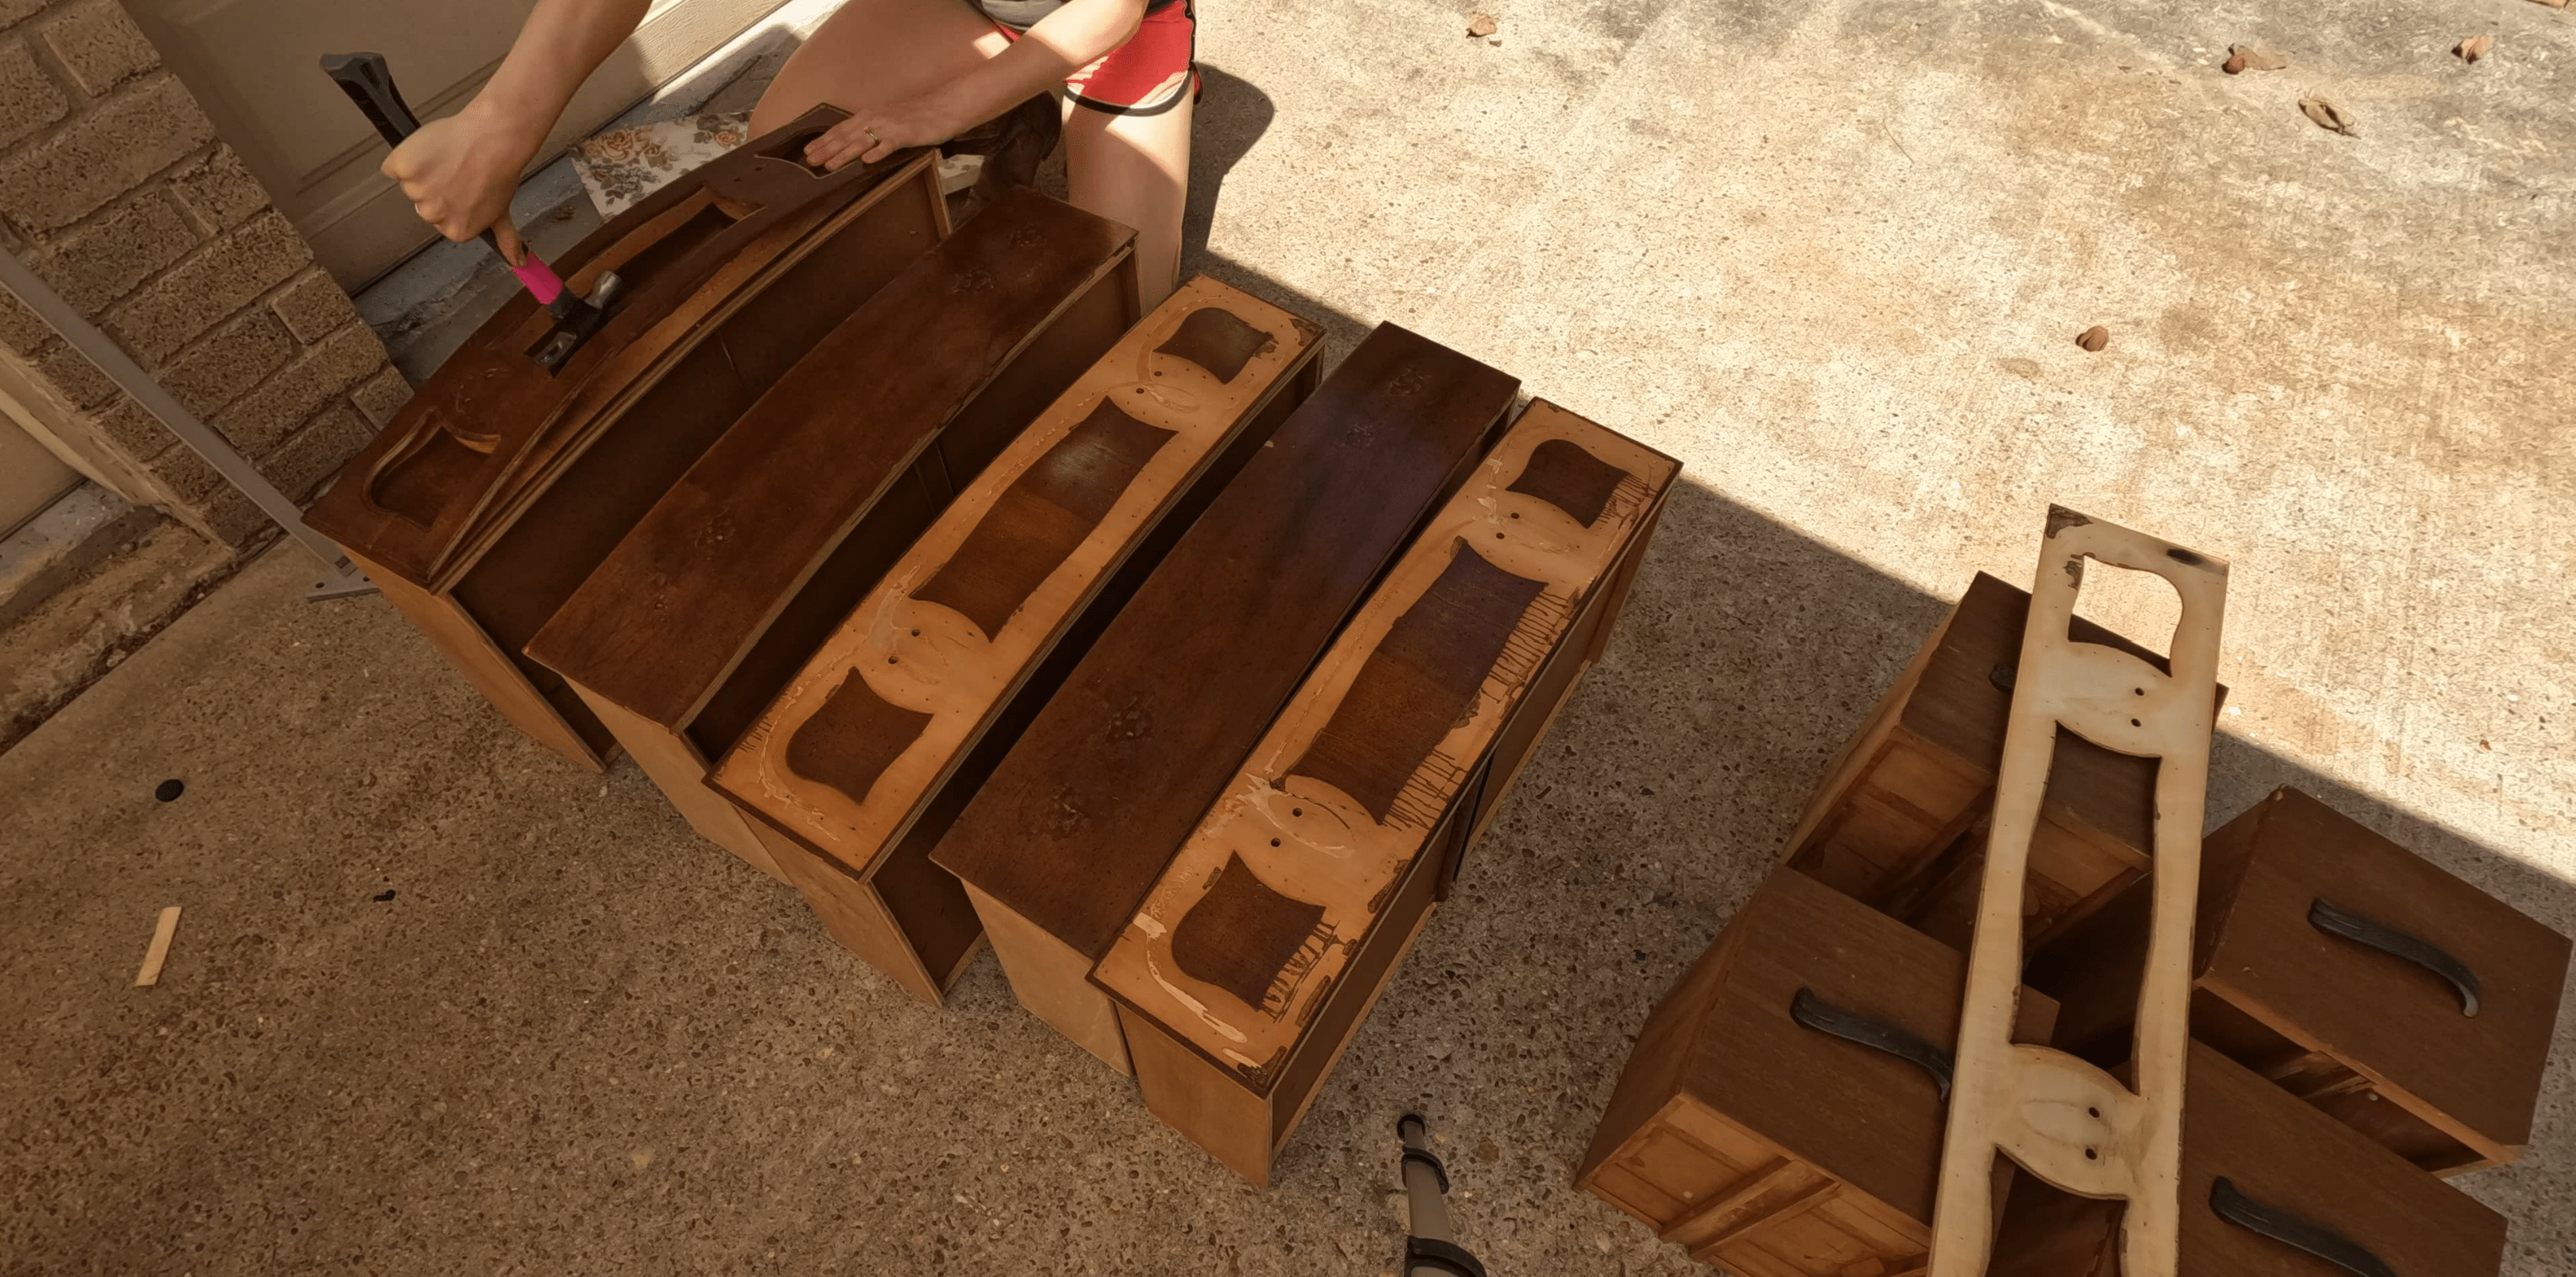 Prying off the Veneer
I bought this desk in particular because the two sides were symmetrical and the right size for my room, but also because the construction made each side quite independent and easy to convert each piece so it could stand on its own. Once I had the desk portion loosened, I literally just pulled the desk apart.
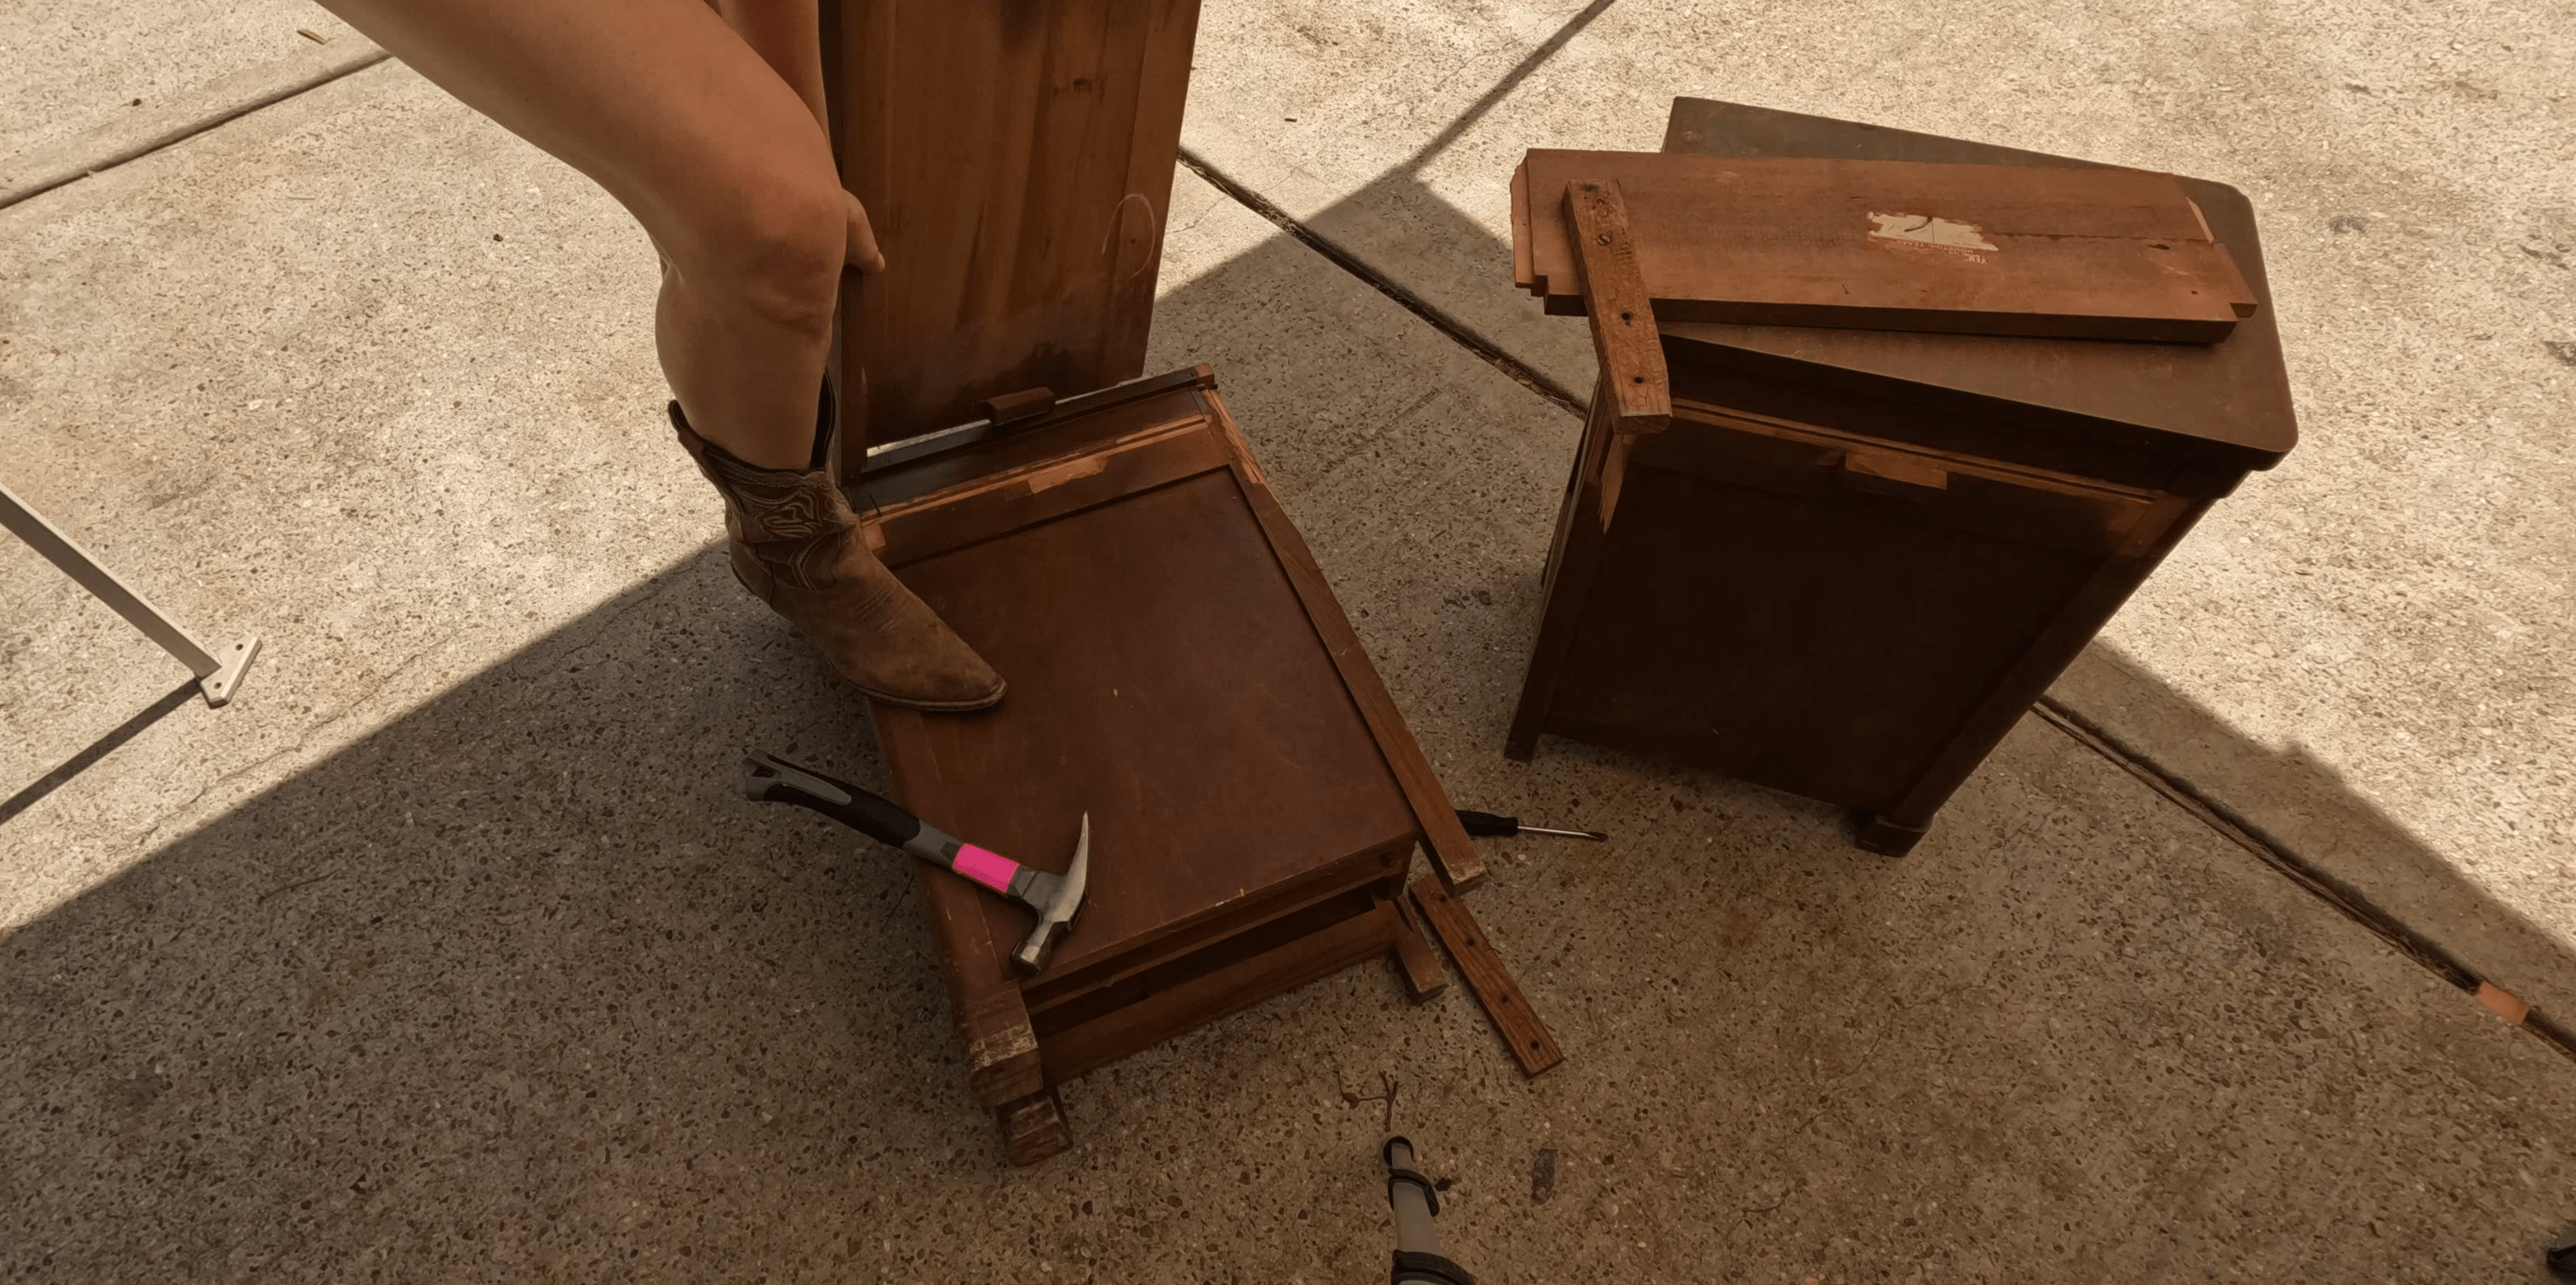 Disassembling the Desk
This left a couple of pockets on either side, so I filled those with some paintable, sandable wood filler and once everything was dry it was time to do a scuff sanding on every surface.
If you’re into furniture flipping you’ve probably seen a lot of people use this SurfPrep Sander. It has foam sanding pads that contour around rounded edges and intricate details, which makes it great for a scuff sand like this. This is one of the pricier options though, so if you’re in the market be sure to do your research.
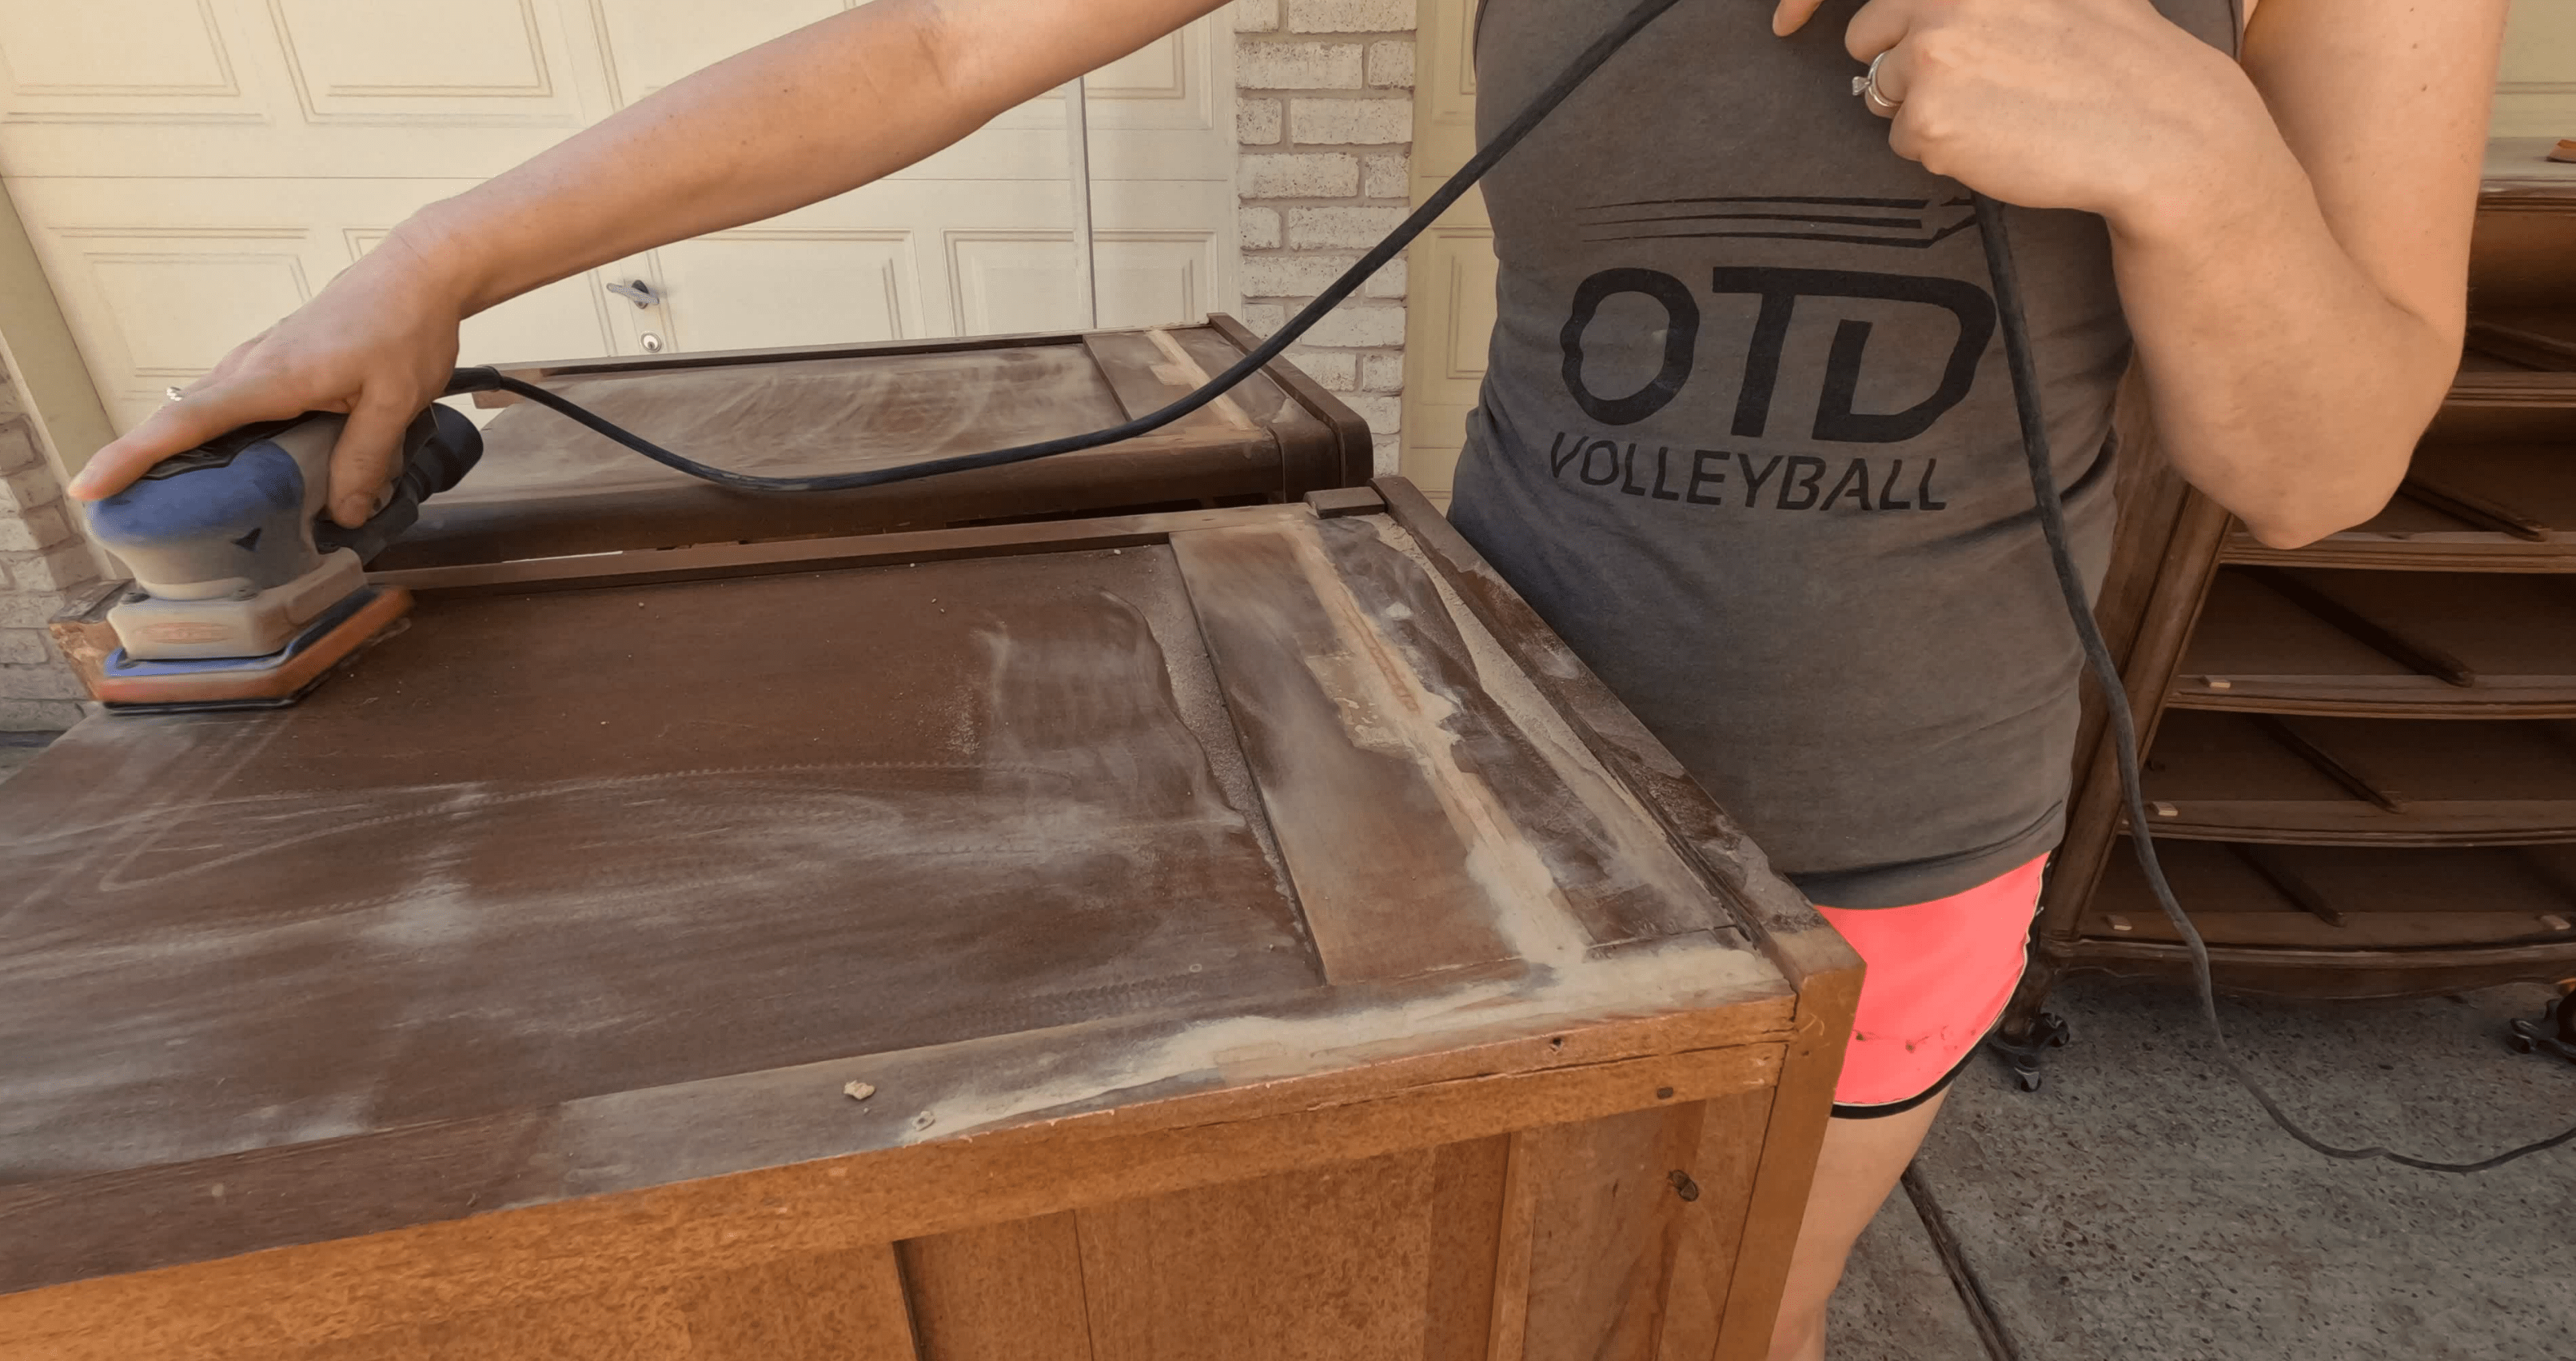 Filling & Sanding
Painting
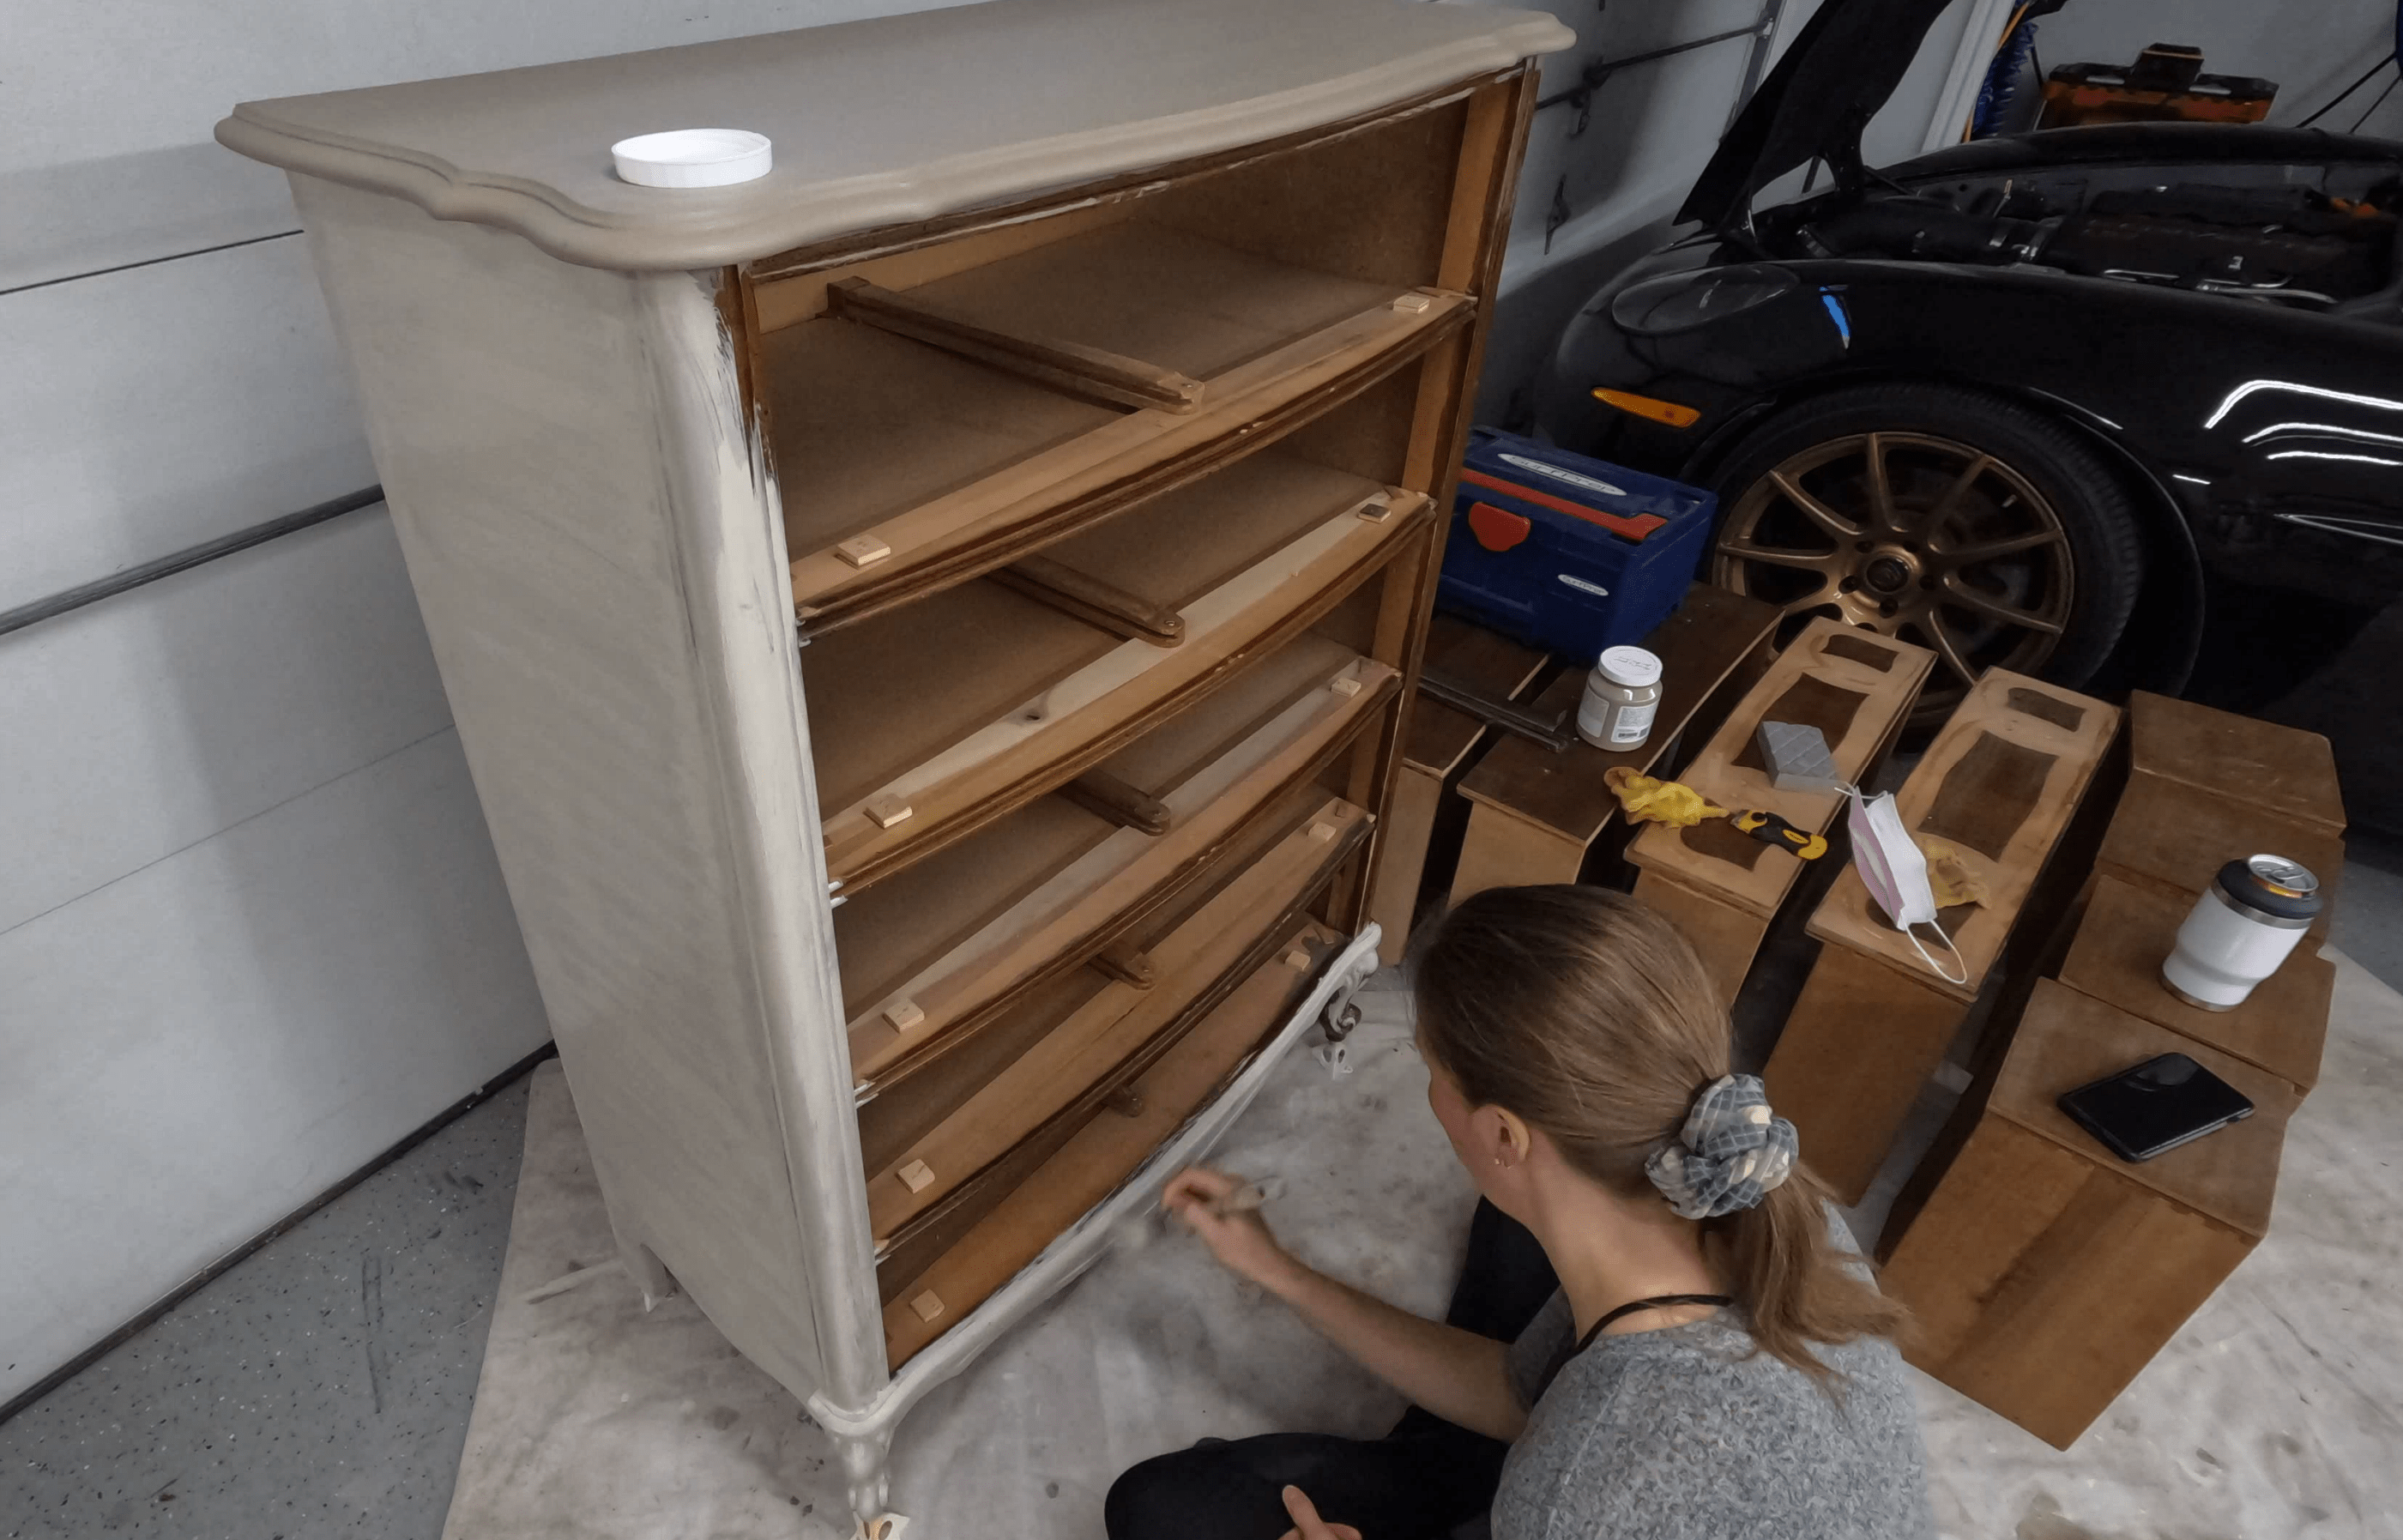
Once I’ve wiped off all that dust, it’s time to get to painting!
These pieces are a bit different in shape so to make them feel like a set, I’m going to paint the bodies all the same colors and apply the same wood details to each drawer front.
I am using Fusion Mineral Paint in Algonquin, a medium beige, on the top and Putty, a lighter cream, on the sides of the body. I applied two coats to each surface, waiting a couple hours between coats.
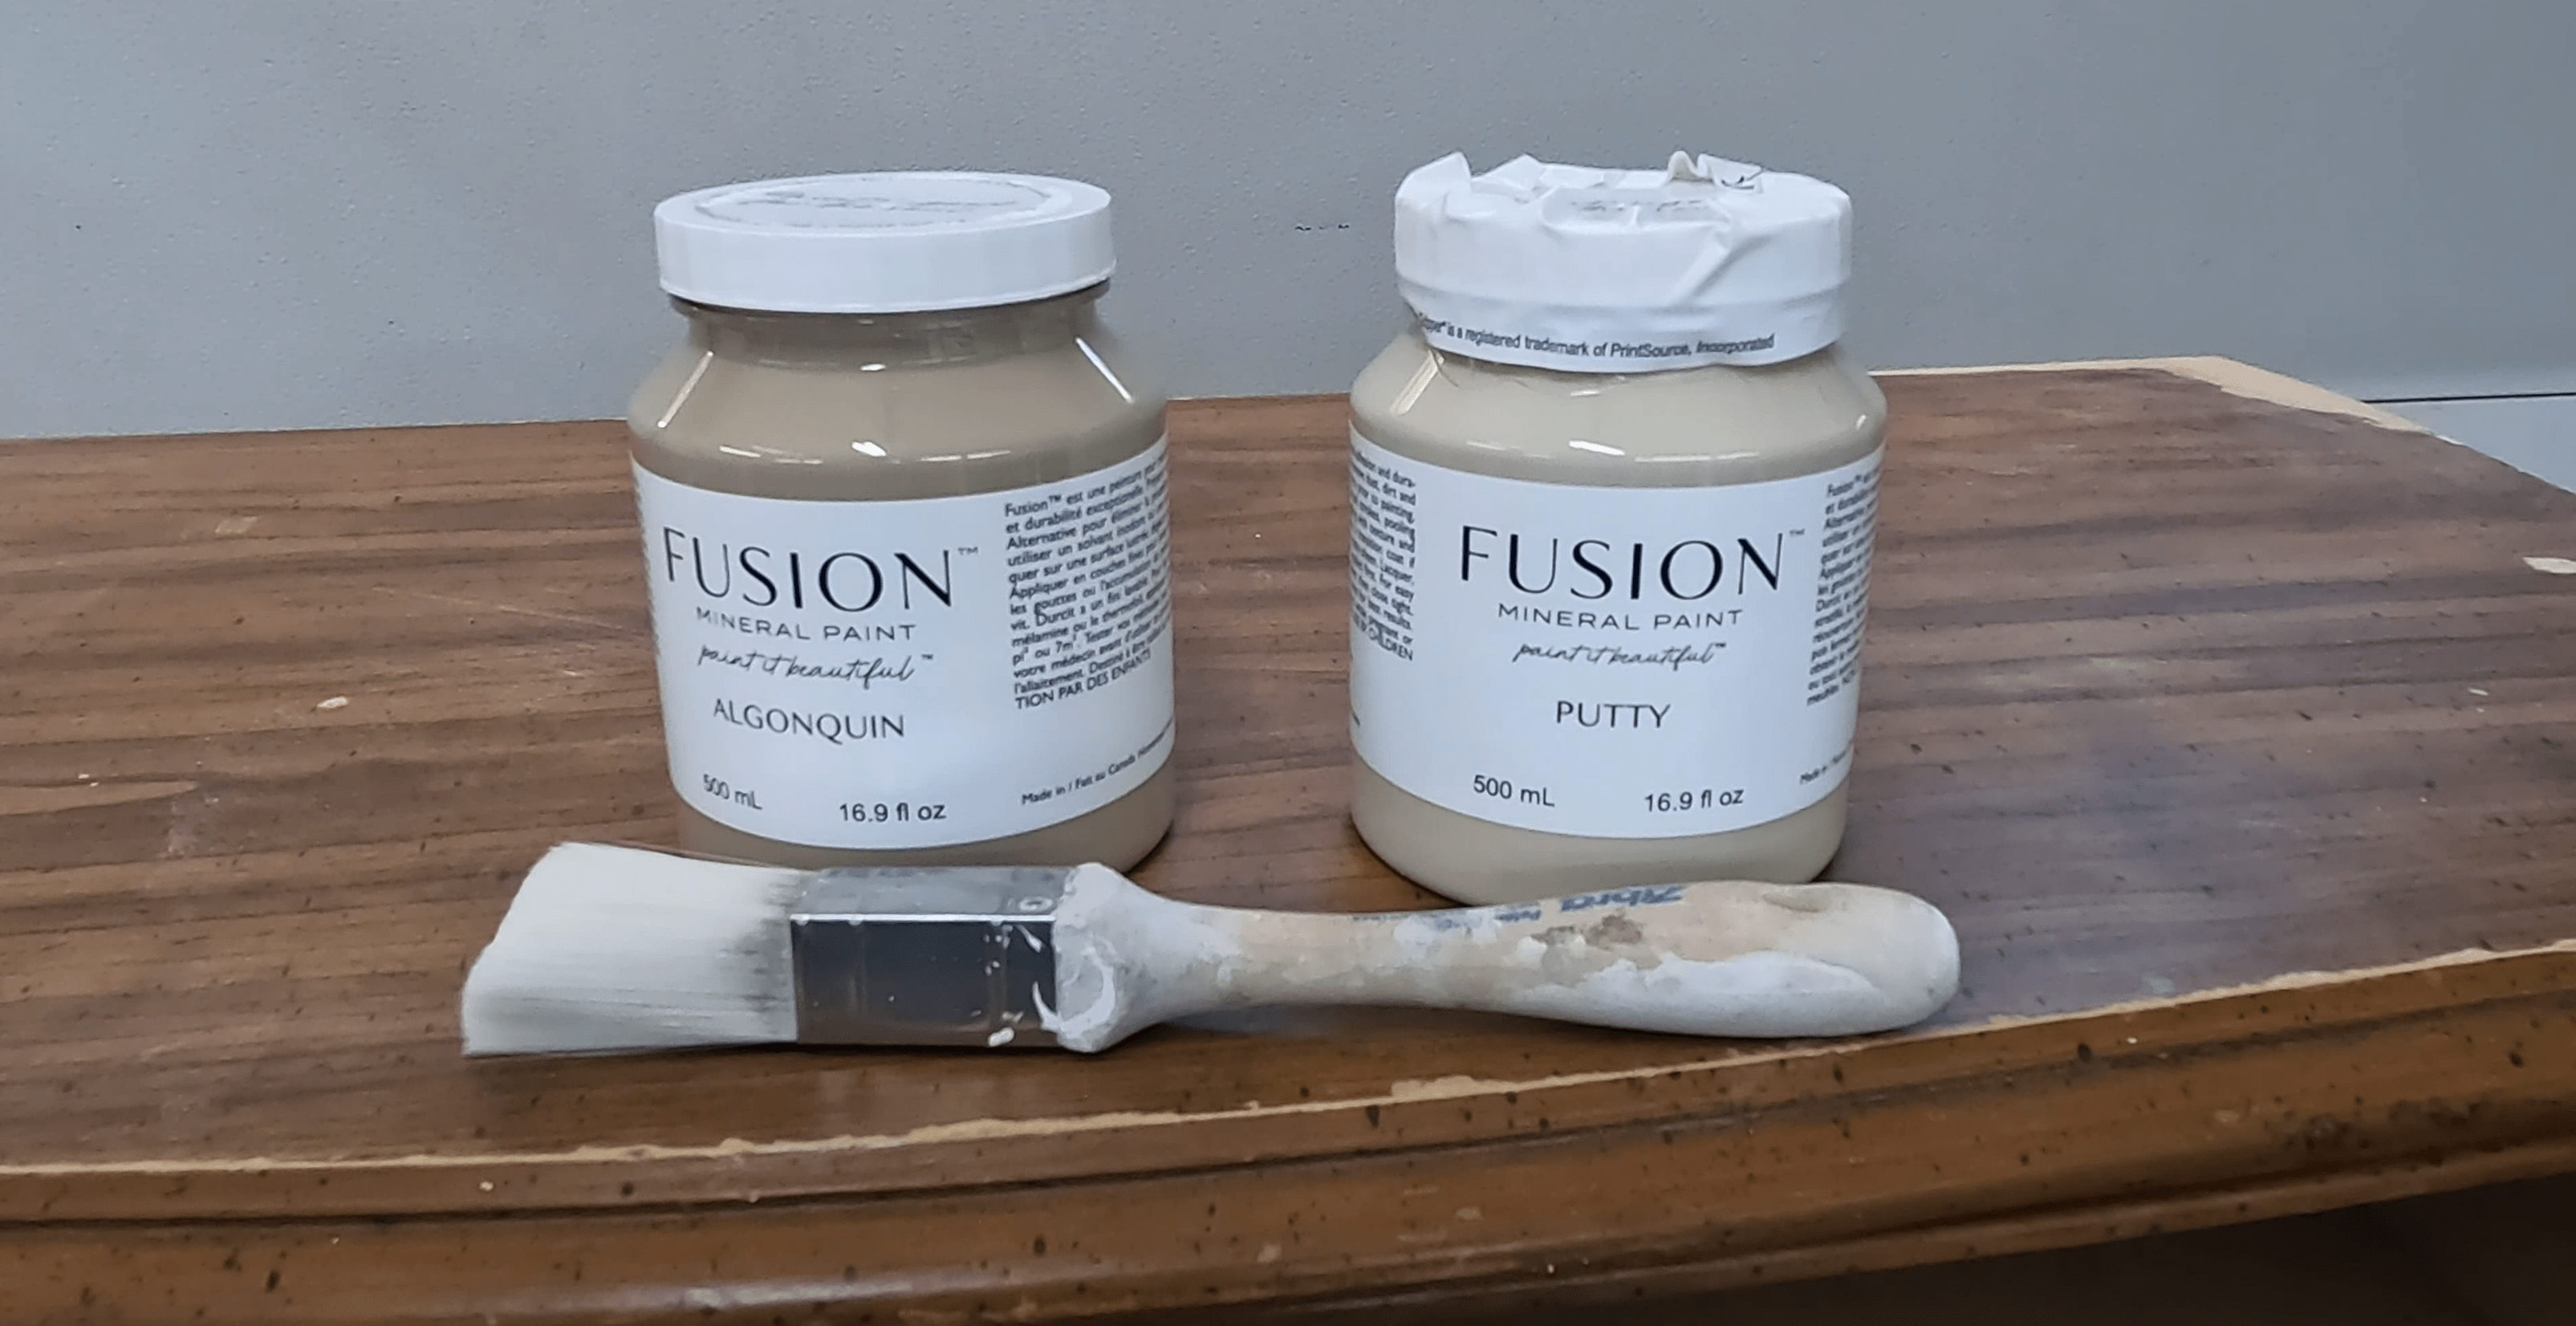 Fusion Mineral Paint
This is, surprisingly, my first time ever using this paint. I’ve used a few of Fusion’s milk paints before but never their Mineral Paint, which is closer to chalk paint but has a few extra benefits. This product needs no primer and minimal prep, is high coverage, and doesn’t require a top coat. Sounds like a painter’s dream, right? I’ve definitely been excited to put it to the test.
I loved the coverage and it seems to adhere similarly to a chalk paint, but I’m still unsure about the whole no-top coat thing. The final texture was a bit rough and seemed almost porous, so I’m not convinced it will hold up against coffee mug stains and things like that—I guess time will tell!
 Two-Toned Paint Scheme
Gluing On the Herringbone Wood
While that’s all curing, it’s time to get to the meat of this project—the wooden drawer faces. I bought a pack of 100 birch painting stir sticks off of Amazon and I’m going to glue them to the front of each drawer face in a herringbone pattern.
To start, I’m drawing a centerline down each drawer face. This will help me line up the pattern.
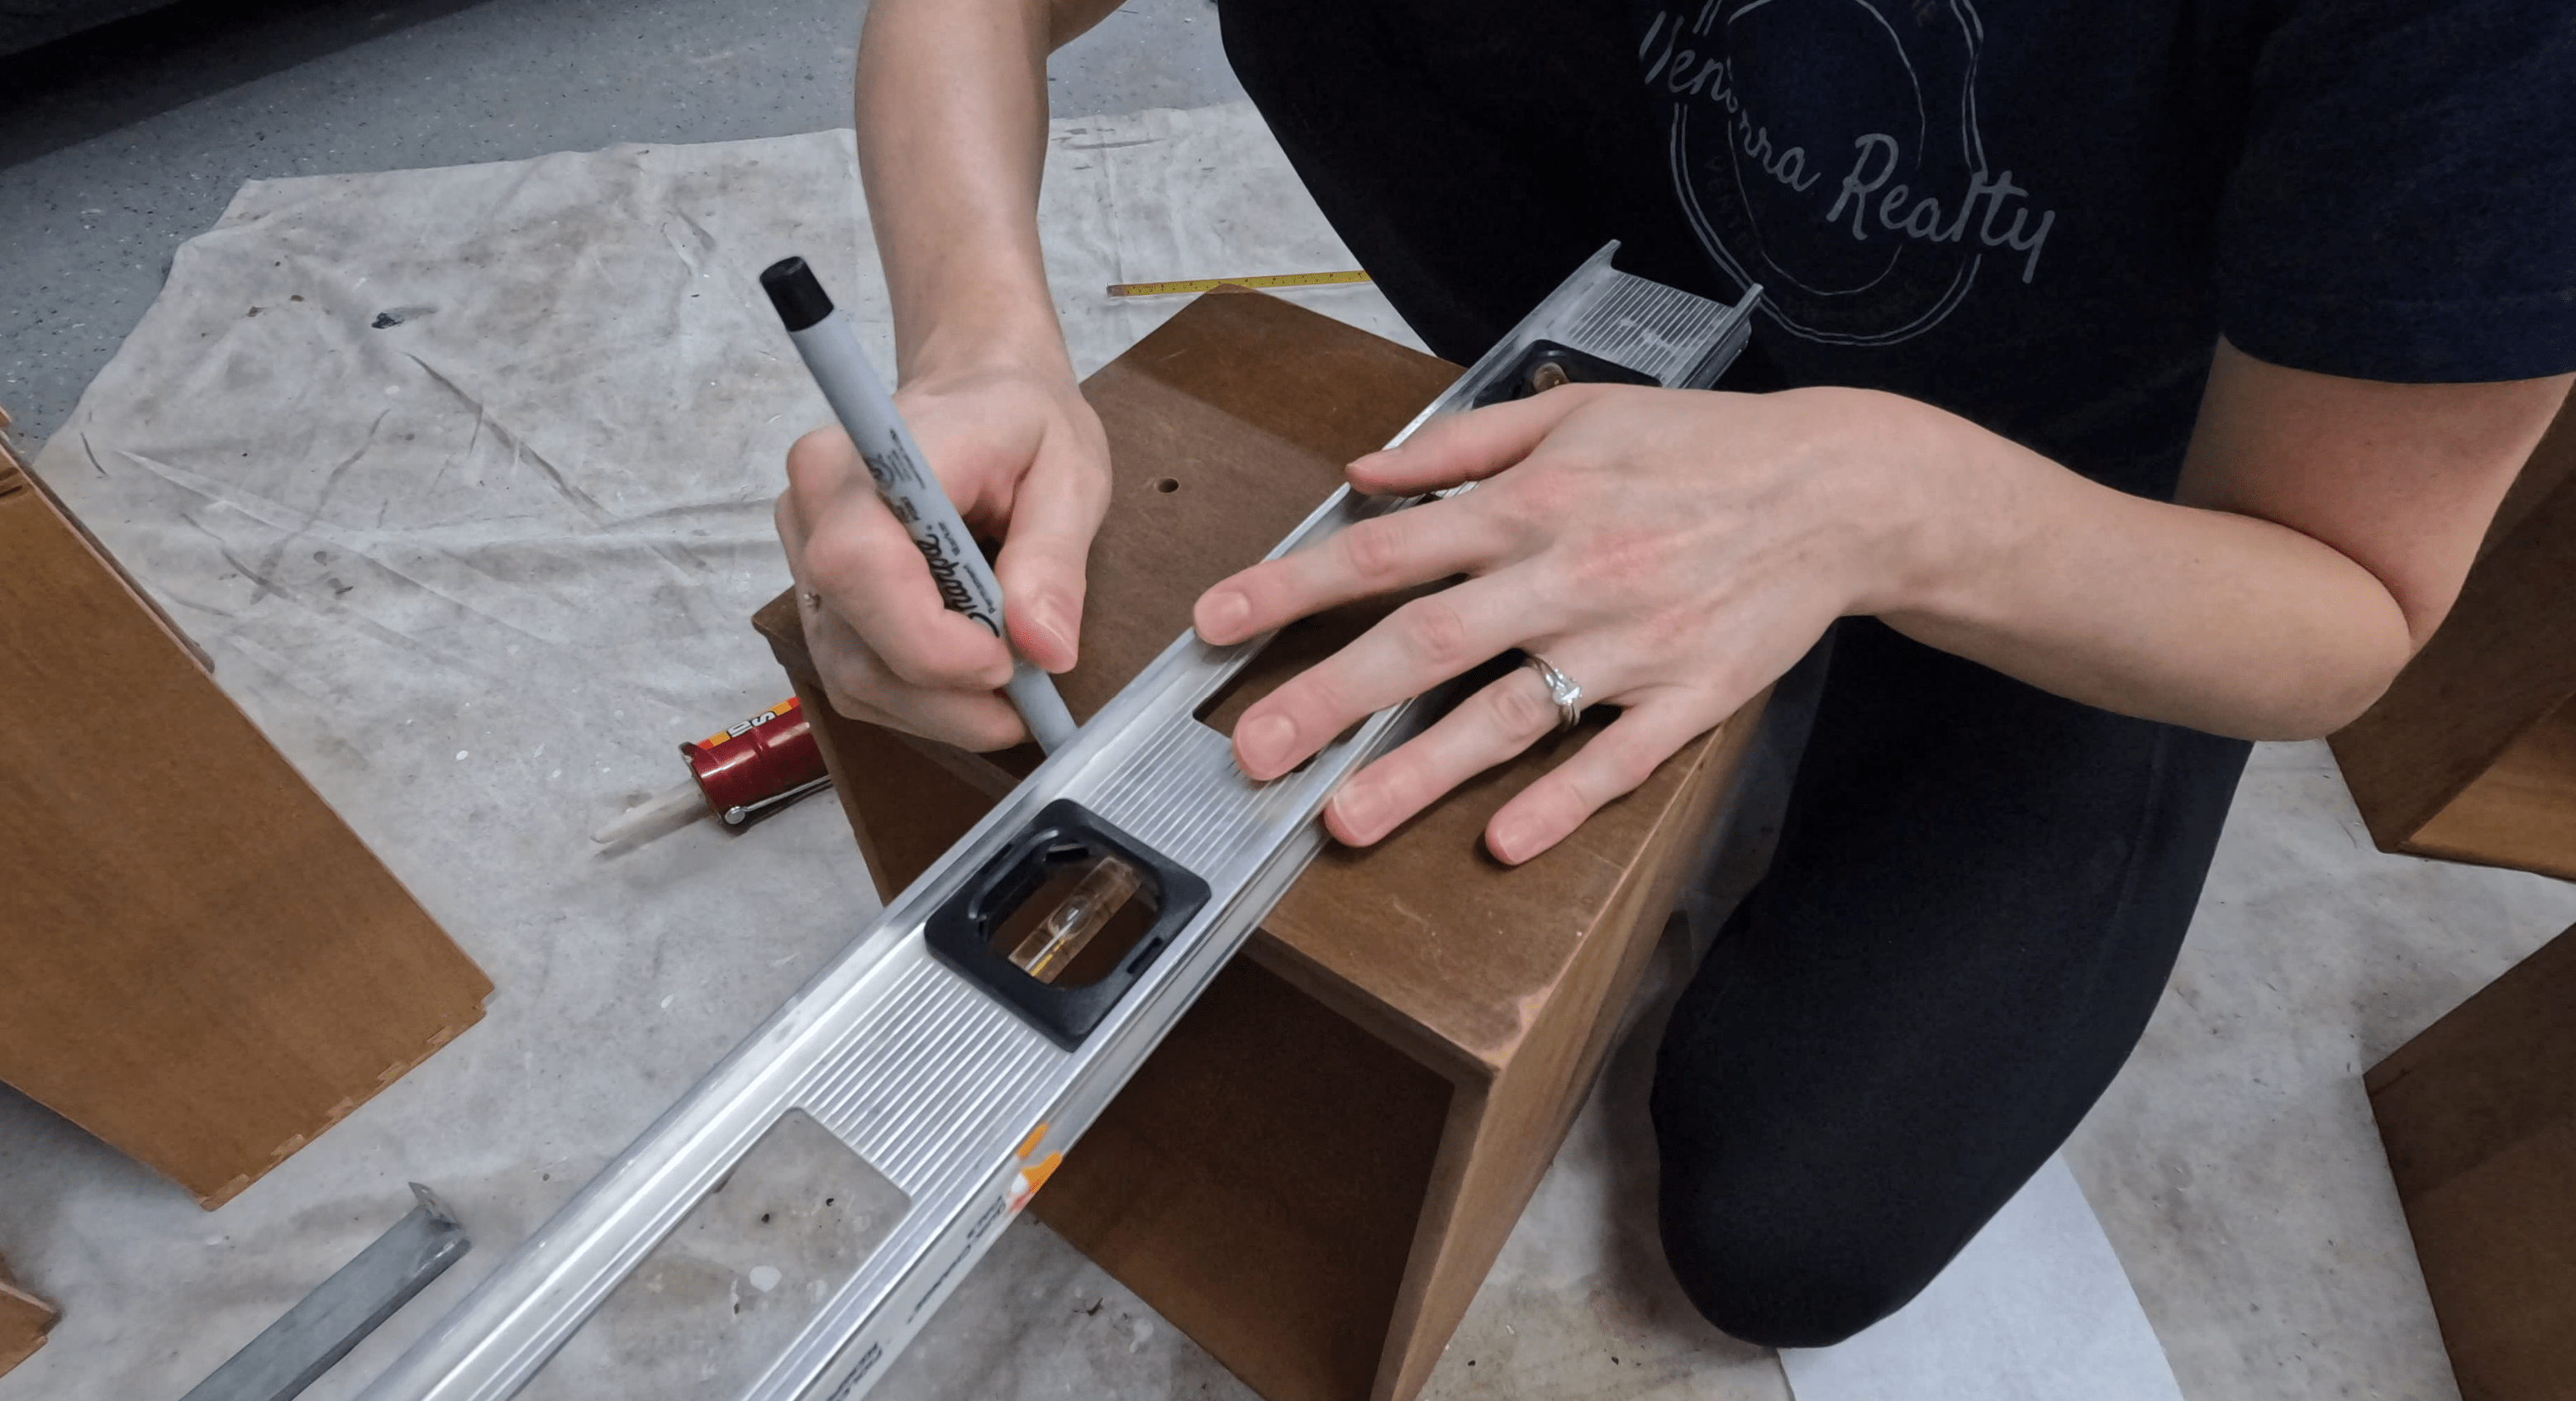 Drawing a Centerline
Then, I squeezed out a generous amount Liquid Nails, spread it around with a stir stick, and started laying out my pattern. There’s plenty of working time with this glue, so I’m going to take my time to make sure everything is straight and even. I’m also snapping some sticks in half to save material on all the little corners.
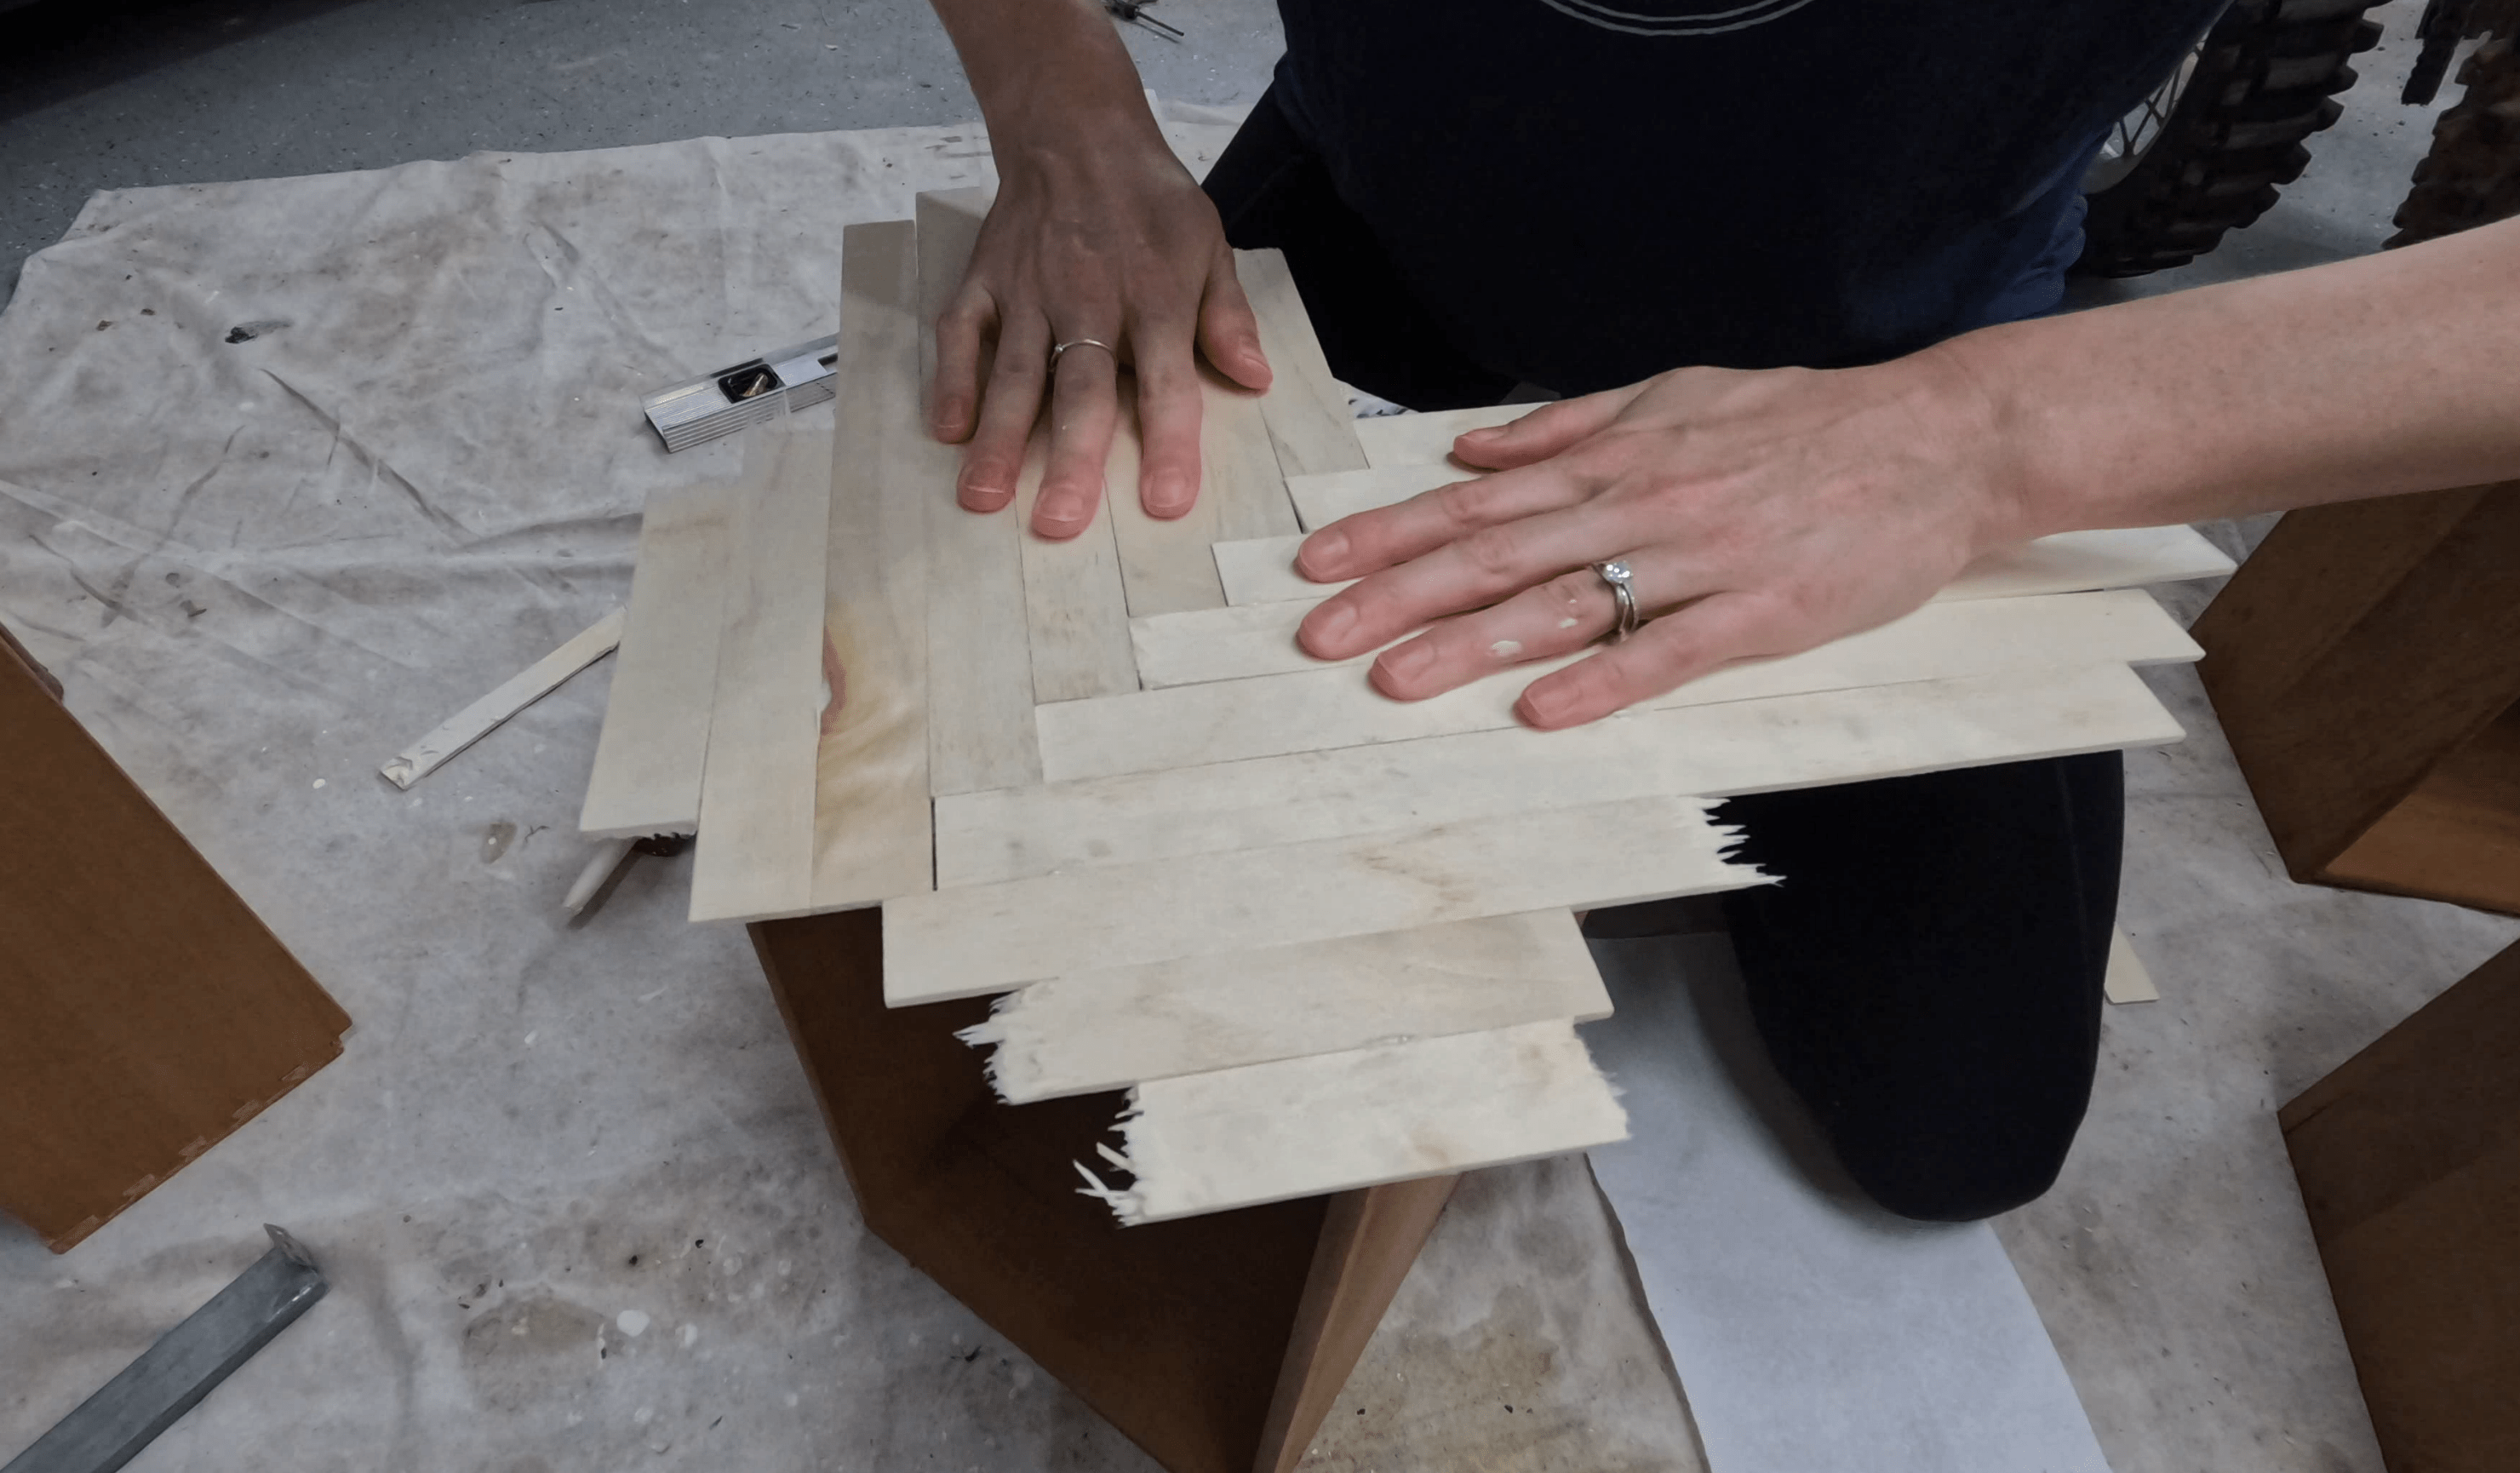 Gluing the Wood Sticks
Once everything’s in place, I’m going to lay a piece of plywood over it and clamp that down to make sure everything is secure while the glue is drying. Then it’s time to repeat the process for the rest of my drawers!
Now, for the larger dresser, the drawer fronts were actually curved, so that posed an extra challenge. These birch sticks are soft and somewhat bendable, but it’s a bit of a dance between how strong the glue can hold and how much force the stick is giving to try to straighten itself back up.
Clamping was also an interesting process. The plywood piece I used is actually a scrap piece from my DIY Shiplap Project, so it’s very thin and flexible. Then I just added as many clamps as I could to get pressure on the whole surface, starting from the inside and working my way out. This use up all my clamps, so I only managed one drawer per day. Good thing there were only five!
 Clamping the Dresser Drawers
Sanding, Staining & Sealing the Herringbone Wood
Once everything was dried, it was time to start cleaning up the edges. I started by taking a coping saw and slicing off as much excess wood as possible. I had to be gentle and take care not to pop the wood piece off of the drawer front.
 Slicing Off the Excess
This is the time that any gluing imperfections will show up, so whenever there was a piece that didn’t stick down quite right, I just squeezed in a bit more glue and clamped it back down.
Then, we routed the edges with a flush bit to get them perfectly in line with the shape of the original drawer. This is super important because if there is anything sticking out, the drawer might not slide in and out as well as it did before. If you don’t have a router, you can also do some sanding on the edges to smooth them out.
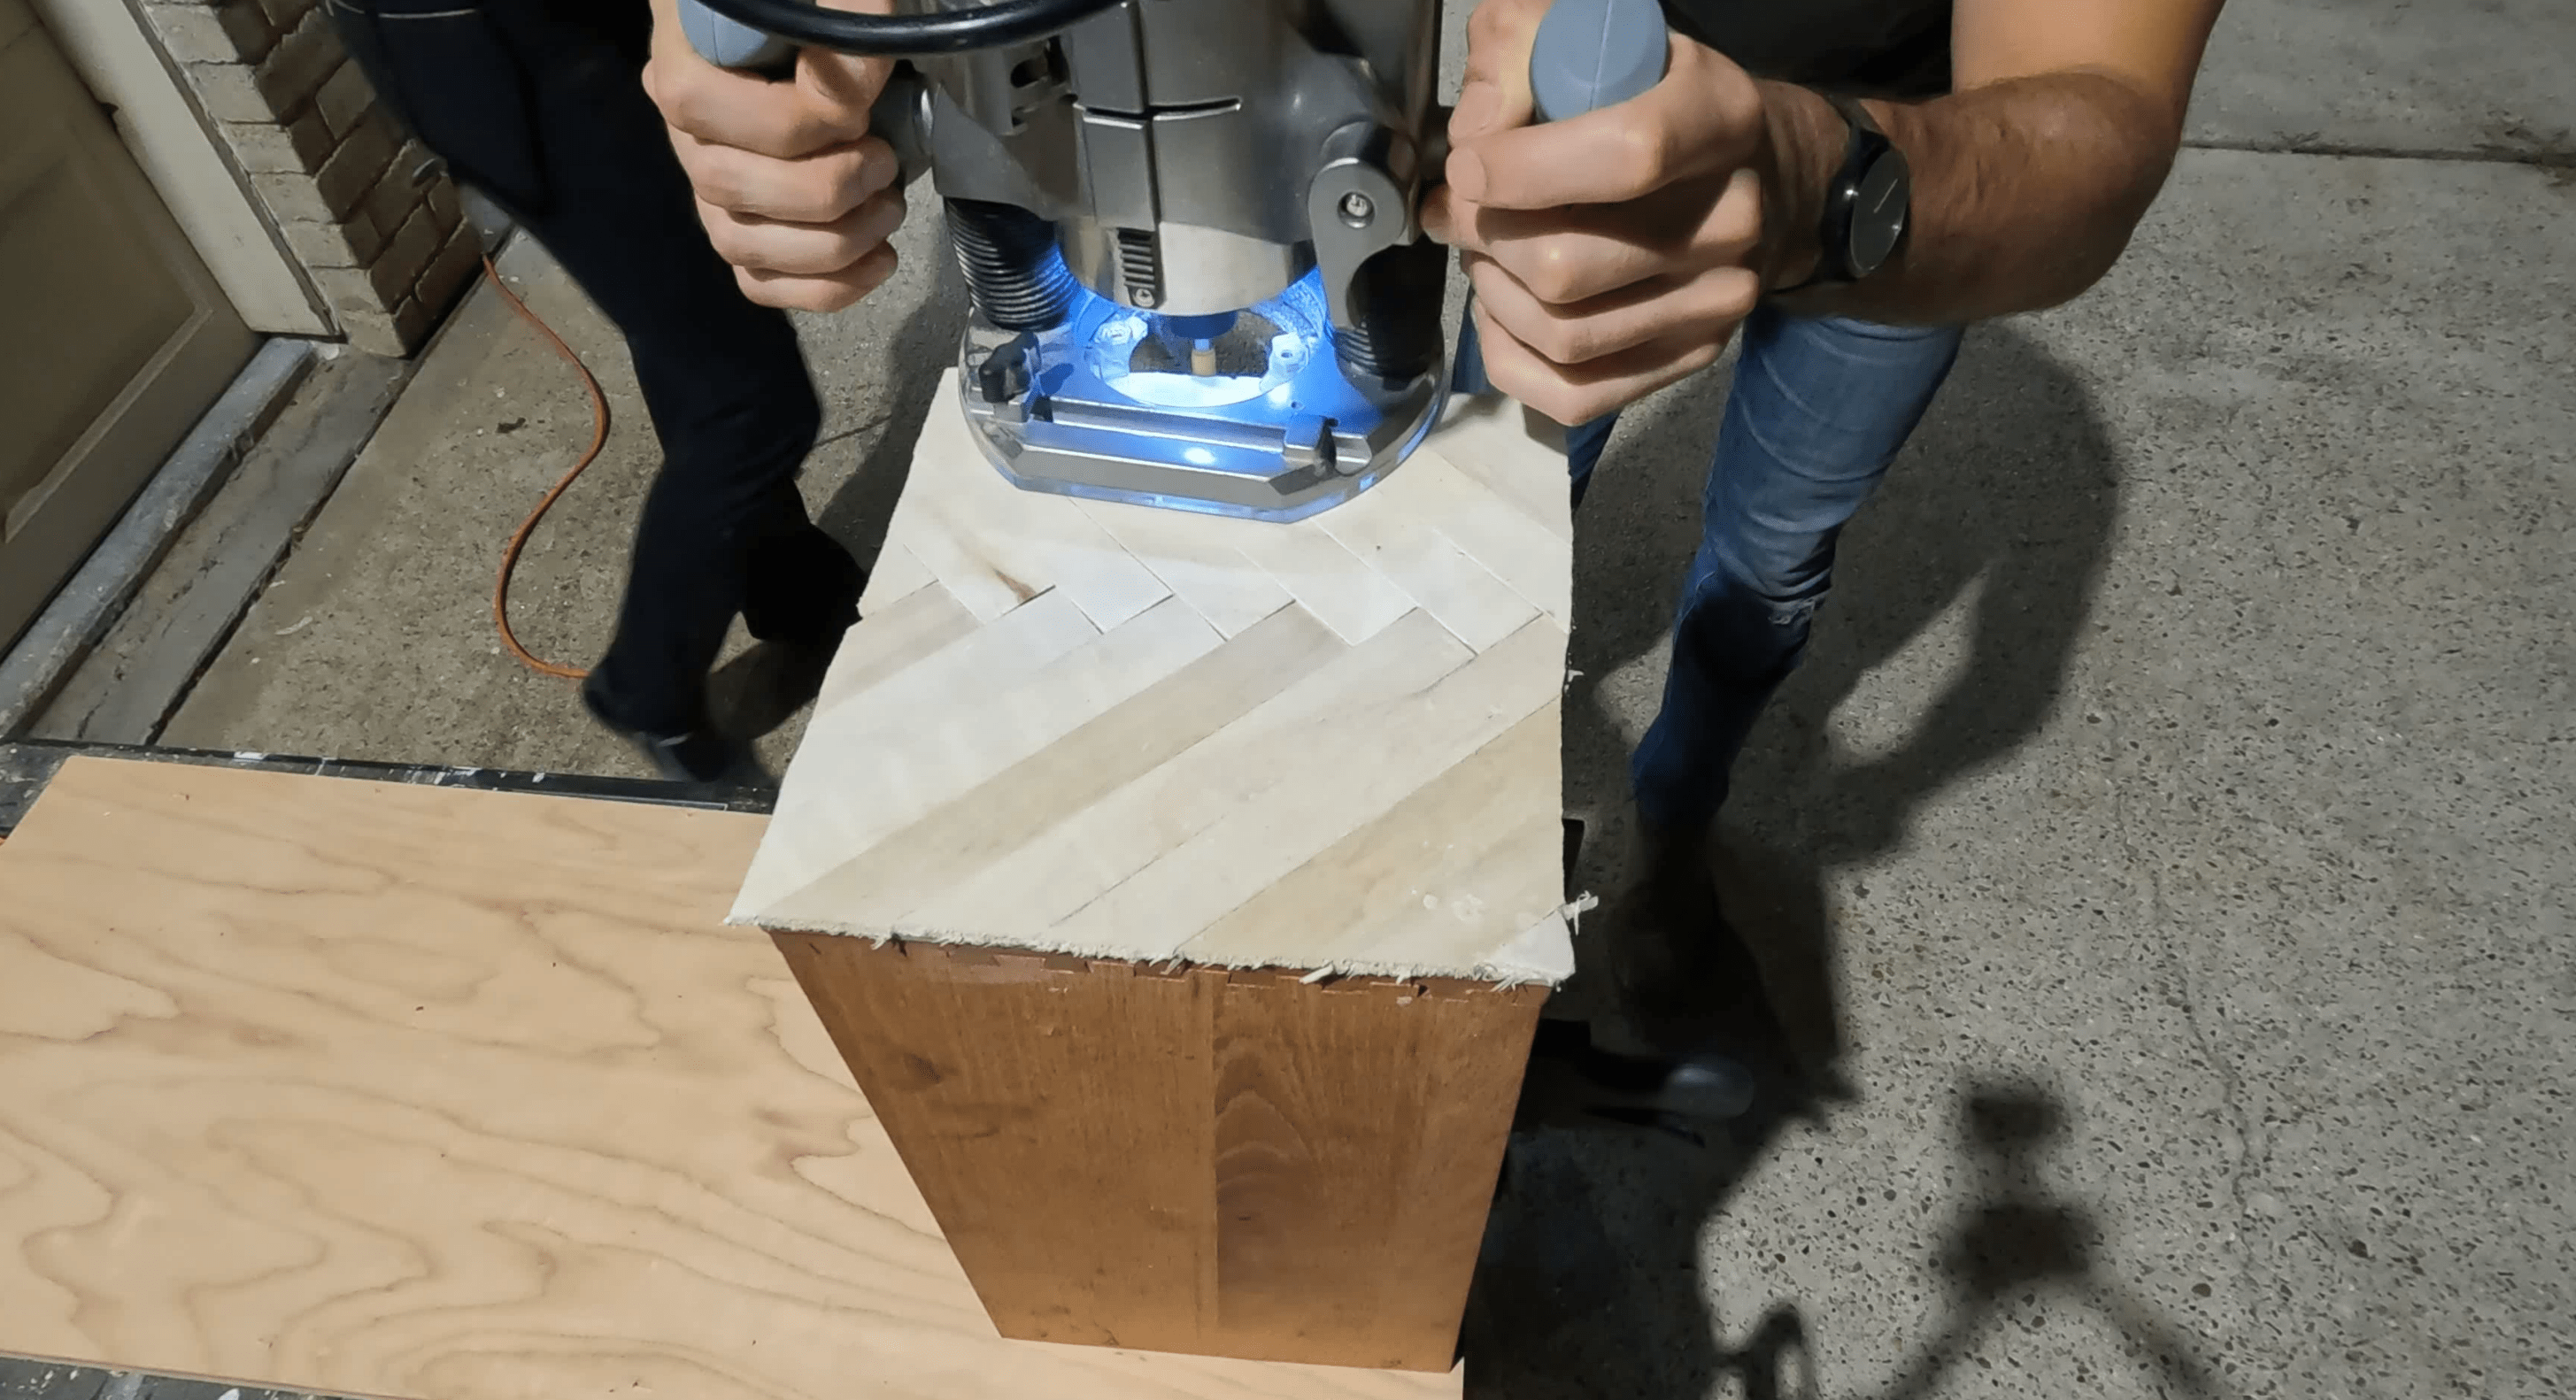 Routing Until Flush
Next step: filling any gaps. The stir sticks were not perfectly milled or straight, so there were a few imperfections that I wanted to fill in to get an even surface. I’m pushing a stainable wood filler into all the gaps that I see. Once that’s dry, I’m going to grab my sander and work off all the excess until these drawer fronts are nice and smooth.
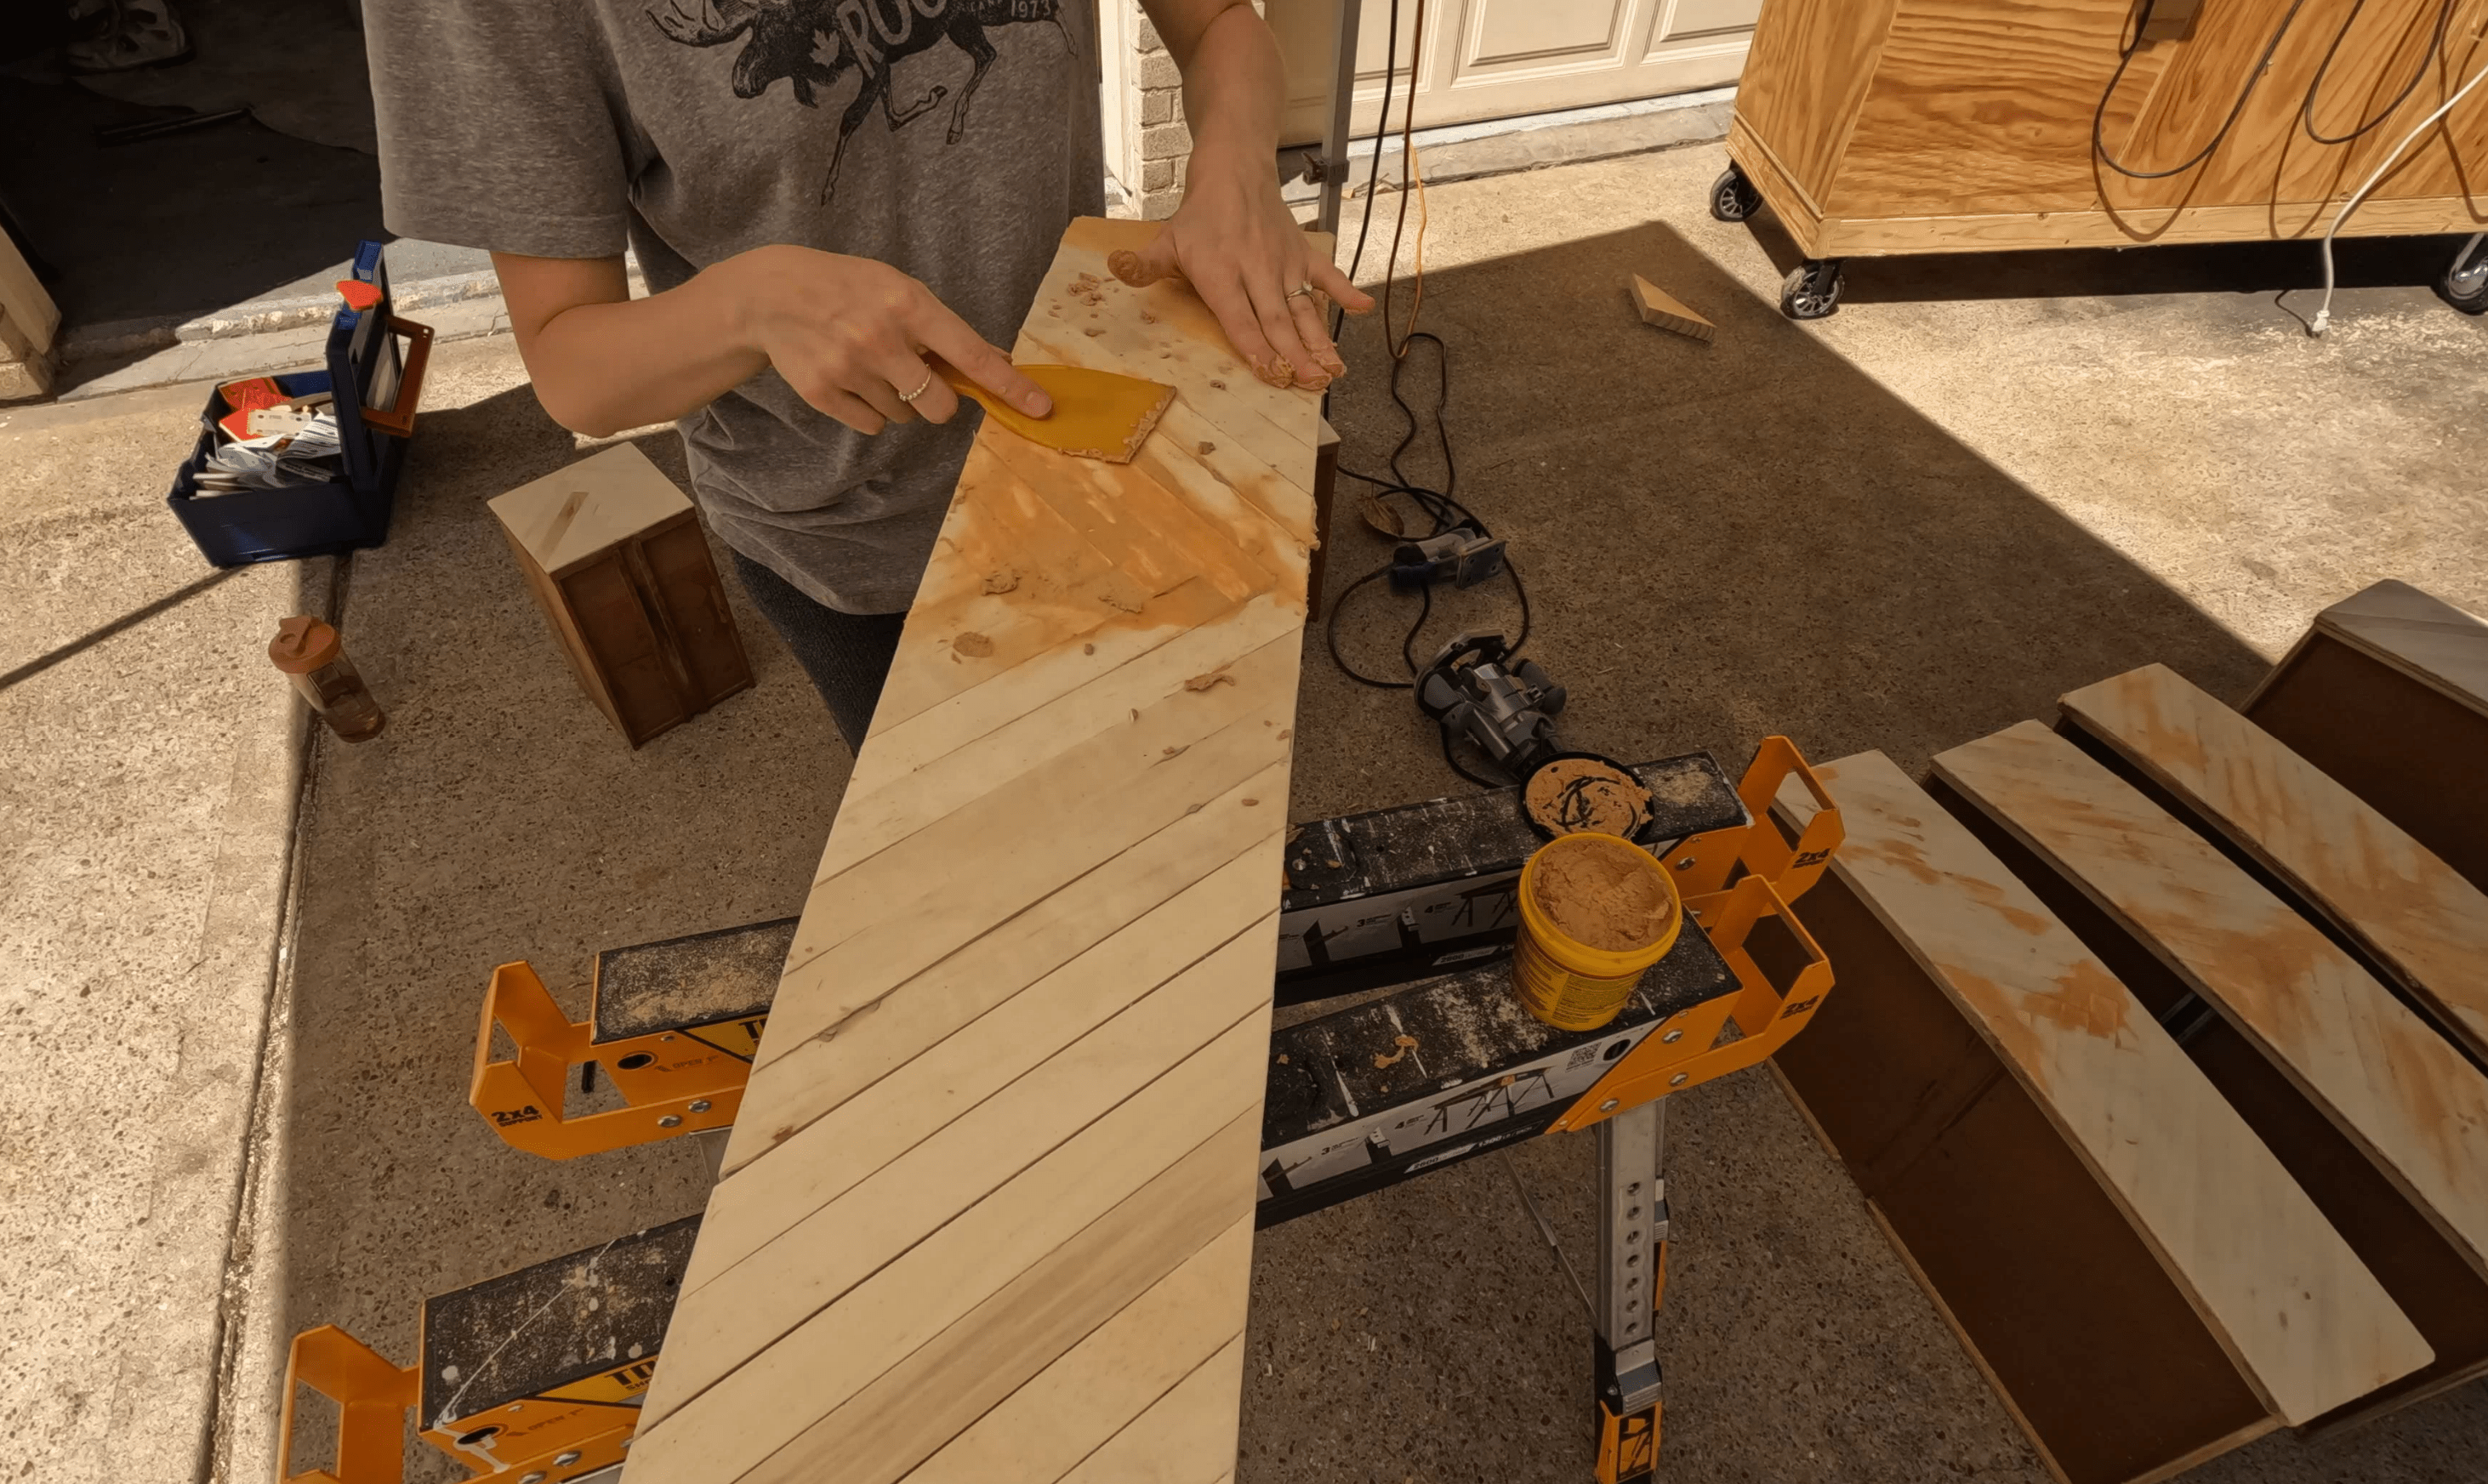 Filling the Gaps and Seams
I debated staining them a medium brown color, but after testing a few stain colors on a spare stick, I decided that natural was best. I applied Minwax’s Simply White, which is a really translucent ashy blonde color to even everything out and make the wood pop. Then, I went in with a coat of water-based polyurethane to make sure the wood is sealed and protected.
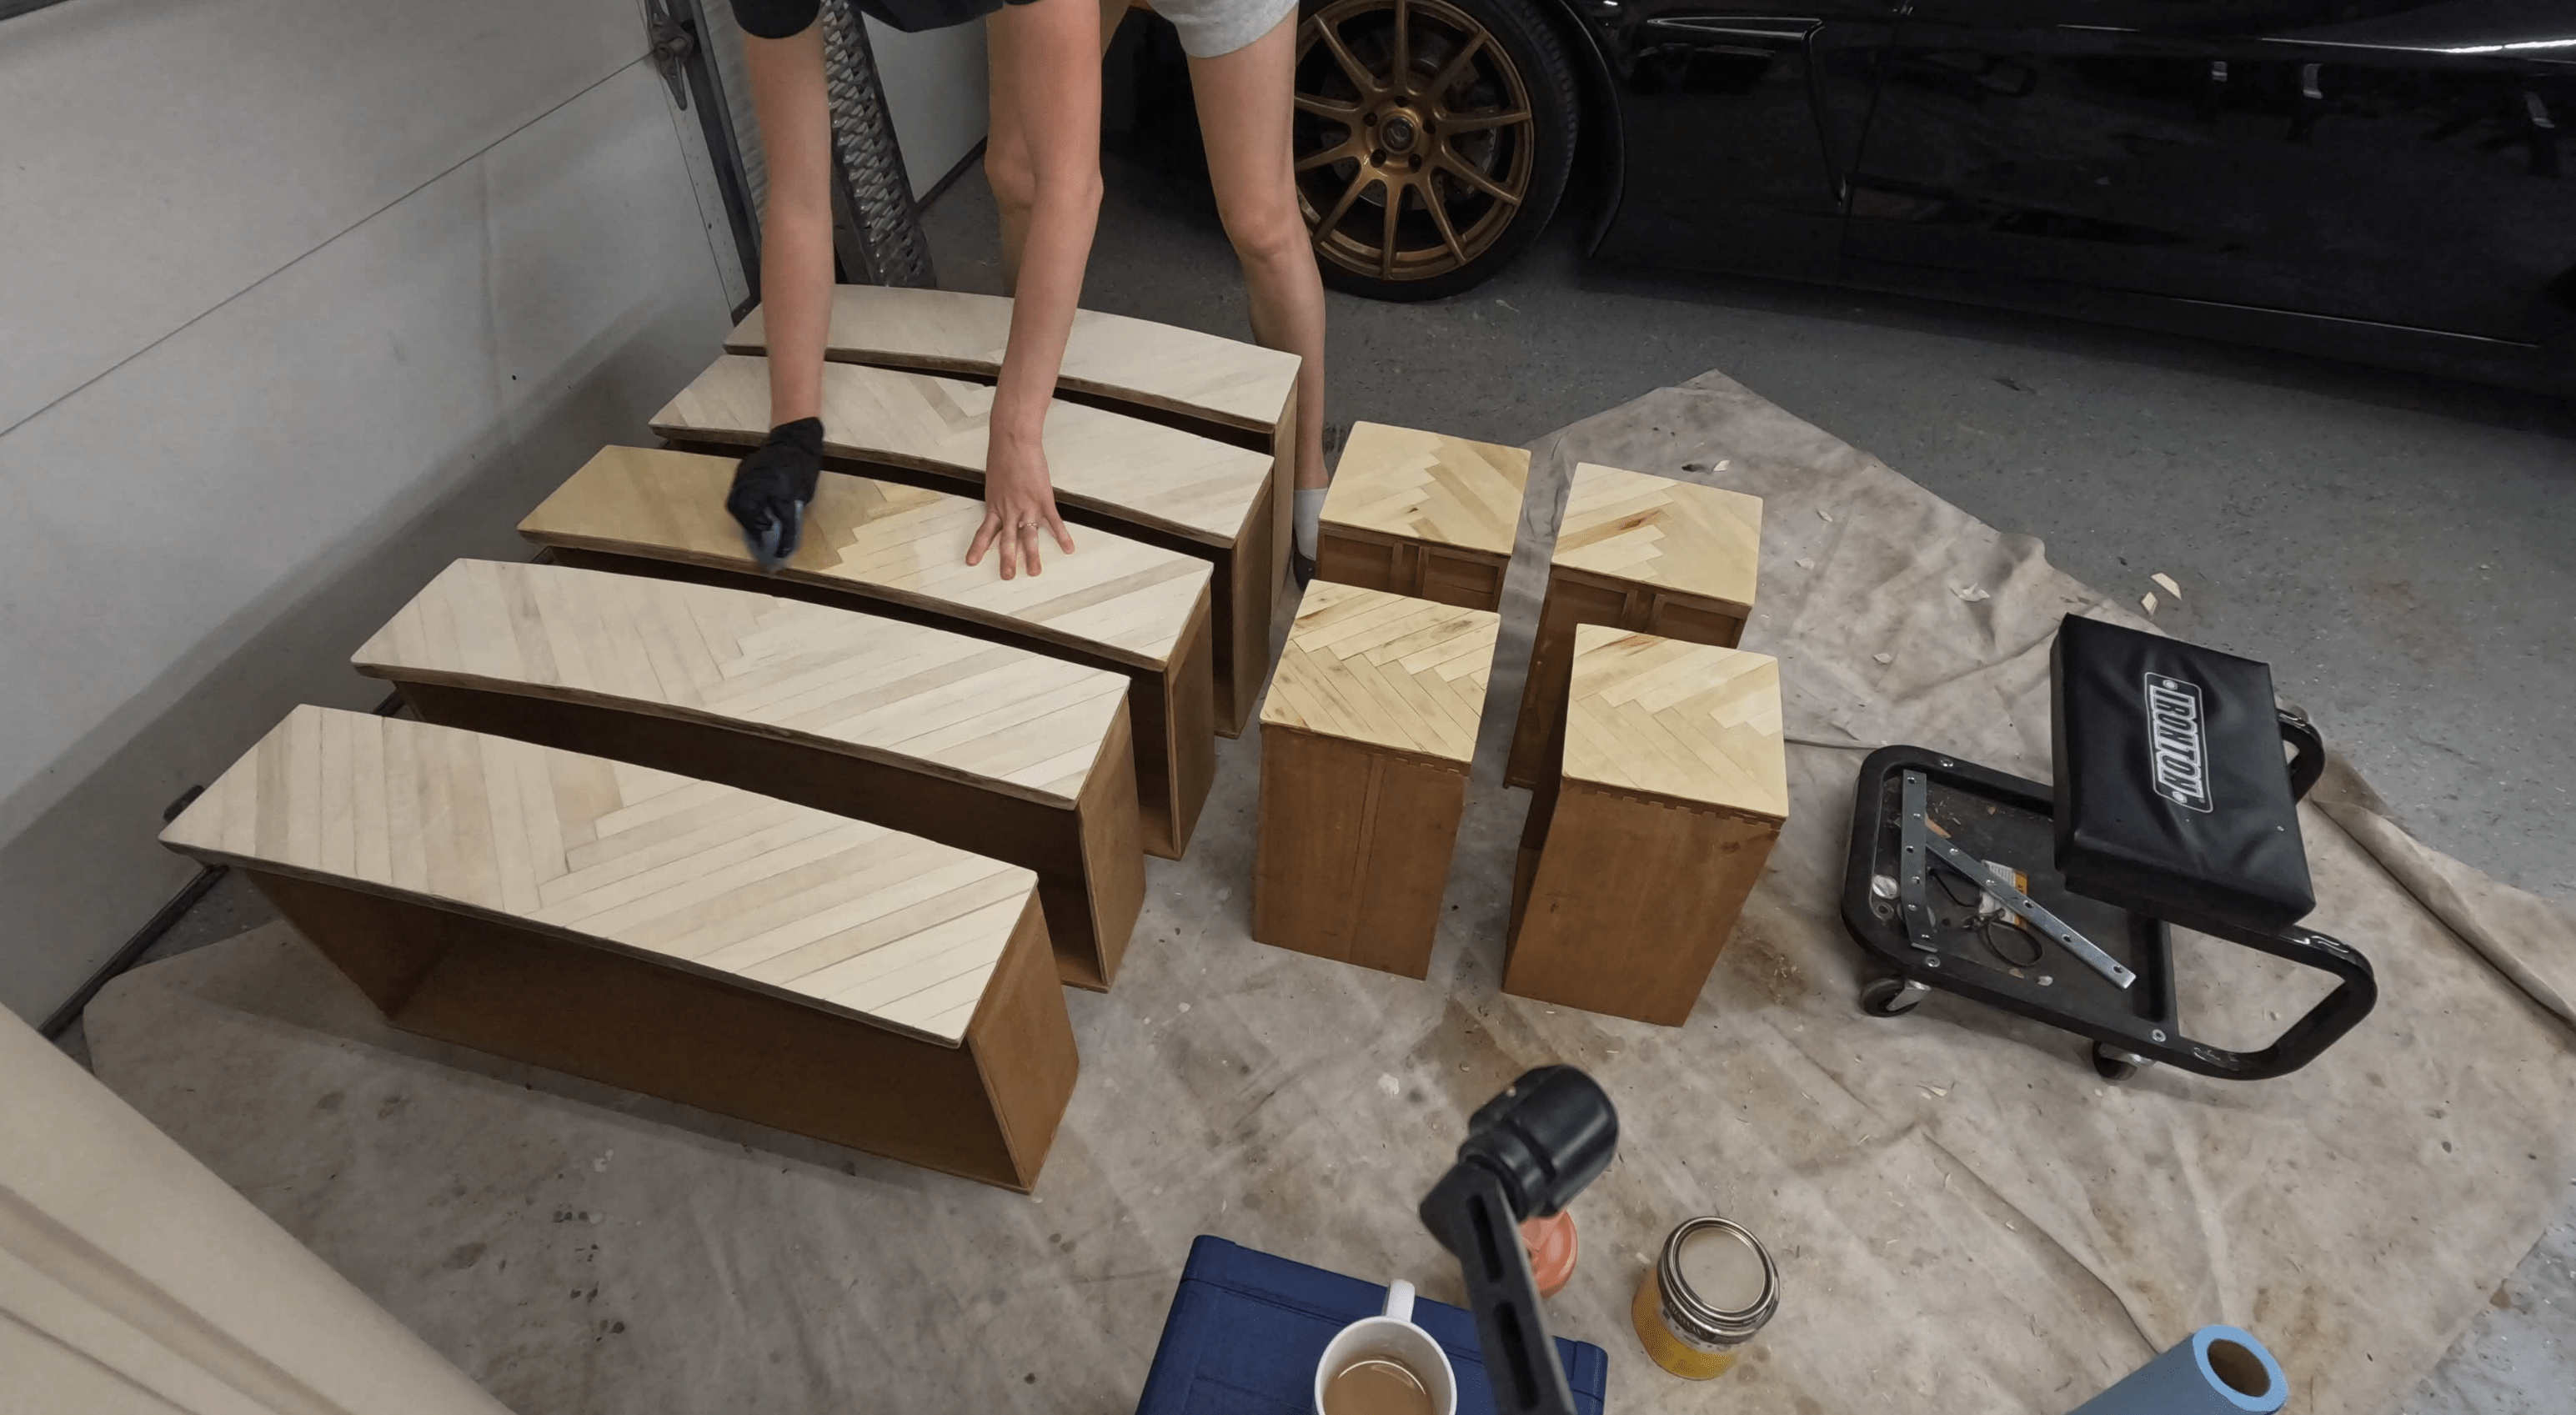 Staining & Sealing the Wood
Finishing Touches
We are in the home stretch! The last thing I need to do is drill new drawer holes. I didn’t want to mark up my new drawer fronts, so I actually applied painter's tape to the approximate position and then measured and marked out my drilling holes onto this tape. This also helped prevent any chipping when I drilled through the faces! I added some matte black pulls I got from Amazon.
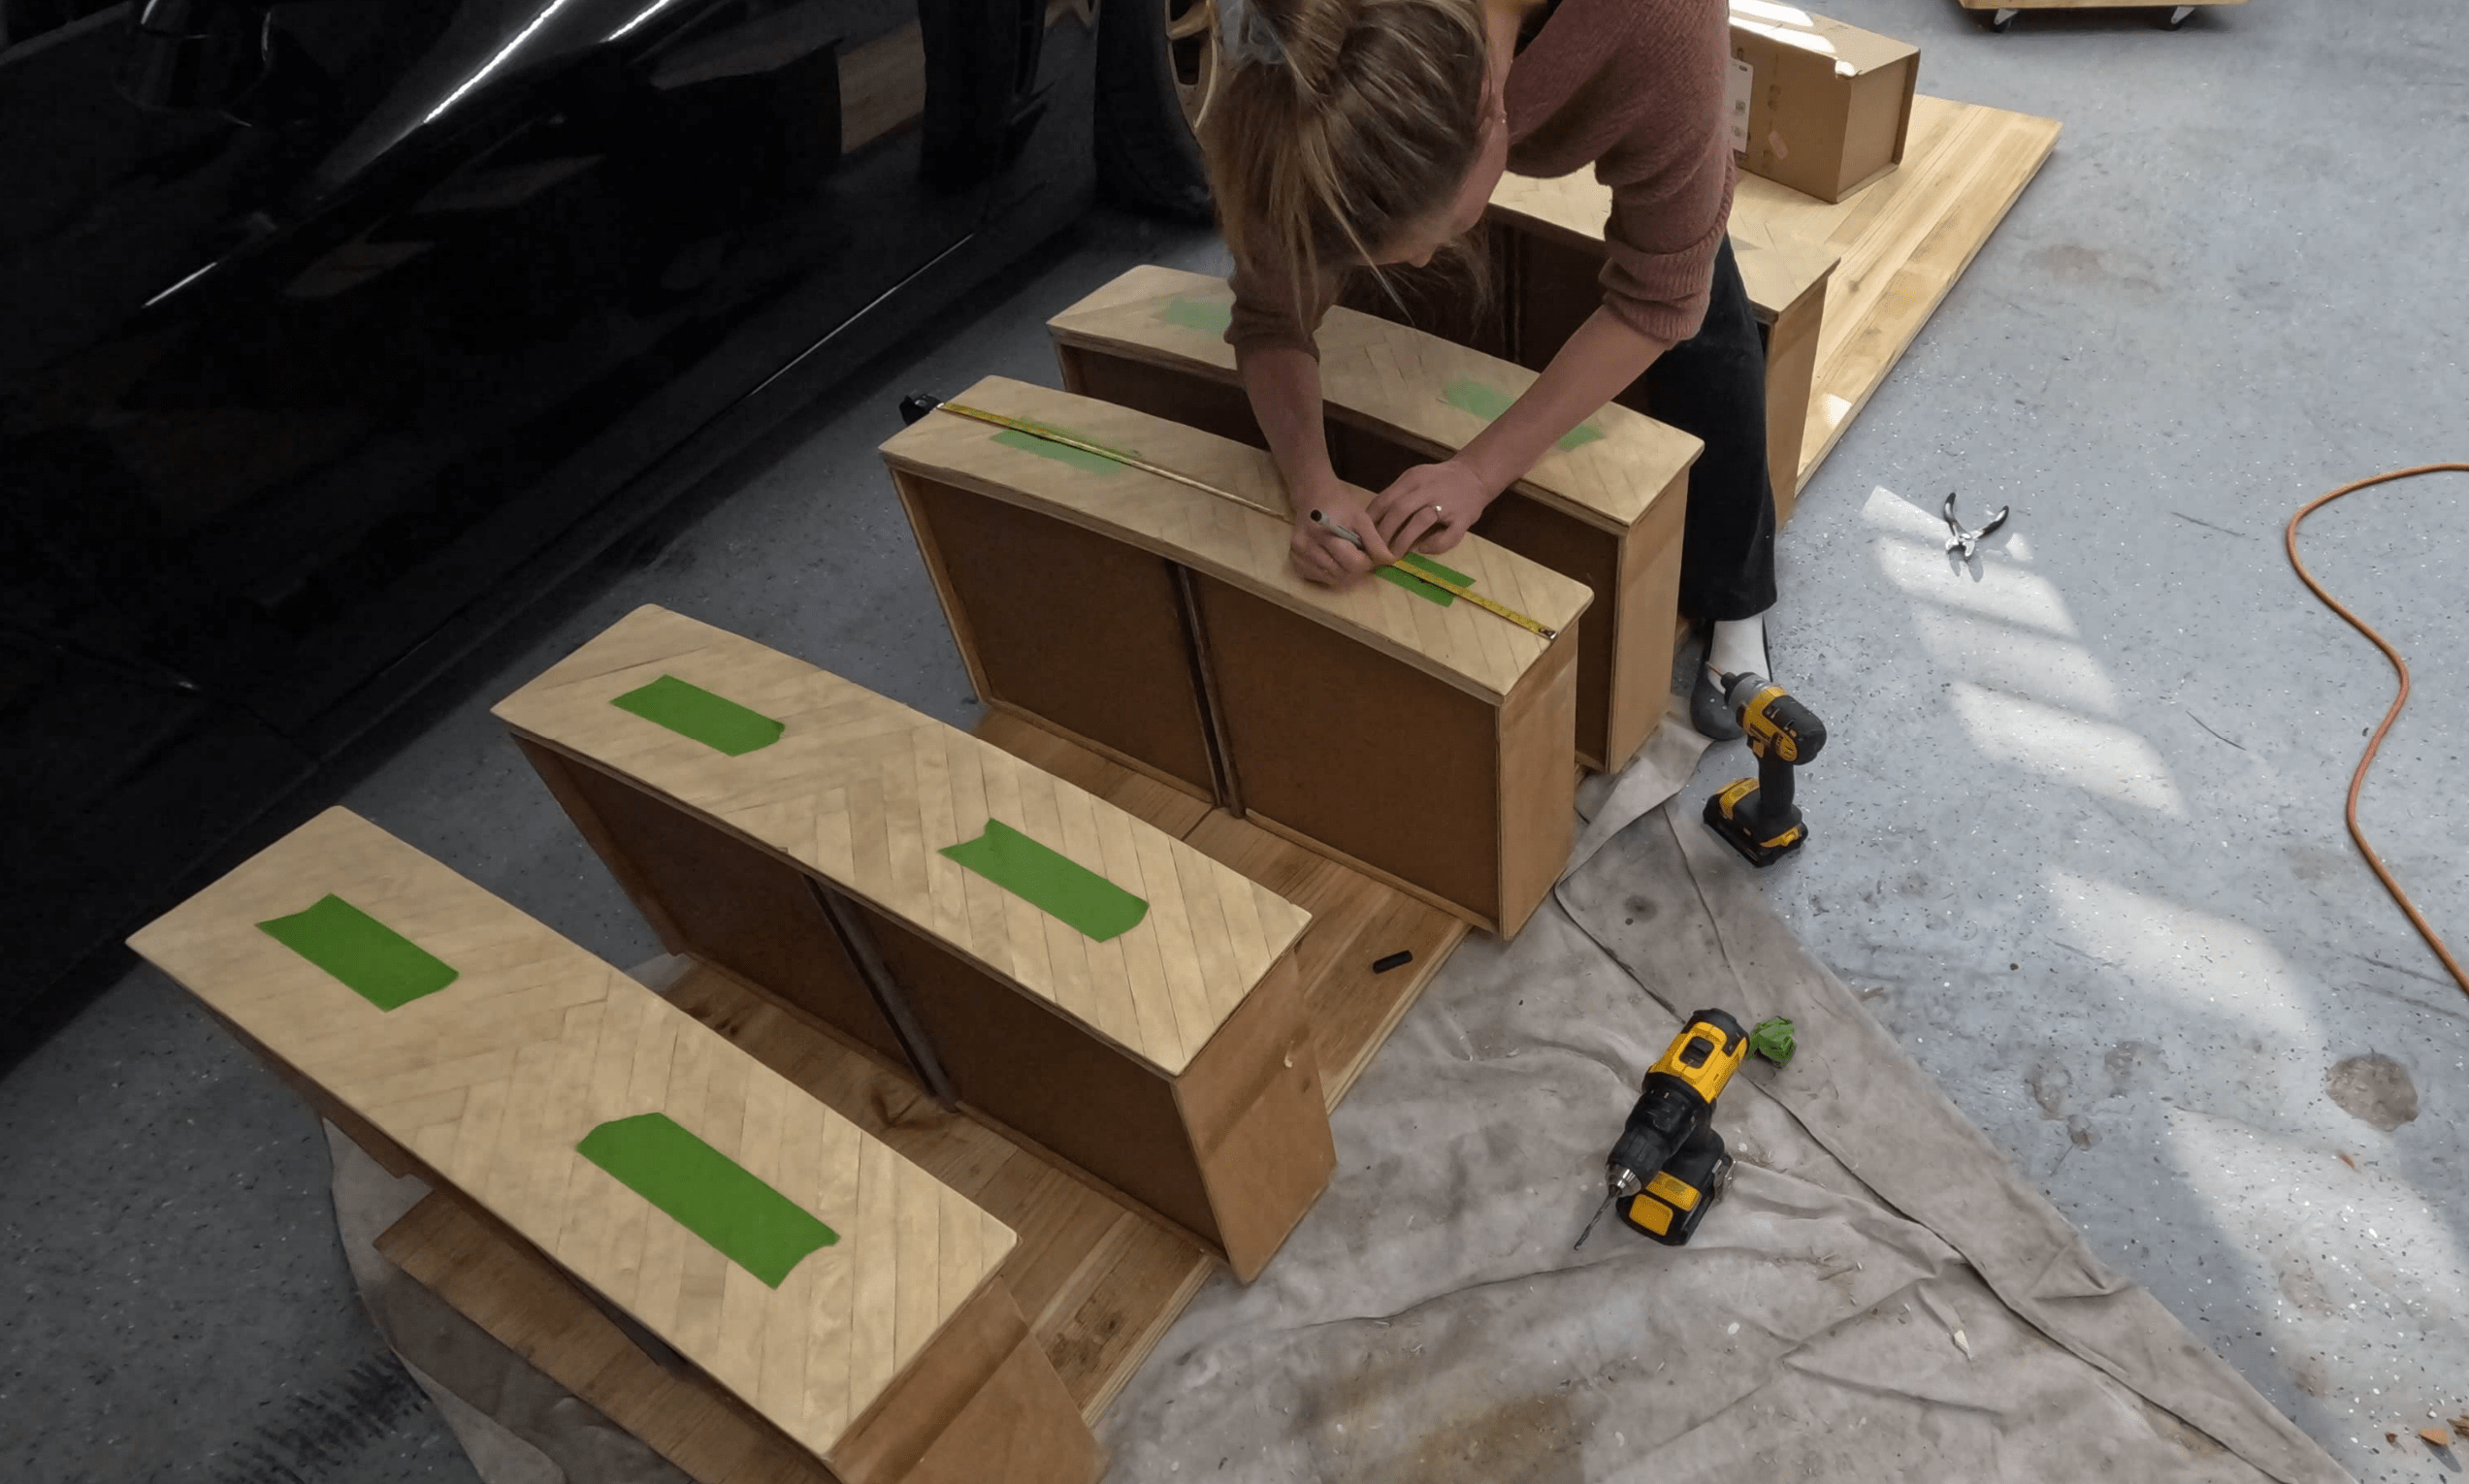 Measuring for New Drawer Pulls
Finally, I jumped back to the body to add a bit of distressing. I also hit the table tops with a coat of water-based poly just for some added assurance, and added some wax to the drawer slides to make them glide extra smooth, and then were are ready for the final reveal!
The Reveal
This is one of my most dramatic transformations and I absolutely love the result! This one definitely tested my patience but in the end, it was well worth wrangling all those little wood pieces and battling against the glue to get them stuck down. I’m so glad that I went with the natural wood color as well as the two-tone cream and beige-colored body.
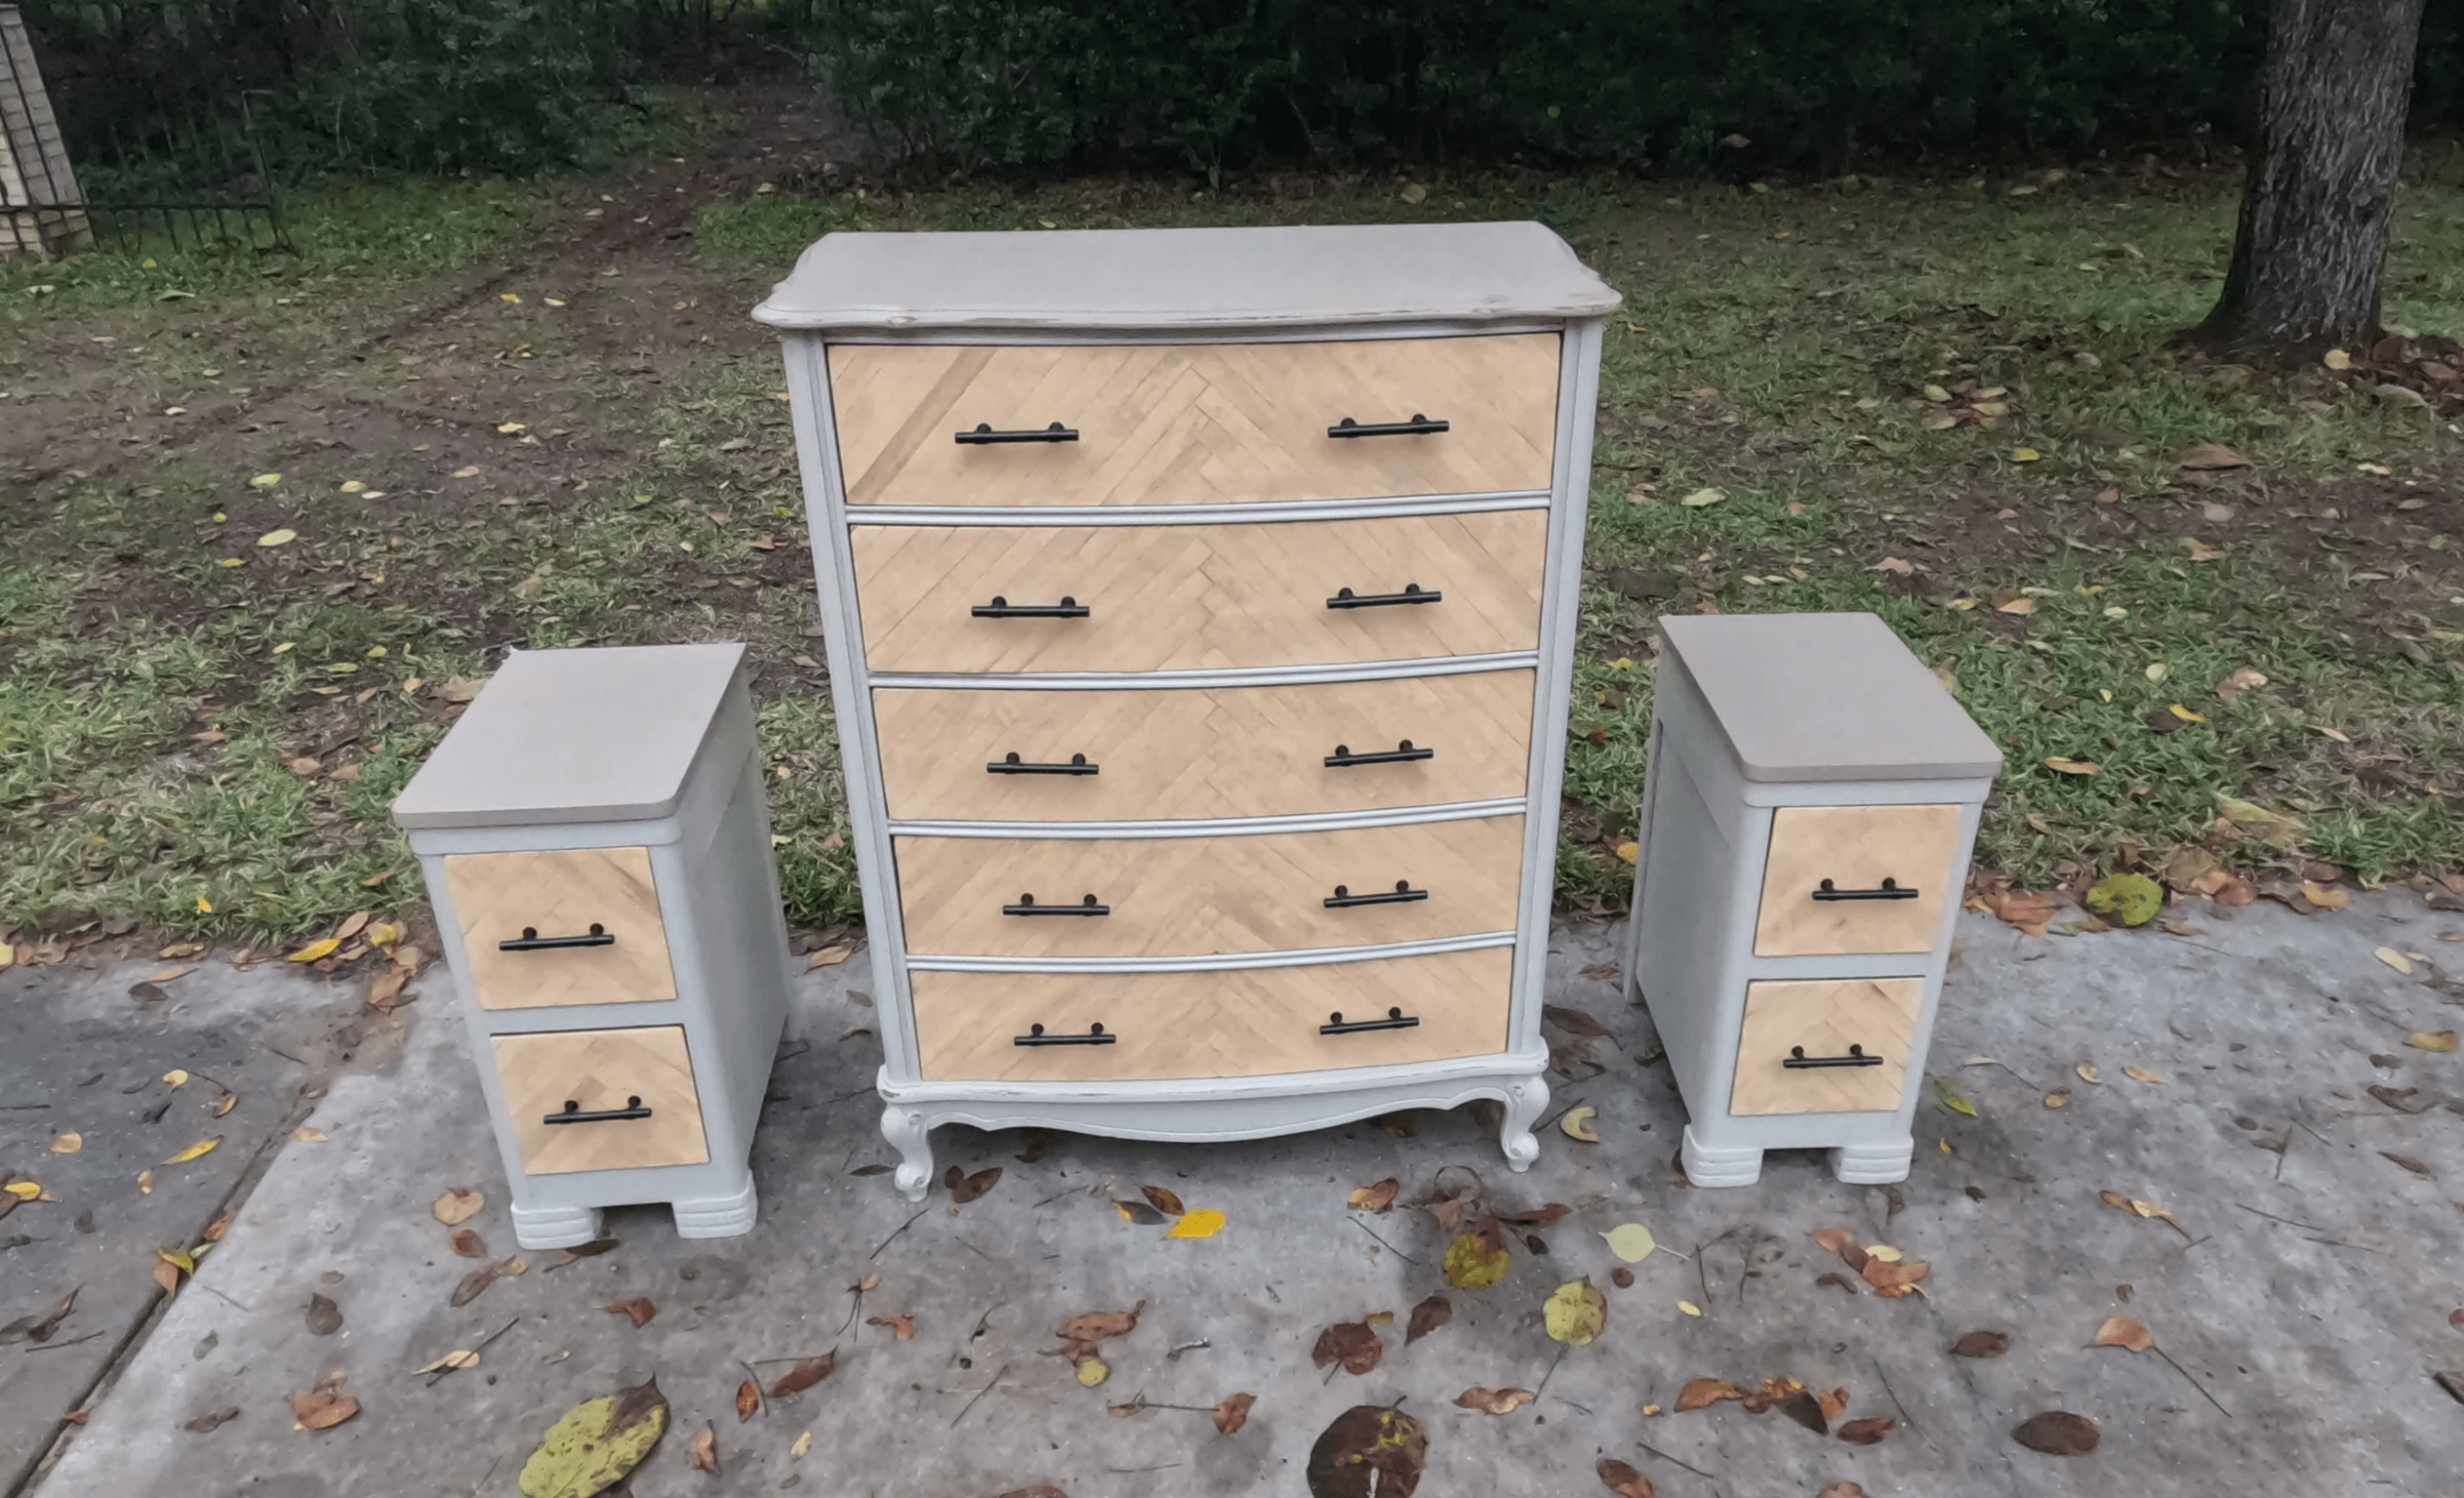 The Finished Result!
These fit so well in my guest room and even better, they match the custom painting I made a while back to bring everything together!
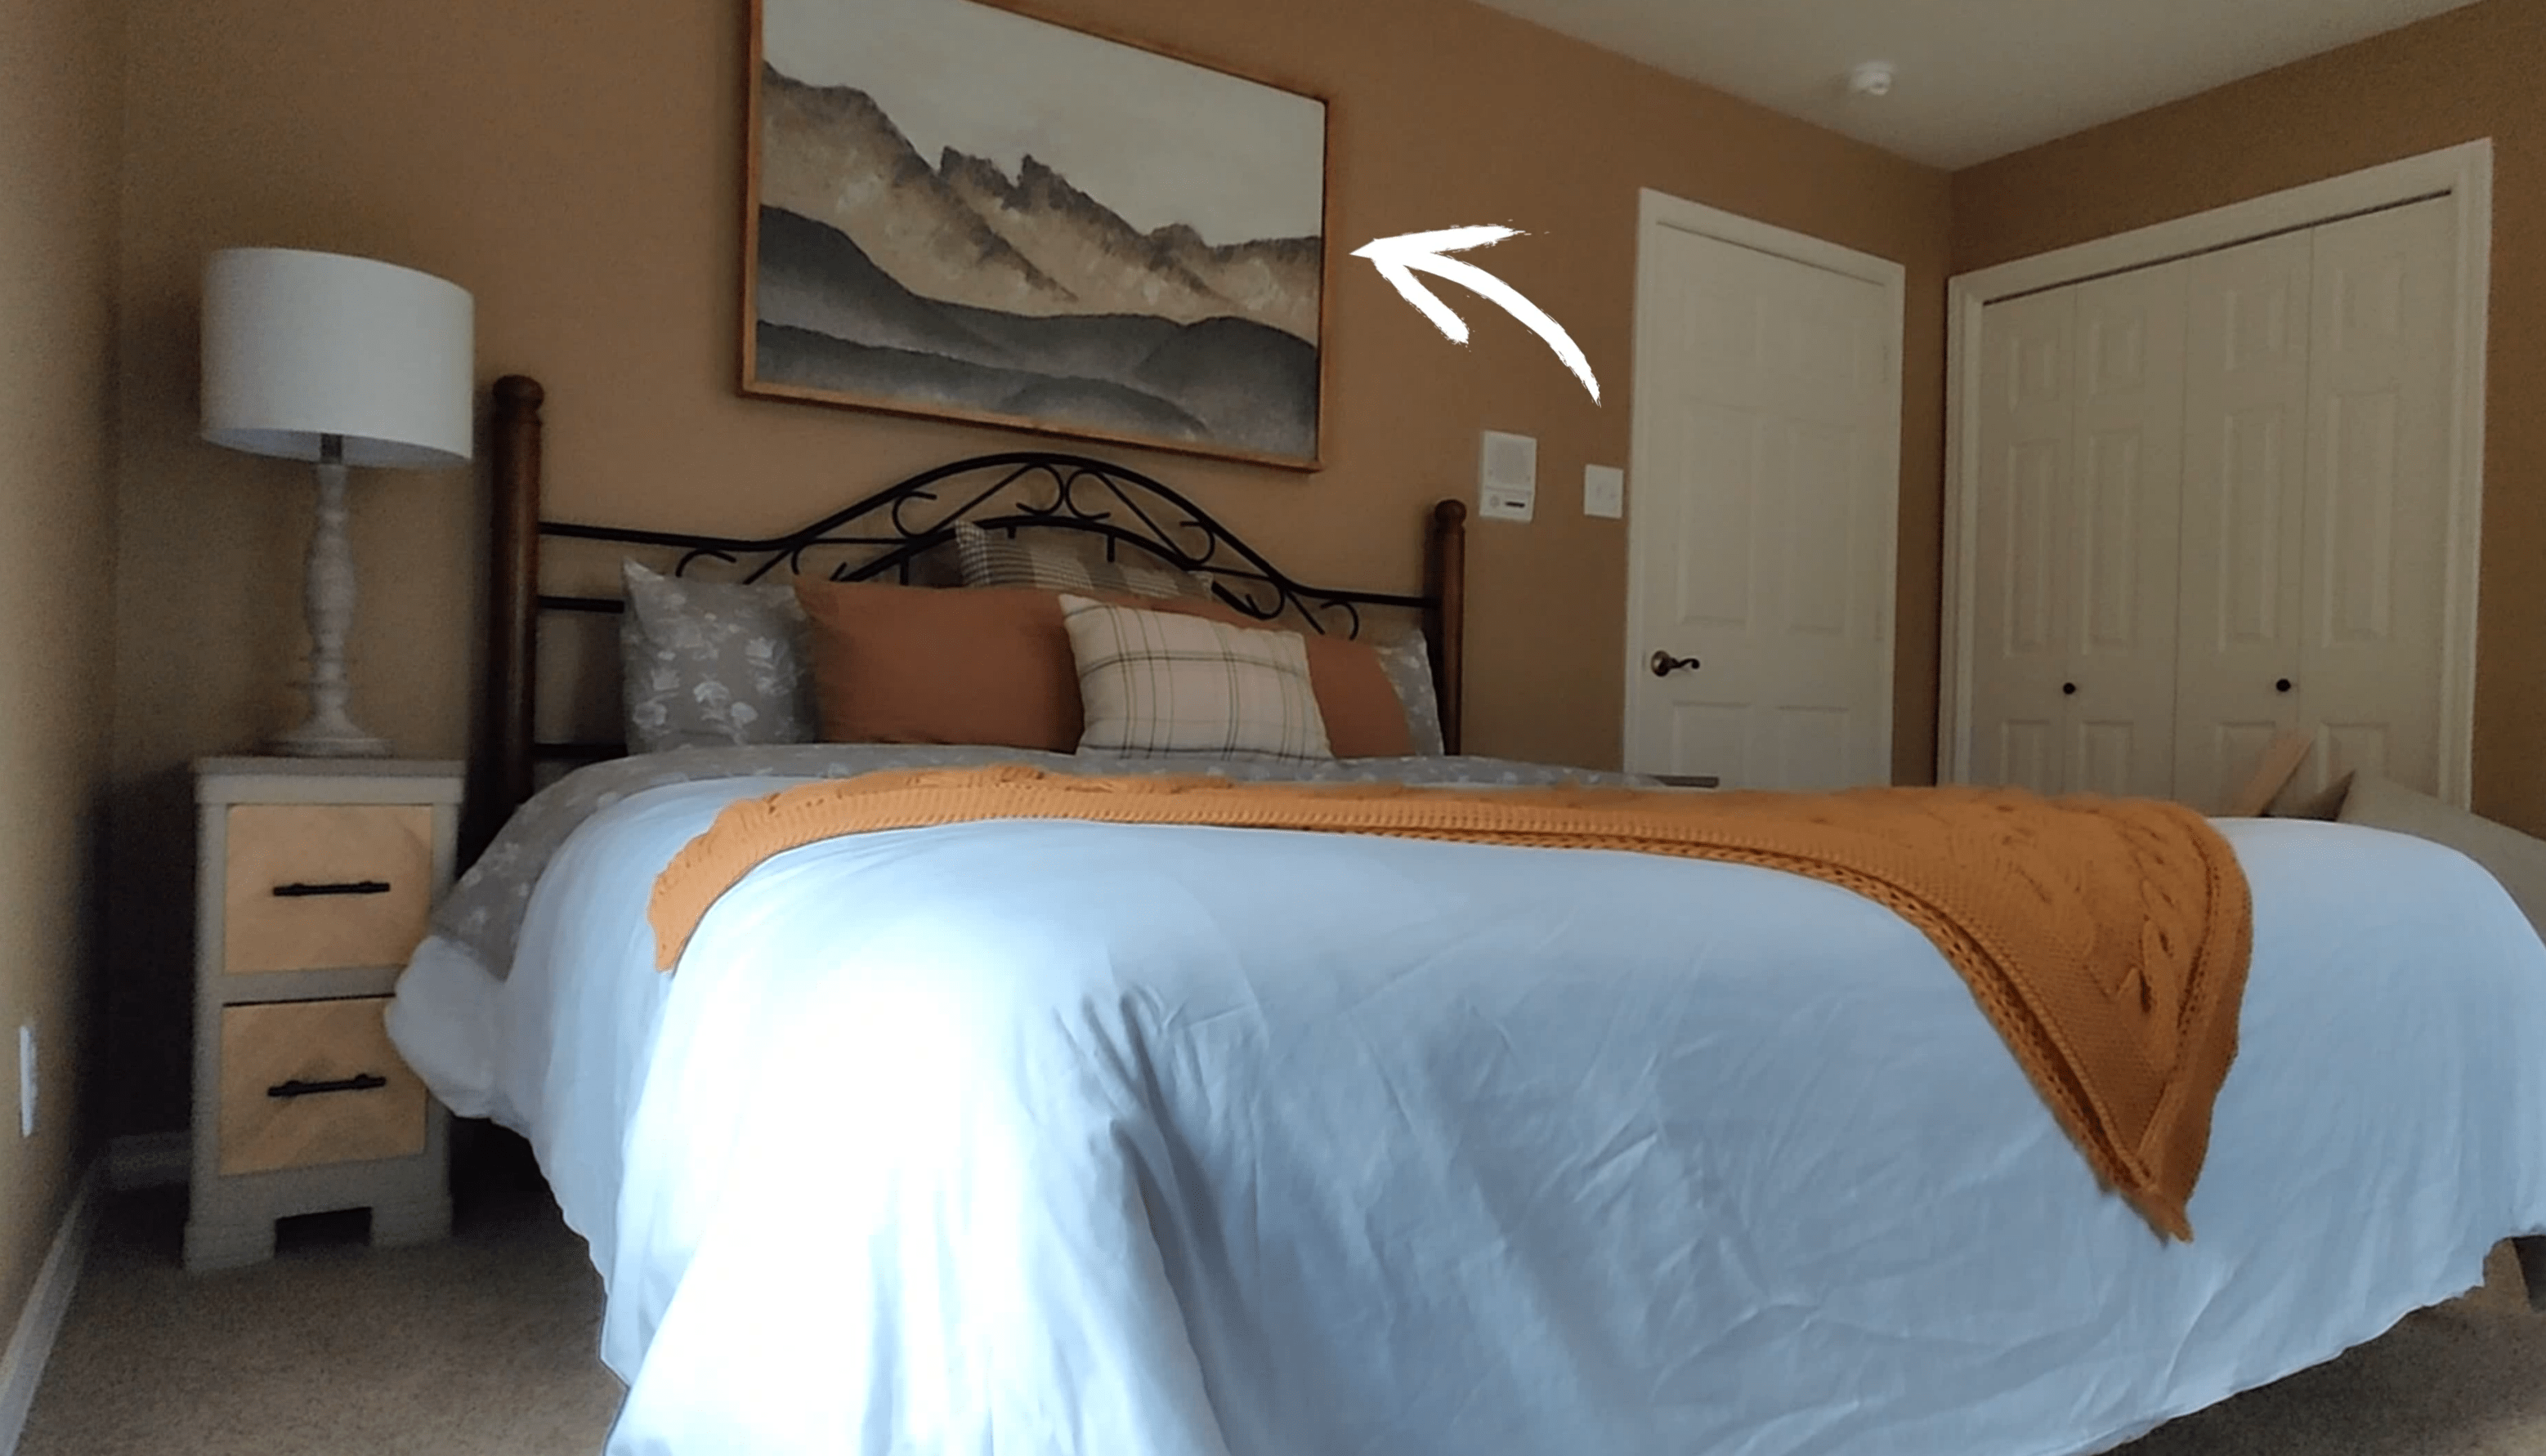 Bedside Tables In Their New Home
Thanks for sticking around. I’ll see you next time!